DS125
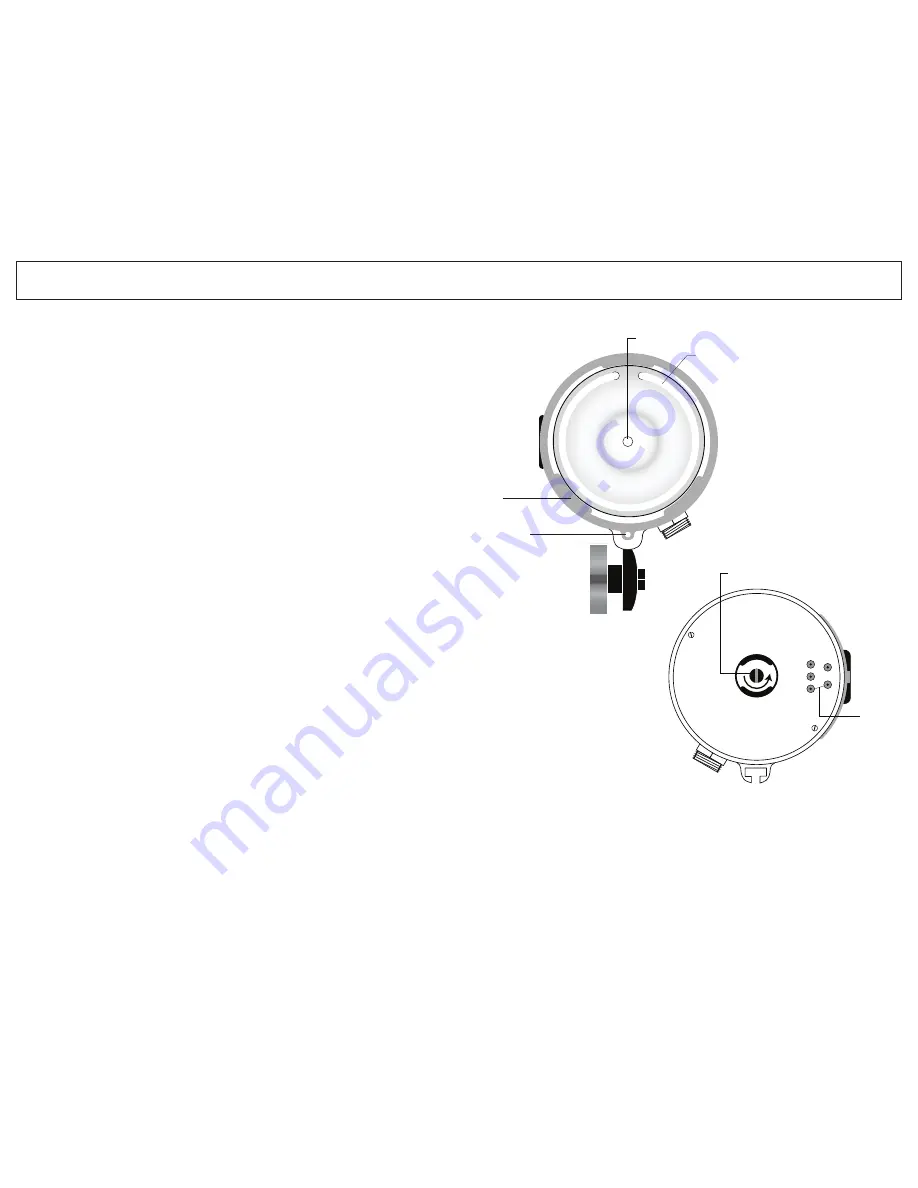
Substrobe DS125 Front
Modeling
Light
Flash
Tube
Flash
Diffuser
Protruding
Ear
Holes
for Lanyard
Tab
Cut-out
Hole for
Diffuser
Lanyard
88
M
MO
ODDEELLIIN
NGG LLIIGGH
HTT
DS125
Electrical
Pins
Bulb Holder Stem
(unscrew to remove)
77
O
OPPEEN
NIIN
NGG AAN
NDD CCLLO
OSSIIN
NGG
Always turn the Substrobe OFF before opening the strobe.
O
OPPEEN
NIIN
NGG TTH
HEE SSTTRRO
OBBEE ____________________________________________________________________________________________
Turn the strobe OFF, and place the strobe face down on a flat surface.
Slide the locking lever out by either grasping the sides of the lever and pulling it out
OR use your thumb to apply slight pressure to the top of the lever and slide it out.
Flip the lever up and then rotate the lever counter-clockwise 90°. The internal
spring automatically pushes open the strobe. Lift the rear section off of the strobe front.
The rear section is the NiMH battery pack for the strobe.
The rear NiMH pack does NOT remain waterproof when removed from the strobe.
Therefore, we suggest keeping the open portion of the NiMH pack pointed down while
removing to eliminate the possibility of water droplets falling inside. The NiMH batteries
remain permanently secured inside the pack.
The front section of the DS125, which houses the main electronics, is safely sealed
separately from the NiMH pack. The front section will remain waterproof when the
NiMH pack is removed. However, avoid salt-water contact with the battery pins.
Damage/corrosion can cause short circuiting.
D
DO
O N
NO
OTT
disassemble the strobe or the
NiMH pack. We suggest storage of your strobe with the locking lever OPEN to allow
any hydrogen/air mixture
to escape.
O
O--RRIIN
NGG __________________________________________________________________________________________________________________________
The o-ring is located on the inside rim of the NiMH pack. Keep the o-ring and the
sealing surfaces clean.
D
DO
O N
NO
OTT
stretch the o-ring when cleaning. It is not necessary to
lubricate the o-ring. Never use spray lubricant because it may crack the plastic.
RREECCH
HAARRGGEE TTH
HEE BBAATTTTEERRIIEESS ____________________________________________________________________________________
See "NiMH Pack" section for recharging information.
CCLLO
OSSIIN
NGG TTH
HEE SSTTRRO
OBBEE ______________________________________________________________________________________________
Make sure the power switch has been rotated to the off position.
Place the front of the strobe face down on a flat surface. Check that the o-ring and
sealing surfaces are clean; make sure the o-ring is positioned properly inside the rim of
the NiMH pack. Place the locking lever in the open position (slide the lever out, flip the
lever up, and rotate the lever counterclockwise).
Align the front and rear sections of the strobe. Lower the NiMH pack onto the front
section of the strobe. Proper alignment of the two sections is extremely important to
avoid possible damage to the internal components.
To seal the strobe, simply press down slightly on the rear of the NiMH pack and
rotate the lever clockwise. Flip the lever down and then slide the lever in to the locked
position to properly seal the strobe.


