Iiyama ProLite X3291HS Скачать руководство пользователя страница 19

ENGLISH

  OPERATING THE MONITOR   15  

See your graphic card user guide for more information 
about changing the resolution and refresh.  

NOTE

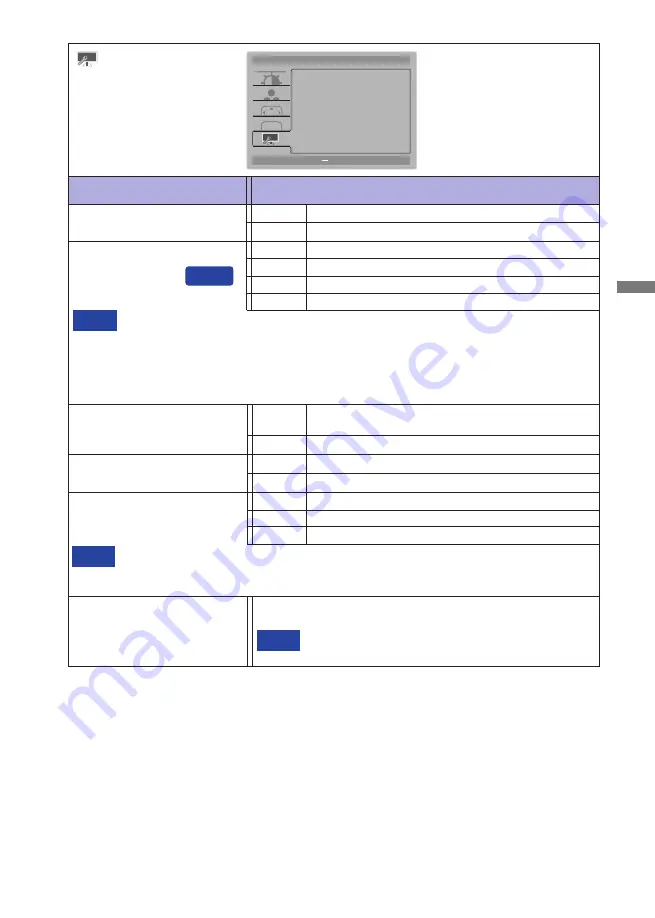
Displays information regarding the current input signal coming 
from the graphic card in your computer.

Information

Adjustment Item

Problem / Option                                      Button to Press

Extra

Reset

Factory-preset data is restored.

No

Return to Menu.

Yes

Input Select

At selected the AUTO, it will automatically be selected when just one source is available.
If there are more input sources available and you select one of them, the AUTO option is 
not available.
If multiple inputs are connected, the monitor may not recover the last one used after 
turning it o

  and on again.

It is only possible when you set a speci

fi

 c source.

NOTE

Select the Analog input.     
Select the Digital (DVI) input.     

D-SUB
DVI

AUTO

:

Exit

:

Move

MENU

:

Select

+

Extra

Reset 
Input Select 
Opening Logo

Audio Input

Memorize Setting

Information
Input:
Resolution:
H. Frequency:
V. Frequency:

Yes

Auto

Off

Line-In

Mode1

OSD

D-SUB

  1920<H> * 1080<V>

67KHz

60Hz

Auto

Select the signal input automatically.

Direct

Select the Digital (HDMI) input.     

HDMI

Select the HDMI input.

Line-In

Select the Line-In input.

HDMI

Audio Input*

1

*

1

 Suitable for HDMI input only.

*

2


Saving and recalling settings

  - Select a Mode in which you want to save the OSD settings. After making the settings, exit the
    OSD operation. The settings are automatically saved in the selected mode when the OSD menu 

disappears.

  - To recall the saved settings, select your desired Mode. If you change the settings in the selected 

mode again and exit the OSD operation, they are overwritten and saved automatically.

Opening Logo

O


iiyama Logo does not display when the monitor is 

turned on. 
iiyama Logo displayed when the monitor is turned on. 

On

Memorize Setting*

2

Mode1

Save the settings of the screen adjustment.

Mode2

Save the settings of the screen adjustment.

Mode3

Save the settings of the screen adjustment.

You can memorize your customized monitor settings.
The following settings can be memorized: Contrast, Brightness, Over Drive, Adv. Contrast, 
Eco, Volume, Mute, Color Temp., Black Tuner and Video Mode Adjust

NOTE

Содержание ProLite X3291HS

Страница 1: ...oosing the iiyama LCD monitor We recommend that you take a few minutes to read carefully through this brief but comprehensive manual before installing and switching on the monitor Please keep this man...

Страница 2: ...ENGLISH...

Страница 3: ...light and bright surfaces CE MARKING DECLARATION OF CONFORMITY This LCD monitor complies with the requirements of the EC EU Directive 2014 30 EU EMC Directive 2014 35 EU Low Voltage Directive 2009 125...

Страница 4: ...CONTENTS OF THE PACKAGE 4 INSTALLATION 5 FITTING AND REMOVAL OF BASE 6 CONTROLS AND CONNECTORS 7 CONNECTING YOUR MONITOR 8 COMPUTER SETTING 9 ADJUSTING THE VIEWING ANGLE 9 OPERATING THE MONITOR 10 ADJ...

Страница 5: ...cause fire electric shock or damage INSTALL THE MONITOR ON A FLAT STABLE SURFACE The monitor may cause an injury if it falls or is dropped DO NOT USE THE MONITOR NEAR WATER Do not use where water may...

Страница 6: ...sure the signal cable is disconnected If you do not disconnect them it may cause fire or electric shock UNPLUG THE MONITOR If the monitor is not in use for a long period of time it is recommended tha...

Страница 7: ...iyama service center for advice or replacement packaging WARNING If you drop any materials or liquids such as water into the monitor when cleaning unplug the power cable immediately and contact your d...

Страница 8: ...moothing Automatic Set up Stereo Speakers 2 3W Stereo Speakers Plug Play VESA DDC2B Compliant Windows 7 8 8 1 10 Compliant Power Management VESA DPMS Compliant VESA Mounting Standard 100mm 100mm Compl...

Страница 9: ...or damage because it may contact with the electrical parts inside the monitor WARNING Screw Chassis Mounting Stage L INSTALLATION WARNING Before installation make sure the wall ceiling or desktop arm...

Страница 10: ...rehand to prevent the monitor from being scratched Lay the monitor flat on a table with front face down Install the Stand Base to the Stand Neck Use the thumb screw provided to secure the Stand Base t...

Страница 11: ...me Blue Light Reducer Button ECO Button Auto Button AUTO Speakers Keyhole for Security Lock You can fasten a security lock and cable to prevent the monitor from being removed without your permission A...

Страница 12: ...r local iiyama dealer or regional iiyama o ce For connection to Macintosh computers contact your local iiyama dealer or regional iiyama o ce for a suitable adaptor Make sure you tighten the finger scr...

Страница 13: ...le You are able to adjust the monitor s angle up to 21 upward 3 downward In order to ensure a healthy and relaxed body position when using the monitor at visual display workstations it is recommended...

Страница 14: ...s passed Also the AUTO button can be used to return previous menu and turn o the On Screen Display Any changes are automatically saved in the memory when the On Screen Display disappears Turning o the...

Страница 15: ...ht is reduced Mode2 Brightness of back light is reduced more than Mode1 O Normal Eco 2 Mode3 Brightness of back light is reduced more than Mode2 i Style Color 2 Standard For general windows environmen...

Страница 16: ...Select Color Adjust Color Temp User Red User Green Warm 43 User Blue 44 50 OSD Color Temp Normal Warm Cool sRGB sRGB NOTE sRGB is an international standard which defines and unifies the difference of...

Страница 17: ...elect Manual Image Adjust Clock Phase Video Mode Adjust H Position 50 86 Full V Position 50 50 Black Tuner 0 OSD 1 See page 18 for SCREEN ADJUSTMENTS 2 Only Analog Input 3 Adjustable settable items de...

Страница 18: ...left OSD is too right OSD is too low OSD is too high You can set the OSD display duration time between 5 and 100 seconds Adjustment Item Problem Option Button to Press OSD Setup V Position AUTO Exit...

Страница 19: ...uto Off Line In Mode1 OSD D SUB 1920 H 1080 V 67KHz 60Hz Auto Select the signal input automatically Direct Select the Digital HDMI input HDMI Select the HDMI input Line In Select the Line In input HDM...

Страница 20: ...not displayed Volume Press the Button when the Menu is not displayed Blue Light Reducer Pressing and holding the Button for 3 4 seconds when the Menu is not displayed O Normal Mode1 Blue light is redu...

Страница 21: ...Pressing and holding the MENU button for 10 seconds when Menu is not displayed will lock unlock the Power OSD Key Lock function Function Correlation M atrix Item to be selected i Style Color Adv Cont...

Страница 22: ...displaying the picture other than the screen adjustment pattern In this case manual adjustments are required There are two ways to adjust the screen One way is automatic adjustment for Position Clock...

Страница 23: ...lock H Position and V Position adjustment In case the picture frame is bigger or smaller than the data display area after the Clock adjustment repeat steps from 2 Stretch the right side of the picture...

Страница 24: ...ed correctly Adjust the H Position after the Phase adjustment if the horizontal position moves during the adjustment Adjust the Phase to correct horizontal wavy noise flicker or blur in the zebra patt...

Страница 25: ...eappears in several seconds when either the keyboard or the mouse are touched again The power management feature of this product complies with power saving requirement of VESA DPMS When activated it a...

Страница 26: ...ith another piece of equipment If the blank screen saver is in active mode touch the keyboard or the mouse Increase the Contrast and or Brightness The computer is ON The Signal Cable is properly conne...

Страница 27: ...ment is within the specification of the monitor The audio output level of the audio equipment is within the specification of the monitor The Audio Cable is properly connected The sound is too loud or...

Страница 28: ...HDMI 1920 1080 60Hz Input Connector VGA DVI D HDMI Plug Play VESA DDC2BTM Input Sync Signal Separate sync TTL Positive or Negative Input Video Signal Analog 0 7Vp p Standard 75 Positive Digital DVI Di...

Страница 29: ...Hz 37 500kHz 75 000Hz 31 500MHz 800 600 35 156kHz 56 250Hz 36 000MHz 37 879kHz 60 317Hz 40 000MHz 46 875kHz 75 000Hz 49 500MHz 1024 768 48 363kHz 60 004Hz 65 000MHz 56 476kHz 70 069Hz 75 000MHz 60 023...

Отзывы: