ENGLISH
OPERATING THE MONITOR 17
OPERATING THE MONITOR
To create the best picture, your iiyama LCD monitor has been preset at the factory with the
COMPLIANT TIMING shown on page 35. You are also able to adjust the picture by following the button
operation shown below. For more detailed adjustments, see page 27 for SCREEN ADJUSTMENTS.
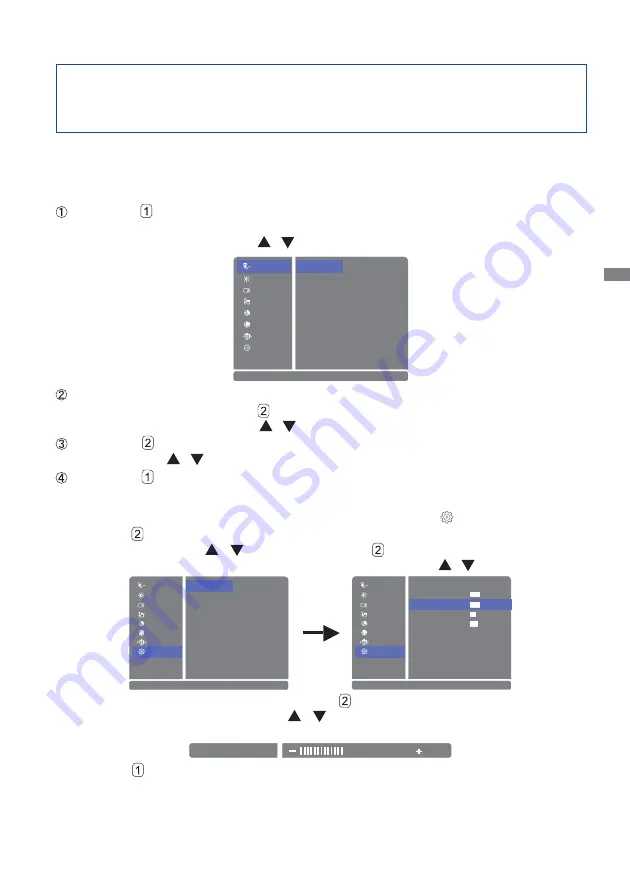
Press the Button on the Monitor or the MENU Button on the Remote Control to
start the On Screen Display (OSD) feature. There are additional Menu items which
can be switched by using the / Buttons.
Select the Menu item which contains the adjustment icon relating to the adjustment
you want to make. Press the Button on the Monitor or the ENTER Button on the
Remote Control. Then, use the / Buttons to highlight the desired adjustment icon.
Press the Button on the Monitor or the ENTER Button on the Remote Control
again. Use the / Buttons to make the appropriate adjustment or setting.
Press the Button on the Monitor or the EXIT Button on the Remote Control to
leave the menu, and the settings you just made would be automatically saved.
For example, to correct for vertical position, select Menu item of
(Setup Menu) and then
press the Button on the Monitor or the ENTER Button on the Remote Control. Then, select
Geometry by using the
/
Buttons and press the Button on the Monitor or the ENTER
Button on the Remote Control. Then, select V. Position by using the / Buttons.
An adjustment page appears after you press the Button on the Monitor or the ENTER Button
on the Remote Control. Then, use the
/
Buttons to change the vertical position settings.
The vertical position should be changing accordingly while you are doing this.
Press the Button on the Monitor or the EXIT Button on the Remote Control lastly, it ends, all
changes are saved in the memory.
HDMI3
HDMI1
DisplayPort
EXIT : E x i t
S e l e c t : ENTER
Audio
Picture
PiP/PbP
Color
Language
OSD Settings
Input Select
VGA
Setup Menu
HDMI2-MHL
AUTO
Opening Logo
DP Format
HDMI1 Format
LED
Auto Pow. Off
EXIT : E x i t
S e l e c t : ENTER
Audio
Picture
PiP/PbP
Color
Language
OSD Settings
Input Select
Geometry
Setup Menu
Memory Recall
1.1
1.4
Phase
H. Position
Clock
EXIT : E x i t
Audio
Picture
PiP/PbP
Color
Language
OSD Settings
Input Select
Auto Image Adjust
Setup Menu
50
50
39
48
V. Position
Information
S e l e c t : ENTER
V. Position
50
The Auto Pow. Off function is enabled as default setting. Monitor will turn off automatically
after 3 hours without any key operation.
If you prefer to use the monitor over 3 hours continuously, please disable The Auto Pow.
Off function.


