18 | kvm-tec
kvm-tec | 19
Misprints, errors and technical changes reserved
Misprints, errors and technical changes reserved
2. EXTENDER INSTALLATION
2. EXTENDER INSTALLATION
2.5 START UP
To start up the system:
1. Make sure that monitor and computer are switched on.
2. If you are using a Network Switch, connect the power cable to an earthed wall socket.
3. Connect both extender power cables ( 6 / 20 ) to an earthed wall socket.
Switch on both
units. Both extenders start an initialization process. The status LED blinks some seconds
red and changes to green after a successful connection The monitor will displays your
com
puter’s desktop or any open applications.
2.6 REPLACING THE SFP MODULE
The Media4K is delivered with a multimode SFP + module.
To replace an SFP module with a different SFP+ module:
1. Remove the black dust protector from the SFP+ module.
2. Pull the metal latch of the SFP+ module forwards until it is at a right angle.
3. Replace the SFP+ module with the other module. Put the metal latch back in position. Only
use SFP+ modules from kvm-tec, or recommended by kvm-tec.
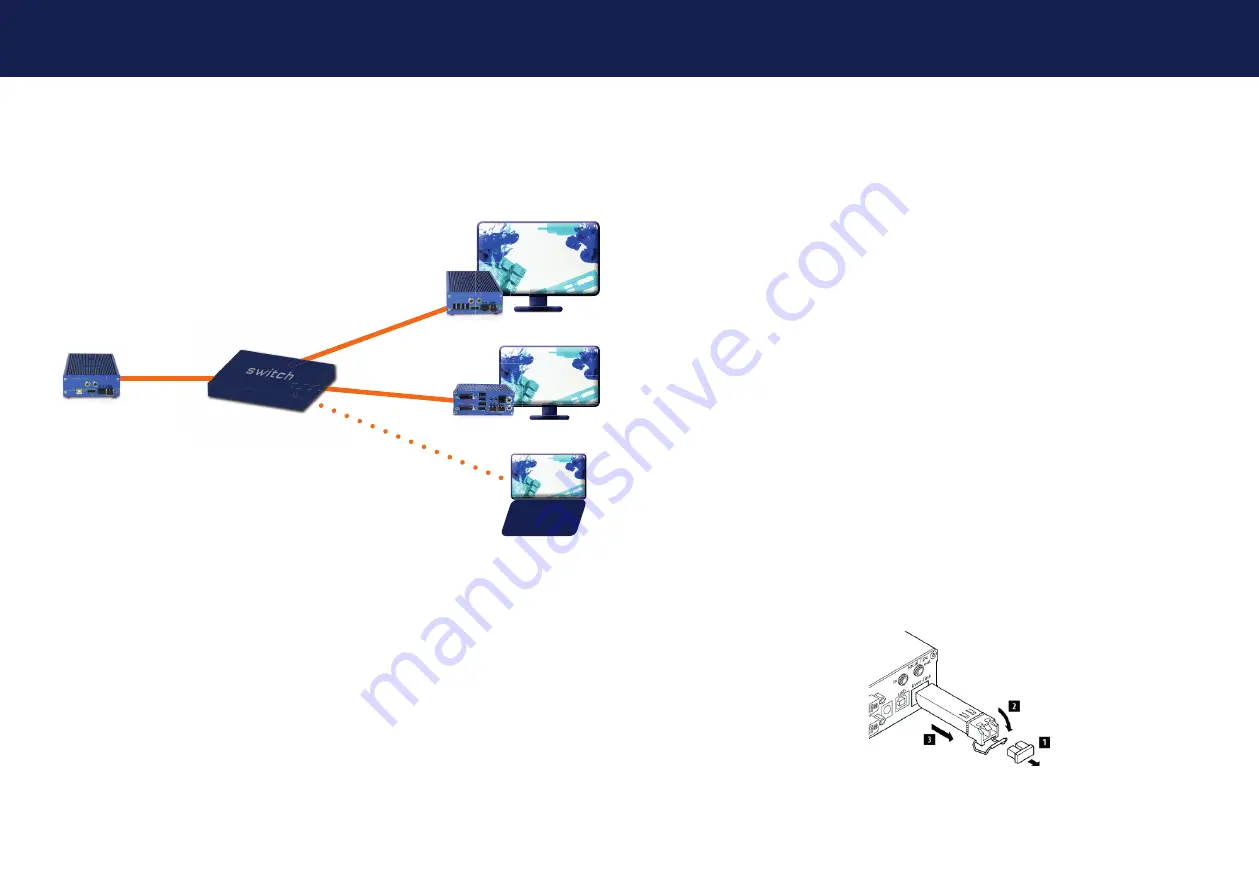
2.4 MEDIA4KCONNECT SIMULTANEOUS DOWNSCLAING
Full
HD
4K
Full
HD
media4Kconnect remote
Flexline remote
Laptop mit gateway2GO
media4Kconnect
local
9 G stream
1 G stream
10 G stream
4K sources can be displayed simultaneously in 4K and with downscaling in Full HD
on the remote unit. The output of the stream is done at 4K over 10G bandwidth. Two
streams are transmitted simultaneously, so the 4K stream has 9 GBIT and the second
stream in Full HD 1 Gbit.
The streams can be routed and shared independently and one source can be split to
any number of screens. One user has full USB control (keyboard and mouse etc).


