IHP.us.com
127191-01B
2
ACCESSING FIREPLACE
You may access burner system through opening in front of unit.
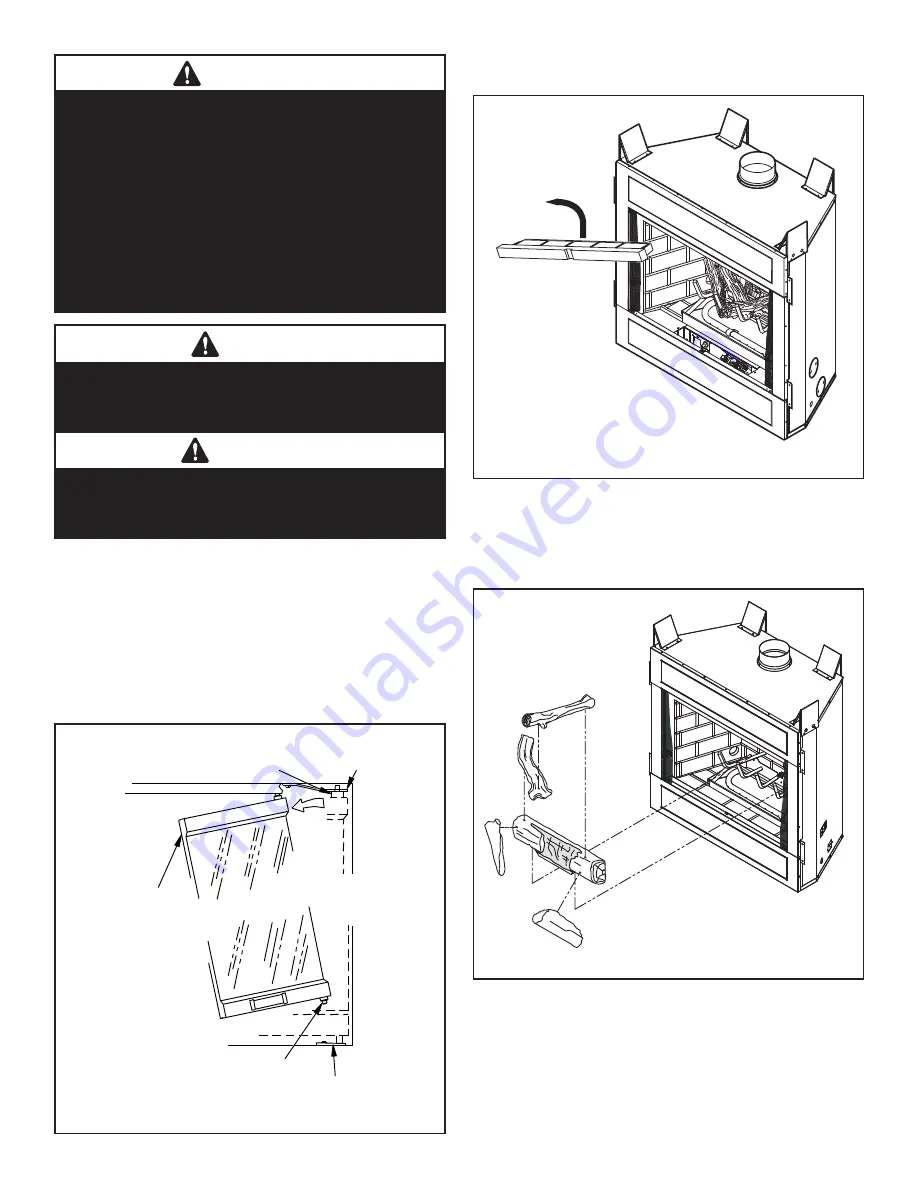
1. Remove front glass panels (if installed). This will keep them from
being damaged. To remove, partially open doors. Press up on upper
spring clip of one door panel with a screwdriver until outer top pivot
pin is free of clip
(see
Figure 1
)
. Repeat with second door panel.
Place glass panels safely out of your work area.
2. Slide open screens and tuck inside outer pockets on fi rebox.
IMPORTANT
The burner orifi ce provided in this kit are only for use at
elevations of 0 to 2,000 feet (610 M) in the USA and 0 to
4,500 feet (0-1372 M) in Canada. At higher elevations
the BTU input must be de-rated by 4% for every 1,000
feet (305 M) to maintain the proper ratio of gas to air. If
the installer must convert the unit to adjust for varying
altitudes, a deration information sticker must be fi lled
out by the installer and adhered to the appliance at the
time of the conversion. Contact your local gas supplier
for deration requirements for your area.
CAUTION
The gas supply shall be shut OFF prior to discon-
necting the electrical power, before proceeding with
the conversion.
ATTENTION
Avant d’effecteur la conversion, coupez d’abord
l’alimentation en gaz, ensuite, coupez l’alimentation
electrique.
Figure 1 - Removing Glass Doors
Figure 2 - Removing Front Refractory Access Panel
Figure 3 - Removing Log Set
4. Remove logs. Carefully lift top logs straight up until pins are clear
of lower logs
(see
Figure 3
)
. Continue removing logs one at a time.
The rear log is very heavy and should be lifted with both hands. Place
logs away from your work area. Be careful not to damage logs.
Spring
Clip
Depress Spring Clip to
Release Pivot Pin
Remove Bottom Pin From
Pivot Plate While Sliding Door
Out of the Upper Track
Pivot
Plate
Fold Bi-Fold
Door After
Releasing
Spring Clip
and Slide
Door Out
of Upper
Track
3. Remove front refractory access panel by lifting up and angling out
of fi rebox opening
(see
Figure 2
)
.
f i r e - p a r t s . c o m


