IMBA-Q454-R10 User Manual
Page 67
Step 5:
Correctly position the CPU.
Match the Pin 1 mark with the cut edge on the
CPU socket.
Step 6:
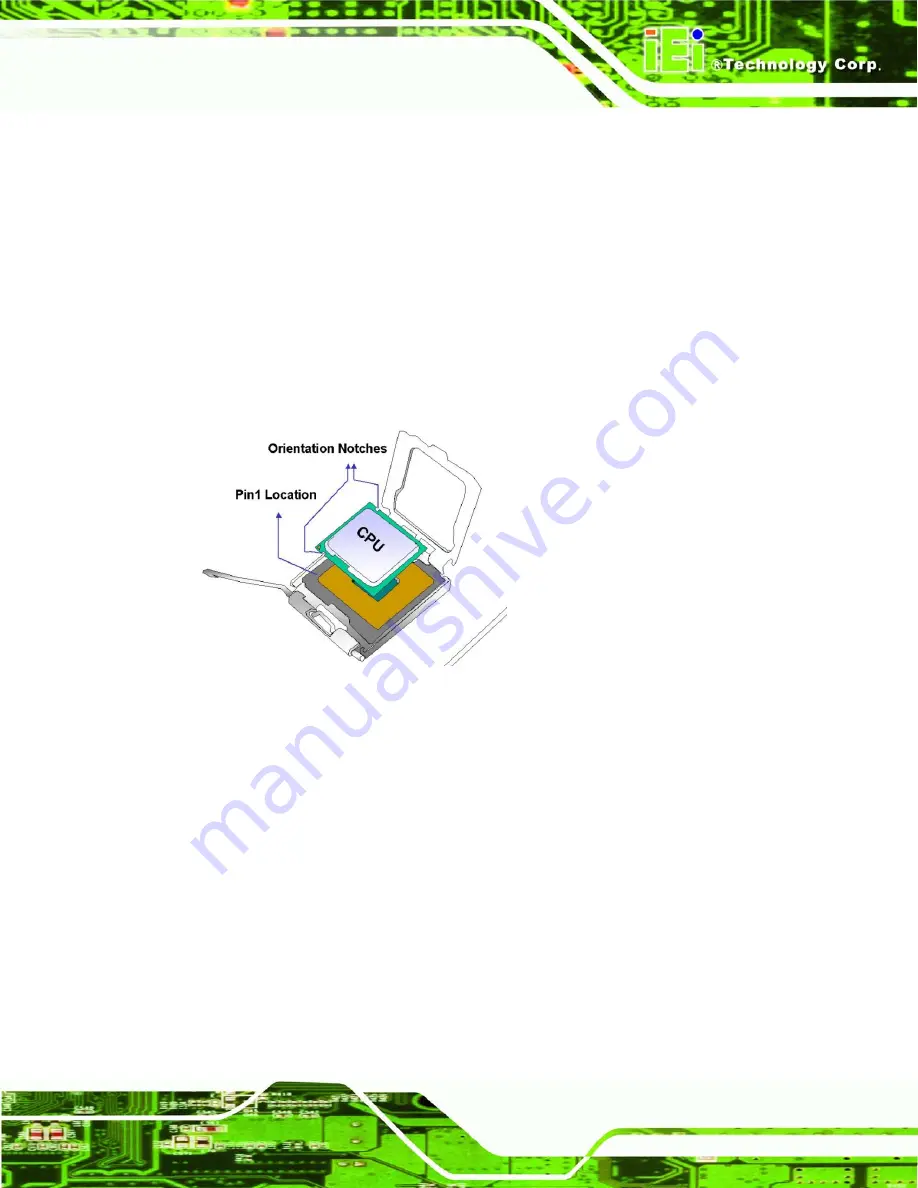
Align the CPU pins.
Locate pin 1 and the two orientation notches on the CPU.
Carefully match the two orientation notches on the CPU with the socket
alignment keys.
Step 7:
Insert the CPU.
Gently insert the CPU into the socket. If the CPU pins are
properly aligned, the CPU should slide into the CPU socket smoothly.
See
8
Figure 4-4
.
Figure 4-4: Insert the Socket LGA775 CPU
Step 8:
Close the CPU socket.
Close the load plate and engage the load lever by
pushing it back to its original position. Secure the load lever under the retention
tab on the side of CPU socket.
Step 9:
Connect the CPU 12 V cable to the 12
After the cooling kit is installed connect
the CPU cable to the CPU 12 V power connector.
Step 0:
Содержание IMBA-Q454-R10
Страница 16: ...IMBA Q454 R10 User Manual Page 16 Chapter 1 1 Introduction...
Страница 24: ...IMBA Q454 R10 User Manual Page 24 Chapter 2 2 Unpacking...
Страница 29: ...IMBA Q454 R10 User Manual Page 29 Chapter 3 3 Connector Pinouts...
Страница 61: ...IMBA Q454 R10 User Manual Page 61 Chapter 4 4 Installation...
Страница 90: ...IMBA Q454 R10 User Manual Page 90 Chapter 5 5 BIOS Setup...
Страница 140: ...IMBA Q454 R10 User Manual Page 140 Chapter 6 6 Software Drivers...
Страница 167: ...IMBA Q454 R10 User Manual Page 167 Chapter 7 7 Intel AMT Setup...
Страница 177: ...IMBA Q454 R10 User Manual Page 177 Chapter 8 8 iSMM Setup...
Страница 193: ...IMBA Q454 R10 User Manual Page 193 Appendix A A BIOS Options...
Страница 197: ...IMBA Q454 R10 User Manual Page 197 Appendix B B Terminology...
Страница 201: ...IMBA Q454 R10 User Manual Page 201 Appendix C C Digital I O Interface...
Страница 204: ...IMBA Q454 R10 User Manual Page 204 Appendix D D Watchdog Timer...
Страница 207: ...IMBA Q454 R10 User Manual Page 207 Appendix E E Compatibility...
Страница 210: ...IMBA Q454 R10 User Manual Page 210 Appendix F F Hazardous Materials Disclosure...


