Idis TR-4516 Скачать руководство пользователя страница 20

Part 1 – Introduction

20

1


ID 

Button

Used to assign remote control ID values.
No additional remote control assignment is necessary 
if the system's ID is 0. If the system's ID is a number 
between 0 and 16, however, you will need to press the 
ID button and then press the system ID number on 
the remote control. If the system's ID is set in double 
digits, press each digit button consecutively. The 


(remote control) icon will appear on the bottom of 
the DVR screen (status indication area) to indicate 
successful system-to-remote control pairing. If using 
multiple systems, it's possible to control all the units 
with a single remote control as long as all the system 
IDs are 0.

2


PANIC

 Button

Pressing this button displays the 

 icon and 

commences recording irrespective of the current 
schedule.
Press the button again to deactivate Panic Recording 
mode. 

3


Camera

 Buttons

Pressing the 

Camera

 button while in Live or Playback 

mode displays images from the selected camera in full 
screen.

4


ZOOM

 Button

Used to zoom in on a specific part of the screen. Once 
zoomed in, use the arrow buttons to pan around.

5


Arrow

 Buttons

Used to navigate through menus and interact with 
GUIs. In a Setup menu, use the 

Up/Down Arrow


buttons to increase or decrease numerical values. 
In Live or Playback mode, use the 

Left/Right Arrow


buttons to view the previous or next screen.

6


MENU

 Button

Pressing the 

MENU

 button while in Live mode 

displays the Live menu. Alternatively, pressing the 
button while in Search mode displays the Search 
menu. Press the button once more to close the menu. 
Use the arrow buttons to select menus and options.

7


PTZ

 Button

Initiates PTZ mode and allows you to control the 
selected PTZ camera.

8


FOCUS NEAR/FAR

 Button

Used in PTZ mode to shift focus between a nearby 
point and a far away point. 

9


PRESET SET

 Button

Press the 

SET

 button while in PTZ mode to save the 

current position as a preset. 

0


PRESET VIEW

 Button

Pressing the 

VIEW

 button displays the preset list.

!


ZOOM IN/OUT

 Button

Used in PTZ mode to zoom in/out on the screen.
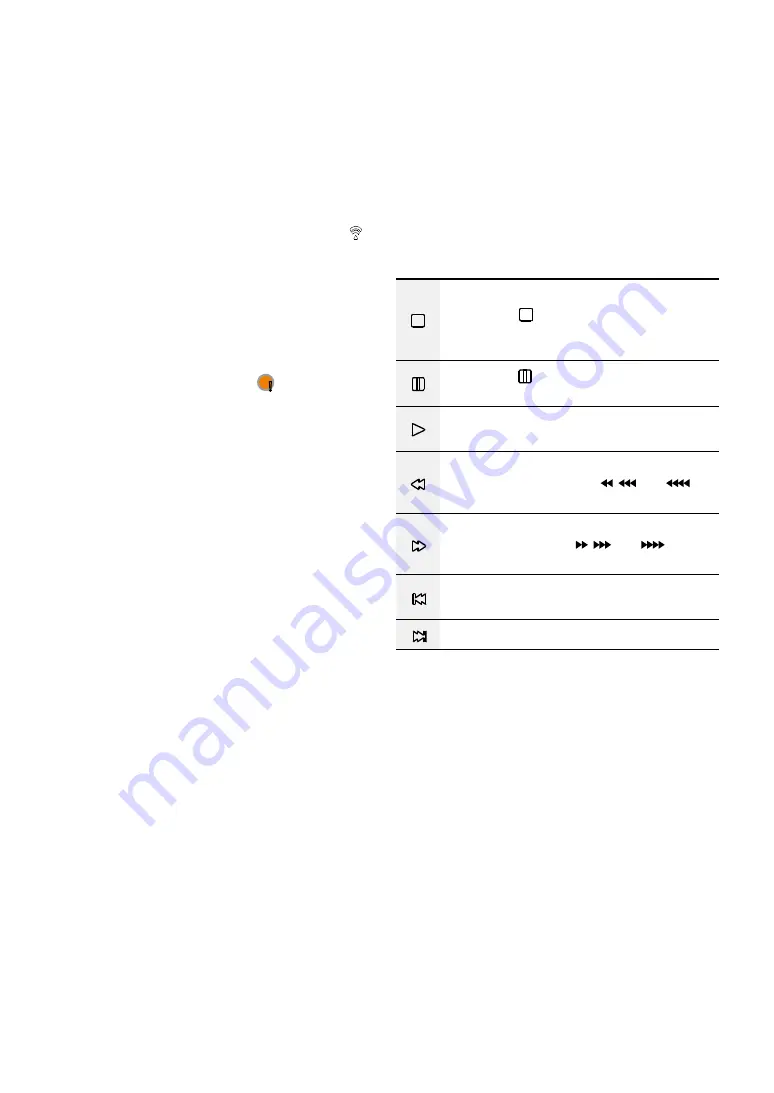
@


Playback

 Buttons

Stops the video and restores Live mode.
Pressing the 

 button during monitoring 

appears the window that selects between 
triplex and all channels modes.

Pressing the 

q

button during playback 

pauses the video and displays 

#

 on the screen.

Plays the video in normal speed and displays 

r


on the screen. 

Scans backward through the video at a fast 
rate (Press to cycle through  , 

, and 

 the 

speed).

Scans forward through the video at a fast rate 
(Press to cycle through  , 

, and 

  the 

speed).

Skips to the previous screen (while in paused 
state).

Skips to the next screen (while in paused state).

#


SPOT

 Button

Select a camera or sequence that appear in the spot 
monitor. Spot monitor only supports the full screen.

$


DISPLAY

 Button

PIP > 2x2 > 1+5 > 1+7 > 3x3 > 4x4

%


SEQUENCE

 Button

Pressing the 

SEQUENCE

 button while in Live mode 

initiates Live Sequential mode (displays channels in 
sequence).

^


FREEZE

 Button

Used to pause Live screen.

&


ALARM

 Button

Pressing this button while the alarm has been 
activated resets all DVR outputs, including the built-in 
buzzer. Displays the event log on the screen when the 
alarm is off in Live mode.

Содержание TR-4516

Страница 1: ...Digital Video Recorder Installation Manual TR 4508 TR 4516 TR 4516R...

Страница 2: ...eir retailer regarding product installation and use If you need to disassemble the product for functionality expansion or repair purposes you must contact your retailer and seek professional assistanc...

Страница 3: ...g this equipment from the wall outlet and refer servicing to qualified service personnel under the following conditions A When the power supply cord or the plug has been damaged B If liquid is spilled...

Страница 4: ...CE AT THEIR OWN EXPENSE WARNING CHANGES OR MODIFICATIONS NOT EXPRESSLY APPROVED BY THE PARTY RESPONSIBLE FOR COMPLIANCE COULD VOID THE USER S AUTHORITY TO OPERATE THE EQUIPMENT THIS CLASS OF DIGITAL A...

Страница 5: ...resulting from the use thereof The information contained herein is subject to change without notice Revisions or new editions to this publication may be issued to incorporate such changes The software...

Страница 6: ...on 7 Product Features 7 Accessories 9 Overview 10 Dimension 10 Front Panel 11 Rear Panel 14 Rear Panel Connections 15 Remote Control Optional 19 Part 2 Appendix 22 System Log Types 22 Error Code Types...

Страница 7: ...control controls camera menu using coax cable Fast and easy search feature Time Lapse Event log Motion Text In Simultaneously survey record play back and transmit data in real time Graphic User Interf...

Страница 8: ...umber of cameras that can be displayed For simplicity the illustrations and descriptions in this document refer to the 16 channel model iRAS WebGuard ATM POS Audio input 1 4 Cameras 1 16 HDMI Monitor...

Страница 9: ...product check the contents inside to ensure that all the following accessories are included Digital Video Recorder Power Cable Quick Guide Optical USB Mouse IR Remote Control Optional Assembly Screws...

Страница 10: ...Part 1 Introduction 10 Overview Dimension Front 430 88 6 5 94 5 Side 94 5 412 8 424...

Страница 11: ...more than one function Remote control sensor is located on the middle of the front panel Ensure that the sensor remains unobstructed at all times If obstructed the sensor might not be able to receive...

Страница 12: ...holding the Menu button for 3 seconds activates Edit Group mode 4 PTZ Button Pressing the PTZ button initiates PTZ mode allowing you to control PTZ cameras In PTZ mode use the arrow buttons to move th...

Страница 13: ...n ethernet USB Ports Storage Device Connection Connect an external USB hard drive or a USB flash memory device to one of the USB ports for use with the Clip Copy feature The external storage device sh...

Страница 14: ...Panel Flash Memory Mouse USB HDD IR Remote Control Rear Panel 1 2 34 5 7 8 9 0 6 1 Video Input 2 Alarm Connection Ports 3 RS 485 Port 4 RS 232 Port 5 eSATA Port 6 SPOT HDMI VGA Out Port 7 Network Por...

Страница 15: ...the GND connector All connectors marked GND are common connectors NC NO Relay Alarm Outputs This DVR is capable of activating deactivating buzzers lights and other external devices Connect the device...

Страница 16: ...irst turn off the DVR and unplug the power cable Connect the eSATA device and then power the eSATA device first and then DVR back on To disconnect an eSATA device first turn off the DVR and unplug the...

Страница 17: ...OUT port Use the AUDIO OUT port to listen to audio from analog cameras Use the AUDIO IN port to establish two way communication with cameras This DVR does not feature a built in audio amplifier unit...

Страница 18: ...troduction 18 Connections on the Rear Panel Power Network IDIS Center Remote Monitoring Sensor HDMI Monitor eSATA Storage Device SPOT Monitor POS VGA Monitor Speaker Microphone Analog Camera Alarm USB...

Страница 19: ...ns 4 ZOOM Button 5 Arrow Buttons 6 MENU Button 7 PTZ Button 8 FOCUS near far Buttons 9 PRESET Set Button 0 PRESET View Button ZOOM in out Buttons Playback Buttons SPOT Buttons DISPLAY Button SEQUENCE...

Страница 20: ...while in Search mode displays the Search menu Press the button once more to close the menu Use the arrow buttons to select menus and options 7 PTZ Button Initiates PTZ mode and allows you to control t...

Страница 21: ...OOKMARK Button Adds a bookmark to the current playback position a CLIP COPY Button Pressing the CLIP COPY button allows you to copy video clips b Enter Button Used to make menu option selections and r...

Страница 22: ...e Sync Auto Deletion Time Sync Failed Search Begin Disk Bad Search End Login Clip Copy Begin Logout Clip Copy End Setup Begin Clip Copy Cancel Setup End Clip Copy Failure Remote Setup Change Clip Copy...

Страница 23: ...nnected 103 LILO Execution Failure 404 USB Storage Device in Use 104 Reboot Failure 405 Unsupported File System 105 Improper File 500 Clip Copy in Progress Upgrade Not Available 300 Remote Connection...

Страница 24: ...setting Check the camera lens settings Check the current main monitor resolution DVR stopped working in the middle of a recording Set the DVR to Recycle mode For more information refer to the General...

Страница 25: ...HDMI 1 VGA 1 SPOT 1 BNC 1 Vp p 75 Ohms Video Resolution HDMI 3840x2160 1920x1080 1280x1024 VGA 1920x1080 1280x1024 Composite SPOT 704x480 NTSC 704x576 PAL Recording Speed IPS Real time 480ips Full HD...

Страница 26: ...IR Remote Control Port Remote Control USB Ports 1 x USB 3 0 2 x USB 2 0 Storage Primary Storage SATA hard disk drive up to 4 Secondary Storage USB hard disk drive or flash drive Some hard disks may no...

Страница 27: ...IDIS Co Ltd For more information please visit at www idisglobal com...

Отзывы: