FD151 Gas Compressor 19
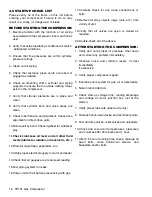
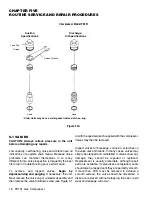
Figure 5.3A
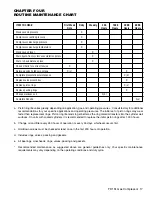
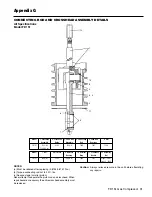
The metal valve gasket should always be replaced
when the valve is reinstalled. Make sure suction and
discharge valves are in the right slots, as shown in
the illustrations. Reinstall cages, spacers or unloader
parts and then tighten the valve hold down screw to
40 ft./lb. to ensure the valve gasket is properly
seated. Replace O-rings sealing the valve cover and
valve cap if they show any signs of wear or damage.
Reinstall valve caps sealed by flat metal gaskets with
new gaskets. Refer to Appendix C for torque values.
5.2 CYLINDERS AND HEAD
Cylinders and heads very seldom require
replacement if the compressor is properly
maintained. The primary causes of damage to
cylinders and heads are corrosion and the entry of
solid debris or liquid into the compression chamber.
Improper storage can also result in corrosion
damage to the head and cylinder (for proper storage
instructions see Section 5.8).
If the cylinder does become damaged or corroded, use
a hone to smooth the cylinder bore, and then polish it to
the value shown in Appendix D. If more than .005” must
be removed to smooth the bore, replace the cylinder.
Cylinder liners and oversized rings are not available.
Overboring the cylinder will result in greatly reduced ring
life. Note: Honing of the cylinder is not normally
recommended unless it becomes heavily scored.
Many compressor repair operations require removal
of the head and cylinder. While the compressor is
disassembled, take special care to avoid damage or
corrosion to the head and cylinder. If the compressor
will be left open for more than a few hours, coat bare
metal surfaces with rust preventative.
When reassembling the compressor, make sure the
bolts are retightened as shown in Appendix C.
5.3 PISTON RINGS AND PISTON RING
EXPANDERS
Piston ring life will vary considerably from application
to application. Ring life will improve dramatically at
lower speeds and temperatures.
Do not hone your cylinder bores unless they become
badly scratched. The piston rings will produce a
mirror-like surface which will enhance piston ring life.
To replace the piston rings: Depressurize the
compressor and purge if necessary. Remove the head
to gain access to the compressor cylinder. Loosen the
piston head bolts. Remove the piston as shown in
Figure 5.3A, by pinching two loose bolts together.
Piston rings and expanders may then be easily
removed and replaced. Corken recommends
replacing expanders whenever rings are replaced.
To determine if rings should be replaced, measure
the radial thickness and compare it to the chart in
Appendix D. Rings should be replaced if they are
near the minimum listed.
5.4 PISTONS
To replace the pistons:
Depressurize the compressor
and purge if necessary.
Remove the compressor
cylinder and head (see Section 5.2). Remove the piston
head by loosening and removing the socket head bolts
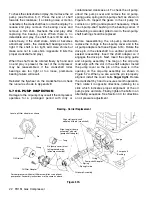
holding the piston head to the piston platform (see Figure
Figure 5.4A
Piston Cross-Section
sizes FD151 (First Stage Only)
Model FD151 - First Stage Only
“X”
Piston Clearnce
Roll
Pin
Piston
Bolt
Castellated
Piston Nut
Piston Ring
Expander
Piston
Ring
Cylinder
Piston
Platform
Piston Rod
Thrust
Washer
Shims
Piston Head


