


www.ideal-tek.com
Switzerland
8
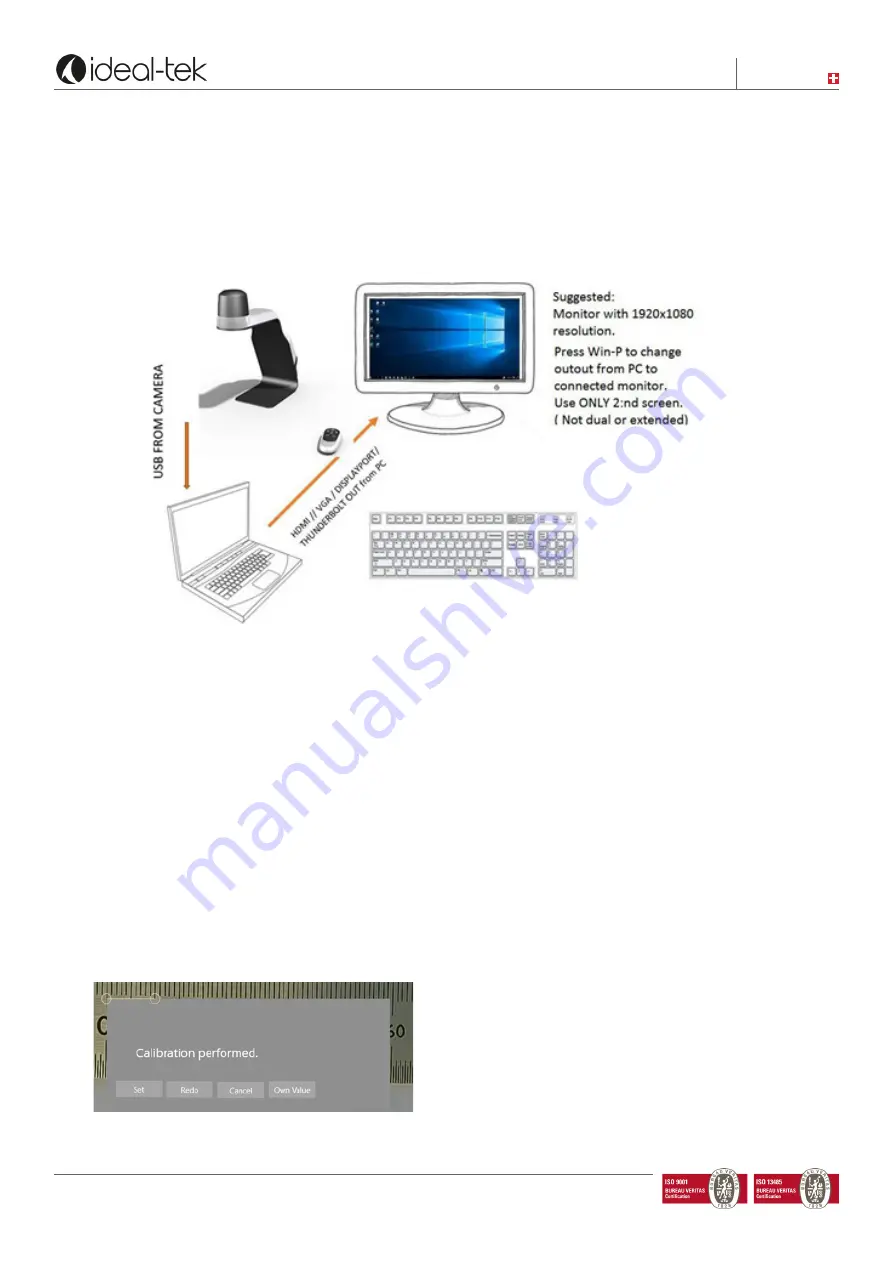
System set up
Example of system setup when TEK-SCOPE PLUS Software is used:
DO NOT CONNECT THE DEVICE BOTH TO A MONITOR AND PC TOGETHER.
If the computer and the monitor are used together, like extended or dual, the algorithm for magnification/
measuring will be effected.
With the following screens sizes: 20”(1600x900); 22”(1920x1080); 22”(1680x1050); 24”(1920x1080);
24”(1920x1200) measuring will have a tolerance of 1-2% without calibration.
Measuring
Put your object under the camera. Choose the magnification by the software buttons.
Notice: using the remote control, the Zoom factor will be not updated and measuring will be wrong.
DO NOT USE REMOT CONTROL WHEN CONNECTED TO THE PC BUT USE THE SOFTWARE TOOLBAR.
Press the draw button. Press LB (Left button) on your mouse, select the horizontal or vertical button and click
the starting point. Then go to the second measuring point and press LB on your mouse. The measure value will
appear on the screen.
Calibration
If you need a more accurate measuring, the calibration
should be done.
Put a ruler horizontally on the subject you wish to measure.
Verify that your magnification is the one you want, select
the drawing mode, and select “calibration” button. Draw
an horizontal line and set your “own value” in mm, then
press “set”.
Zoom value / rotation
: how much the zoom moves vs. the scroll wheel
Editing Colors
: change the color of text and drawings in the Draw Mode


