background image

                                           --

10

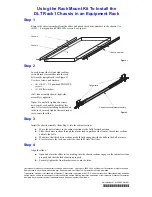
Step 1

Step 2

Содержание PAC-170

Страница 1: ...PAC 170 CHASSIS USER S MANUAL...

Страница 2: ...manual may be reproduced copied or translated without prior notice to ICP Electronics Inc The information provided in this document is for reference only We do not assume any responsibility arising ou...

Страница 3: ...Chapter 2 System Setup 2 1 Front Panel of PAC 170 2 2 Rear Panel of PAC 170 2 3 Removing the chassis cover 2 4 The Backplane and Card Clamp Installation 2 5 Disk Drives Installation 2 6 Replacing the...

Страница 4: ...easily be mounted on panels or walls with the supplied brackets 1 2 Product Specifications General specification Construction Heavy duty steel Disk Drive One 3 5 FDD One 5 25 CD ROM and Two 3 5 HDDs...

Страница 5: ...tion 5 17Hz 0 1 double amplitude displacement 17 640Hz 1 5G acceleration peak to peak Shock 10G acceleration peak to peak Safety approval meet CE FCC Shipping Weight 10Kgs Cooling Fan One ball bearing...

Страница 6: ...5 1 3 Dimensions 412 00mm 432 00mm 400 00mm 360 00mm 334 00mm 310 00mm 286 00mm 260 00mm 210 00mm D10 D5 R2 5 193 00mm 254 00mm 230 00mm...

Страница 7: ...llation Procedure The following set up procedures are provided to assist you in installing the system unit please follow the steps below 2 1 Front Panel of PAC 170 RESET POWER H D D LED POWER LED SWIT...

Страница 8: ...7 2 2 Rear Panel of PAC 170 AC INPUT AC OUTPUT...

Страница 9: ...moving the chassis cover The cover is mounted by six screws on the top of the chassis remove them and slide the cover to the rear of the chassis Figure below shows how to remove the chassis cover Step...

Страница 10: ...9 2 4 Backplane Installation Figure below illustrates how to install the backplanes on the PAC 170...

Страница 11: ...10 Step 1 Step 2...

Страница 12: ...e bay 2 Mount the drive rails on the front of HDD or FDD 2 Attach the FDD to the bracket with four screws and connect FDD cable power cable to the FDD 3 Attach the HDD to the bracket with four screws...

Страница 13: ...12 Step 1 Step 2...

Страница 14: ...ated at the front end of the chassis Under continuous use the filter should be removed about once a mounth To replace the filter open and close the door by press Take out the old filter and slide the...

Страница 15: ...14...

Страница 16: ...15 2 7 Power Supply Installation P9 P8 P8 ACE 925A POWER SUPPLY Brown Blue White Black Brown Blue Black White 1 7 P9 POWER SWITCH GND BACKPLANE...

Страница 17: ...16 2 8 Fan Installation ACE 925A POWER SUPPLY GND BLACK 12V RED...

Страница 18: ...17 APPENDIX A PASSIVE BACKPLANES mm mm mm mm mm mm mm mm mm 0 00 18 00 175 00 165 00 mm mm 0 00 10 00 19 30 0 00 97 00 142 50 150 00...

Страница 19: ...18 APPENDIX B EXPLODED DIAGRAM...

Отзывы: