ICP DAS USA DL-100T485 Скачать руководство пользователя страница 7

DL-100T485 Quick Start V.104 

Configuration 

After the connection between the PC and the DL-100T485 has 

been established, click the “

” icon to configure the DL-100T485. 

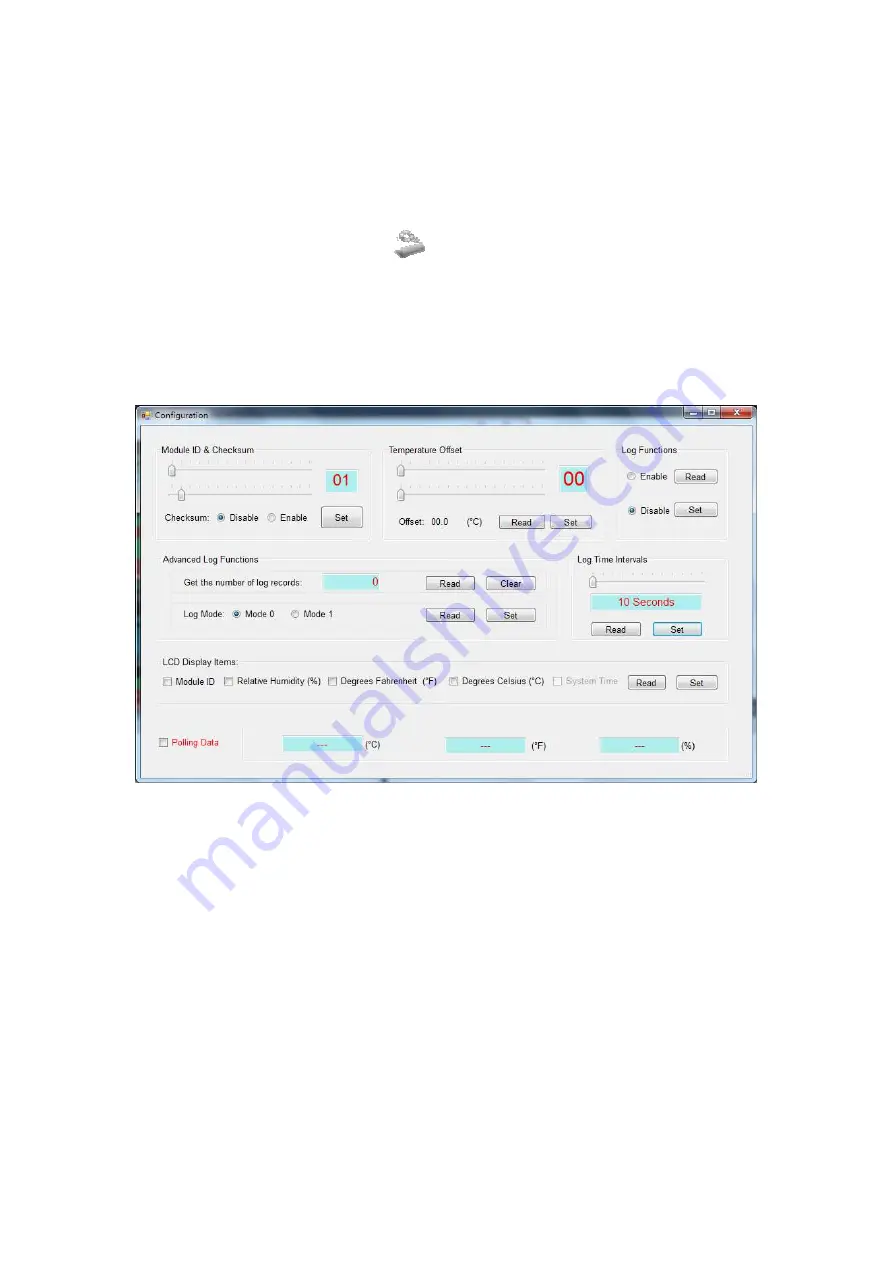
The details are shown as follows: 
1.  A new menu window would be created and the current module 

configurations will be displayed. After changing the values, click 
the “Set” button to update the configurations of the module. 


2.  When you successfully connect to the DL-100 by using the 

Utility software, this Utility software will disable the data log 
function. If you need to the data log function, you need to 
enable the data log function before you close the Utility 
software. 

Содержание DL-100T485

Страница 1: ...roduct ICP DAS reserves the right to change this manual at any time without notification The information furnished by ICP DAS is believed to be accurate and reliable However no responsibility is assum...

Страница 2: ...DL 100T485 Quick Start V 104 Table of Contents Before you use the Utility Software 3 DL 100T485 Utility Illustration 4 Connecting to the DL 100T485 5 Retrieving Records 6 Configuration 7...

Страница 3: ...talled NET Framework yet please refer to section 2 for more information or refer tonsection 3 for more information about the installation of this Utility 2 To download NET Framework refer to http www...

Страница 4: ...creates a connection from the serial port Clicking Connection Disconnect or the icon disconnects the connection between the PC and the DL 100T485 Clicking Functions Get Records or the icon retrieves t...

Страница 5: ...ecksum will be disabled Click the OK button to connect to the DL 100T485 Note The LCD will also indicate the module address and the checksum status 3 If the connection is successfully established the...

Страница 6: ...d you can retrieve the log data via the Utility software The procedure is as follows 1 Click the Get button and wait until the data is successfully received 2 The log data will be listed at the left s...

Страница 7: ...w would be created and the current module configurations will be displayed After changing the values click the Set button to update the configurations of the module 2 When you successfully connect to...

Отзывы: