16
3
BASIC OPERATION
■
Receiving
Make sure the hardware installation is finished. (p. 1)
D
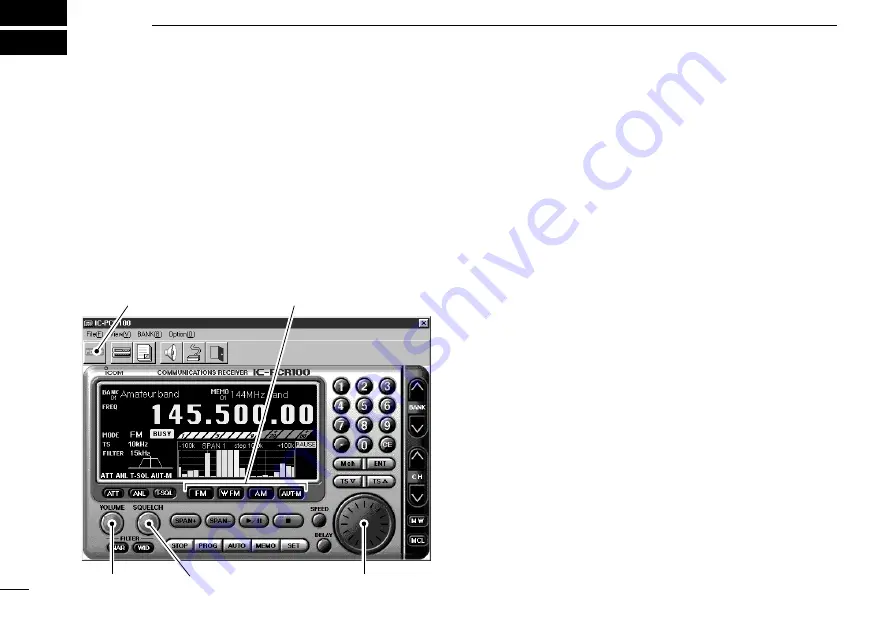
Using the multi-function receiver screen
q
Click [POWER] to turn power ON.
w
Click the [VOLUME] control with the sub mouse button to
increase the audio level; click the [VOLUME] control with
the main mouse button to decrease the audio level.
• When clicking and holding the control, the audio level scrolls up
or down.
• Pushing the PC’s [
c
] or [
d
] key also sets the audio level.
e
Set an operating frequency and mode. (pgs. 17, 18)
r
Click the [SQUELCH] control with the sub mouse button to
increase the squelch level (tight squelch); click the
[SQUELCH] control with the main mouse button to de-
crease the squelch level (loose squelch).
• When clicking and holding the control, the squelch level scrolls
up or down.
t
When a signal is received:
➥
Squelch opens and audio is emitted from the speaker.
➥
The S-meter shows the relative signal strength.
D
Using the simple function receiver screen
q
Click [PWR] to turn power ON.
w
Click [MENU] and select the ‘Function Controller’ when it
is not displayed.
e
Click [VOL
J
] or [VOL
K
] to set the desired audio level.
• When clicking and holding either button, the volume level scrolls
up or down.
• Pushing the PC’s [
c
] or [
d
] key also sets the audio level.
r
Set an operating frequency and mode. (pgs. 17, 18)
t
Click [SQL
J
] or [SQL
K
] to set the desired squelch level.
• When clicking and holding either button, the squelch level scrolls
up or down.
y
When a signal is received:
➥
Squelch opens and audio is emitted from the speaker.
➥
The S-meter shows the relative signal strength.
q
Power switch
e
Select mode
w
Set volume
e
Set frequency
r
Set the squelch level


