background image


16 

4  Quick Configuration Tool 

4.1  Overview  

Quick configuration tool can search current IP address, modify IP address. At the same time, you can 

use it to upgrade the device.  

Please note the tool only applies to the IP addresses in the same segment. 

4.2  Operation 

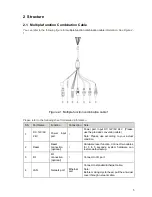
Double click the “ConfigTools.exe” icon, you can see an interface is shown as in Figure 4-1. 
In the device list interface, you can view device IP address, port number, subnet mask, default 

gateway, MAC address and etc.  


Figure 4-1 Search interface 

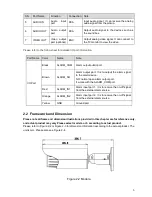
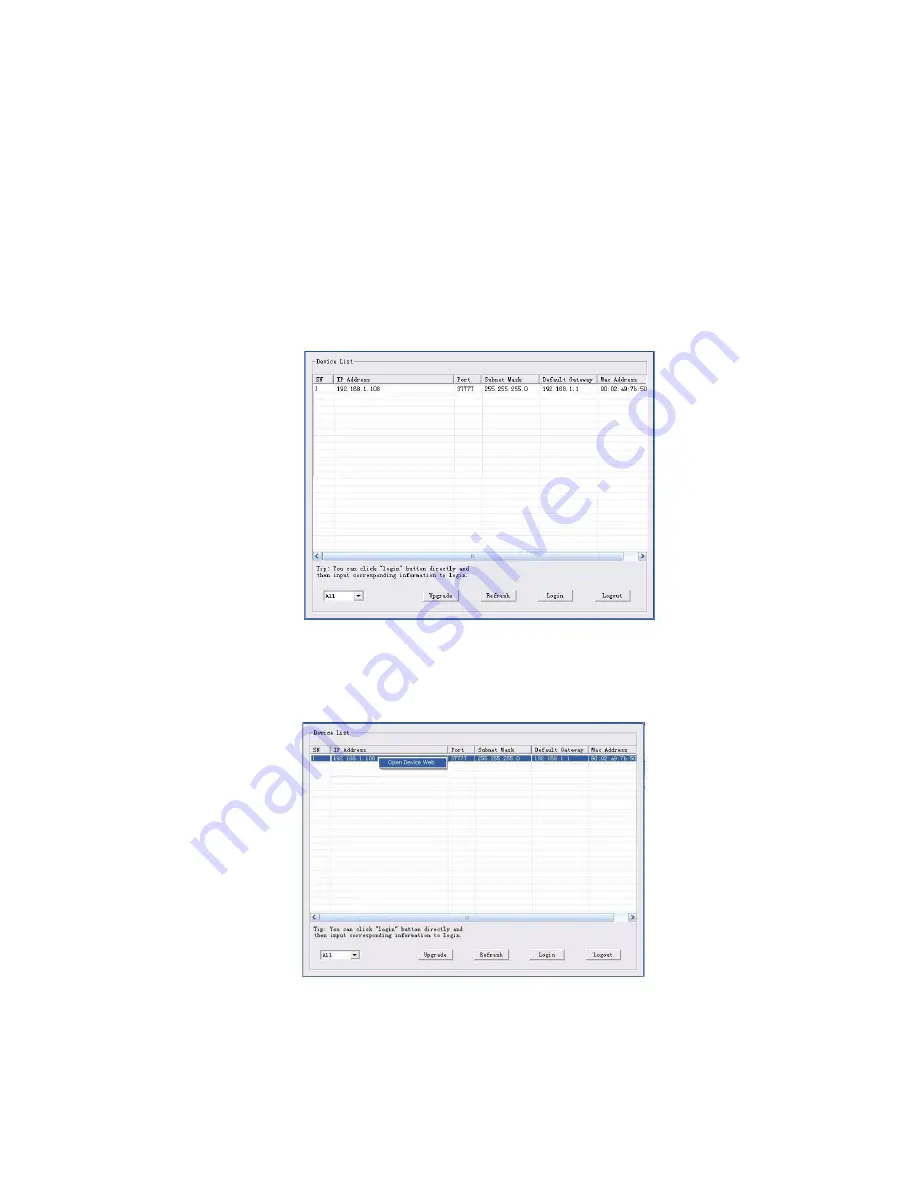
Select one IP address and then right click mouse, you can see an interface is shown as in Figure 4-2. 
Select the “Open Device Web” item; you can go to the corresponding web login interface. 


Figure 4-2 Search interface 2 


If you want to modify the device IP address without logging in the device web interface, you can go to 

the configuration tool main interface to set.  

Содержание ICIP B3000AF

Страница 1: ...HD IR Waterproof Fixed Network Camera With Integrated Bracket User s Manual Version 1 0 1 ...

Страница 2: ...ur network camera This user s manual is designed to be a reference tool for your system Please read the following safeguard and warnings carefully before you use this series product Please keep this user s manual well for future reference ...

Страница 3: ...on Please install the proper power cut off device during the installation connection Always follow the instruction guide the manufacturer recommended 4 Qualified engineers needed All the examination and repair work should be done by the qualified service engineers We are not liable for any problems caused by unauthorized modifications or attempted repair 5 Environment This series network camera sh...

Страница 4: ...enclosure when you are installing the device or clean the enclosure when you are doing maintenance work Please use professional optical clean method to clean the enclosure Improper enclosure clean method such as use cloth may result in poor IR effect of camera with IR function 7 Accessories Be sure to use all the accessories recommended by manufacturer Before installation please open the package a...

Страница 5: ...2 3 1 Device end to PC end 7 2 3 2 PC end to the Device end 7 2 4 Alarm Setup 8 3 Installation 10 3 1 Device Installation 10 3 2 Micro SD Card Installation 10 3 3 Lens Adjustment 11 3 4 Bracket Adjustment 12 3 5 OSD Buttons 14 4 Quick Configuration Tool 16 4 1 Overview 16 4 2 Operation 16 5 Web Operation 18 5 1 Network Connection 18 5 2 Login and Main Interface 18 6 FAQ 20 7 Appendix Toxic or Haza...

Страница 6: ...p one user belongs to one group The user right shall not exceed the group right Storage Function Support central server backup function in accordance with your configuration and setup in alarm or schedule setting Support record via Web and the recorded file are storage in the client end PC Support built in Micro SD card Do not support local Micro SD card hot swap storage function Support short tim...

Страница 7: ... such as WEB DSS PSS System Status Micro SD card status bit stream statistics log and software version Video Parameter Image Sensor 1 2 8 inch CMOS Pixel 2080 H 1553 V Day Night Mode Support day night mode switch and IR CUT at the same time The lens has built in IR CUT mechanical component Auto Aperture Enable Gain Control Fixed Auto White Balance Manual Auto BLC Off BLC WDR 1 100 adjustable HLC a...

Страница 8: ...image snapshot log email function and etc Alarm Input 2 channel input 1 channel output Note Only some series support this function Record and Backup Record Priority Manual External alarm Video detect Schedule Storage Management Support SD card storage NAS storage Network Wire Network 1 channel wire Ethernet port 10 100 Base T Ethernet Network Protocol HTTP TCP ARP RTSP RTP UDP RTCP SMTP FTP DHCP D...

Страница 9: ...4 Installation Bracket is included in the accessories bag IR Distance 20 30m Protection Level IP66 ...

Страница 10: ...ion Note 1 DC 12V AC 24V Power input port Power port Input DC 12V AC 24V Please use the provided conversion cable Note Please use according to your actual condition 2 Reset Reset connection optional Hardware reset function Connect two cables for 3 to 5 seconds system hardware can restore default setup 3 I O I O connection optional Connect to I O port 4 LAN Network port Ethernet port Connect to sta...

Страница 11: ...output port It is to output the alarm signal to the alarm device NO normal open alarm output port It works with the ALARM_COM port Red ALARM_IN1 Alarm input port 1 It is to receive the on off signal from the external alarm source Orange ALARM_IN2 Alarm input port 2 It is to receive the on off signal from the external alarm source Yellow GND Ground port 2 2 Framework and Dimension Please note all f...

Страница 12: ... port of the PC Login the Web and then click the Audio button to enable the bidirectional talk function You can see the button becomes orange after you enabled the audio talk function Click Audio button again to stop the bidirectional talk function Listening Operation At the device end speak via the speaker or the pickup and then you can get the audio from the earphone or sound box at the pc end 2...

Страница 13: ...arm input device to the alarm input port red or orange of the I O cable 2 Connect the alarm output device to the alarm output port brown and alarm output public port black The alarm output port supports NO normal open alarm device only 3 Open the Web go to the Figure 2 5 Please set the alarm input 01 port for the first channel of the I O cable red The alarm input 02 is for the 2nd channel of I O c...

Страница 14: ...7 Port ALARM_COM and Port ALARM_NO composes an on off button to provide the alarm output If the type is NO this button is normal open The button becomes on when there is an alarm output If the type is NC this button is normal off The button becomes off when there is an alarm output Figure 2 7 Alarm output ...

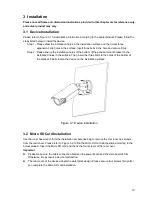
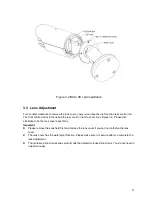
Страница 15: ...tallation holes in the surface Then insert the three bolts to the holes of the bottom of the bracket Finally fasten the device on the installation surface Figure 3 1 Device installation 3 2 Micro SD Card Installation Use the inner hex wrench from the installation accessories bag to remove the four inner hex screws from the rear cover Please refer to Figure 3 2 to find the Micro SD card slot positi...

Страница 16: ... rod is to zoom See Figure 3 3 Please turn clockwise to fix the lens cover back firmly Important Please remove the sunshield first and remove the lens cover if you can not unfasten the lens cover The lens cover has the waterproof function Please make sure it is secure after you complete the lens adjustment The motorized zoom lens series product has the default motorized zoom lens You do not need t...

Страница 17: ...ure 3 5 according to the actual product The horizontal angle of the rear cover can rotate 360 the tilt angle can rotate 90 and the chassis can rotate 360 Please use the inner hex wrench to firmly secure the inner hex screw after you complete the setup Important Please make sure the M4 inner hex screw or M4 inner hex flat tight screws are firm otherwise it may result in chassis vibration and the ca...

Страница 18: ...13 Figure 3 4 Bracket adjustment 1 ...

Страница 19: ...SD Buttons Please refer to the following contents for detailed information See Figure 3 6 and Figure 3 7 Top button Focus zoom in Bottom button Focus zoon out Left button Far Right button Near Middle button Auto focus It is to get clear video ...

Страница 20: ...15 Figure 3 6 OSD button 1 Figure 3 7 OSD button 2 ...

Страница 21: ...wn as in Figure 4 1 In the device list interface you can view device IP address port number subnet mask default gateway MAC address and etc Figure 4 1 Search interface Select one IP address and then right click mouse you can see an interface is shown as in Figure 4 2 Select the Open Device Web item you can go to the corresponding web login interface Figure 4 2 Search interface 2 If you want to mod...

Страница 22: ...to login Please note the port information here shall be identical with the port value you set in TCP port in Web Network interface Otherwise you cannot login the device If you are using device background upgrade port 3800 to login other setups are all invalid Figure 4 3 Login prompt After you logged in the configuration tool main interface is shown as below See Figure 4 4 Figure 4 4 Main interface...

Страница 23: ... the PC and the network camera respectively Network camera default IP address is 192 168 1 108 Subnet mask is 255 255 255 0 Gateway is 192 168 1 1 Use order ping network camera address to check connection is OK or not 5 2 Login and Main Interface Open IE and input network camera address in the address bar See Figure 5 1 Figure 5 1 IP address The login interface is shown as below See Figure 5 2 Ple...

Страница 24: ...ogin After you successfully logged in please install WEB plug in unit Please refer to the Web Operation Manual included in the resource CD for detailed operation instruction See Figure 5 3 Figure 5 3 Web monitoring window ...

Страница 25: ...1G SanDisk 4G Usually we recommend the 4GB or higher high speed card in case the slow speed results in data loss Audio function Please use active device for the audio monitor input otherwise there is no audio in the client end To guarantee setup update After you modified the important setup please reboot the device via the software to make sure the setup has been updated to the storage medium Powe...

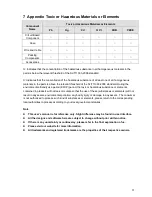
Страница 26: ...he toxic or hazardous substance or elements contained in products will not leak or mutate so that the use of these substances or elements will not result in any severe environmental pollution any bodily injury or damage to any assets The consumer is not authorized to process such kind of substances or elements please return to the corresponding local authorities to process according to your local ...

Отзывы: