1. Unplug the ac power adapter cable from the computer.
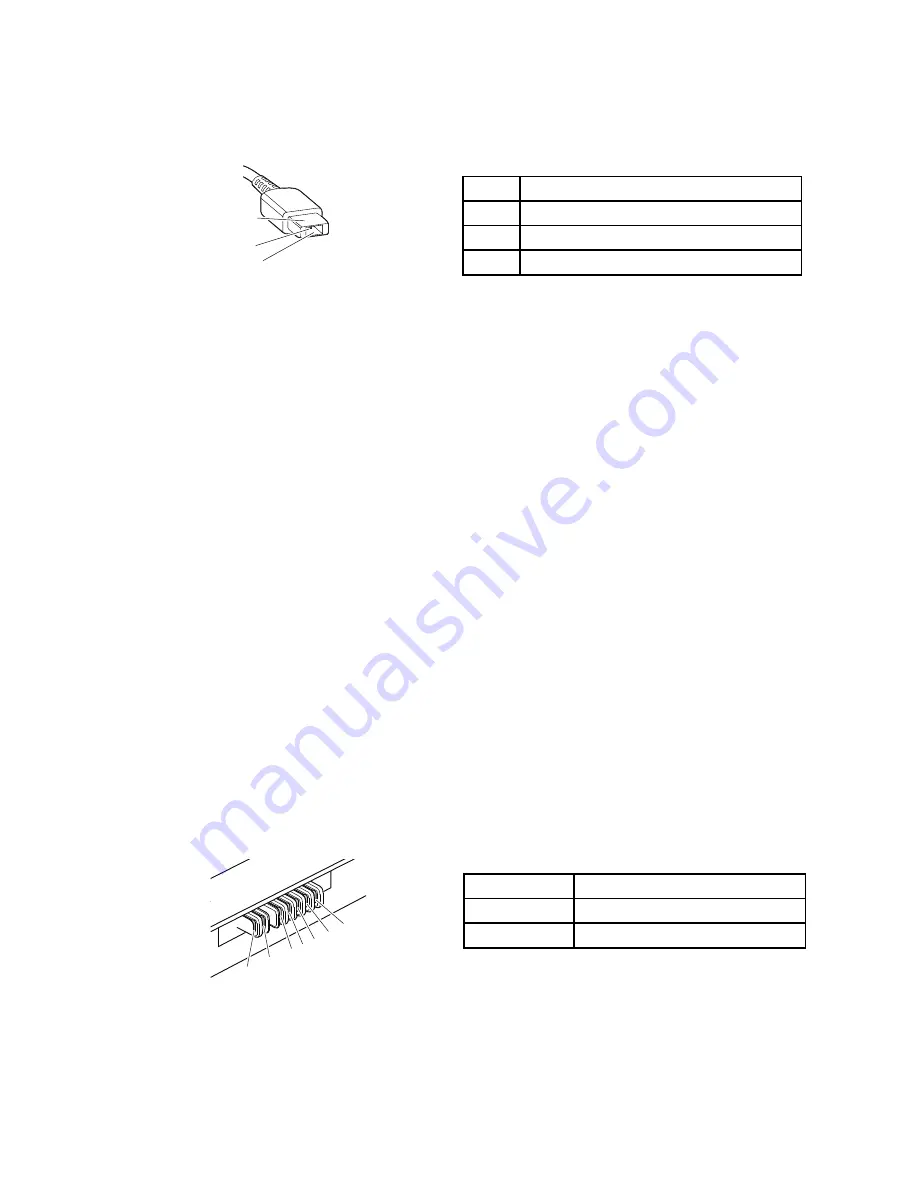
2. Measure the output voltage at the plug of the ac power adapter cable. See the following illustration:
Pin
Voltage (V dc)
1
+20
2
0
3
Ground
(20V)
1
3
2
Note:
Output voltage of pin 2 of the ac power adapter might differ from the one you are servicing.
3. If the voltage is not correct, replace the ac power adapter.
4. If the voltage is acceptable, replace the system board.
Note:
Noise from the ac power adapter does not always indicate a defect.
Checking the external battery pack and the operational charging
Checking the external battery pack
This system supports only batteries specially designed for this specific system and manufactured by Lenovo
or an authorized builder. The system does not support unauthorized batteries or batteries designed for other
systems. If an unauthorized battery or a battery designed for another systems is installed, the system will
not charge.
Attention:
Lenovo has no responsibility for the performance or safety of unauthorized batteries, and
provides no warranties for failures or damage arising out of their use.
Move your pointer to the battery-status icon in the Windows
®
notification area to check the battery status.
The battery-status icon displays the percentage of battery power remaining and how long you can use
your computer before you must charge the battery.
Note:
If the external battery pack becomes hot, it may not be able to charge. Remove it from the computer
and leave it at room temperature for a while. After it cools down, reinstall and recharge it.
To check the external battery pack, do the following:
1. Power off the computer.
2. Remove the external battery pack and measure the voltage between battery terminals 1 (+) and 7
(-). See the following figure:
Terminal
Voltage (V dc)
1, 2
+ 0 to + 12.6
6, 7
Ground (-)
1(+)
2(+)
3
4
5
6(-)
7(-)
3. If the voltage is less than +11.0 V dc, the external battery pack has been discharged.
If the voltage is still less than +11.0 V dc after recharging, replace the external battery pack.
Chapter 3
.
General checkout
27
Содержание YhinkPad T460
Страница 1: ...Hardware Maintenance Manual ThinkPad T460 ...
Страница 6: ...iv Hardware Maintenance Manual ...
Страница 11: ...DANGER DANGER DANGER DANGER DANGER Chapter 1 Safety information 5 ...
Страница 12: ...6 Hardware Maintenance Manual ...
Страница 13: ...PERIGO PERIGO PERIGO PERIGO Chapter 1 Safety information 7 ...
Страница 14: ...PERIGO PERIGO PERIGO PERIGO DANGER 8 Hardware Maintenance Manual ...
Страница 15: ...DANGER DANGER DANGER DANGER DANGER DANGER Chapter 1 Safety information 9 ...
Страница 16: ...DANGER VORSICHT VORSICHT VORSICHT VORSICHT 10 Hardware Maintenance Manual ...
Страница 17: ...VORSICHT VORSICHT VORSICHT VORSICHT Chapter 1 Safety information 11 ...
Страница 18: ...12 Hardware Maintenance Manual ...
Страница 19: ...Chapter 1 Safety information 13 ...
Страница 20: ...14 Hardware Maintenance Manual ...
Страница 21: ...Chapter 1 Safety information 15 ...
Страница 22: ...16 Hardware Maintenance Manual ...
Страница 23: ...Chapter 1 Safety information 17 ...
Страница 24: ...18 Hardware Maintenance Manual ...
Страница 28: ...22 Hardware Maintenance Manual ...
Страница 46: ...40 Hardware Maintenance Manual ...
Страница 50: ...44 Hardware Maintenance Manual ...
Страница 56: ...LCD FRUs 2 1 2 2 2 3 2 4 2 5 2 6 7 8 7 7 7 9 50 Hardware Maintenance Manual ...
Страница 62: ...56 Hardware Maintenance Manual ...
Страница 89: ...b c a Removal steps of the system board Chapter 9 Removing or replacing a FRU 83 ...
Страница 107: ......
Страница 108: ...Part Number SP40K04896 Printed in China 1P P N SP40K04896 1PSP40K04896 ...


