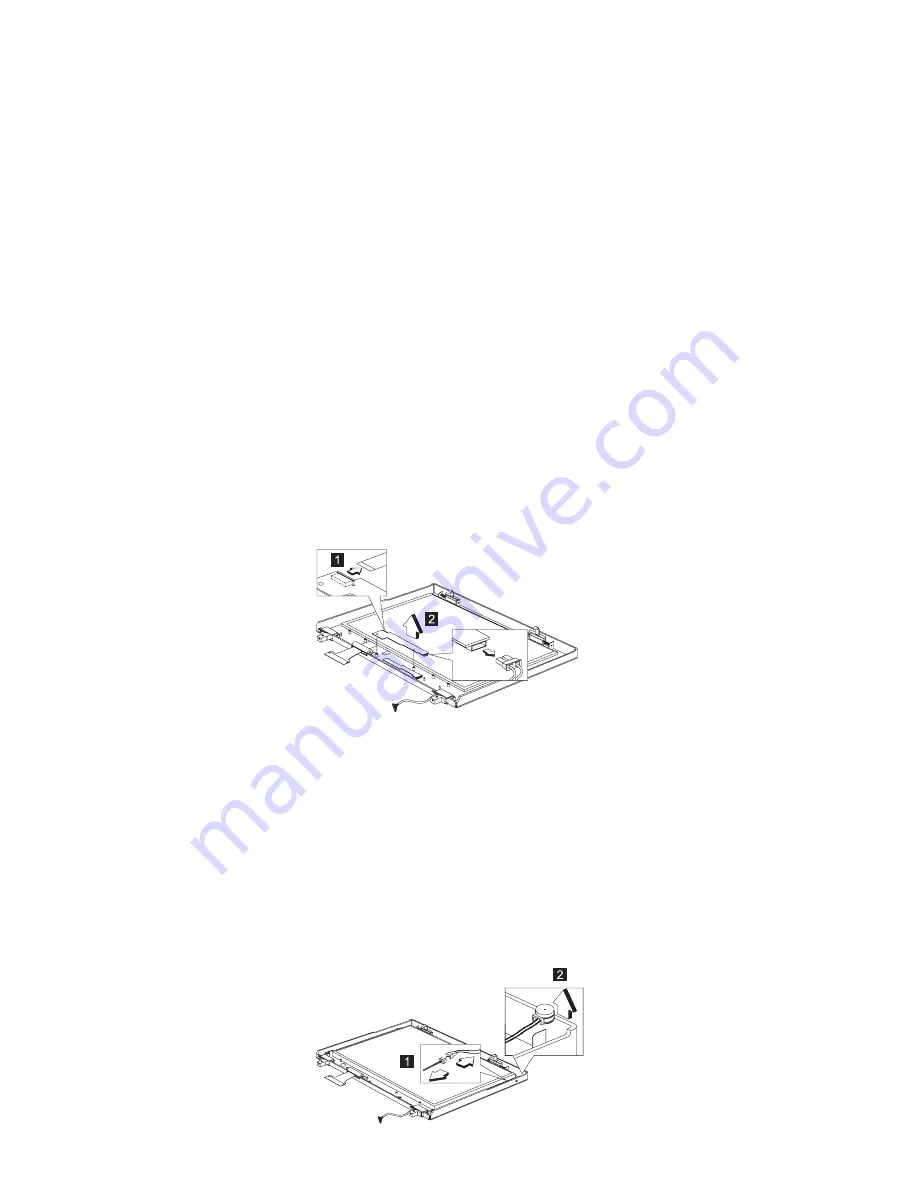
LCD Inverter ASM 13.3"
“Battery ASM” on page 49
“Hard Disk Drive” on page 49
“Combo Bay” on page 50
“Keyboard” on page 54
“LCD Bezel ASM 13.3"” on page 71
“Speaker ASM 13.3"” on page 72
“VR Board ASM 13.3"” on page 73
Note: See “Setting the LCD Panel ID” on page 41.
To remove the LCD inverter ASM:
1. Disconnect the cable from the inverter board.
2. Lift the inverter board away from the display panel.
Microphone ASM 13.3"
“Battery ASM” on page 49
“Hard Disk Drive” on page 49
“Combo Bay” on page 50
“Keyboard” on page 54
“LCD Bezel ASM 13.3"” on page 71
“Speaker ASM 13.3"” on page 72
“VR Board ASM 13.3"” on page 73
“LCD Inverter ASM 13.3"”
To remove the microphone ASM:
1. Disconnect the power cable from the microphone.
2. Lift the LCD away from the display panel.
74
ThinkPad 390/i Series 1700
Содержание ThinkPad 390
Страница 8: ...viii ThinkPad 390 i Series 1700...
Страница 26: ...18 ThinkPad 390 i Series 1700...
Страница 90: ...Switch Location Keyboard Lan guage US European Japanese J2 ON OFF J3 ON ON 82 ThinkPad 390 i Series 1700...
Страница 91: ...System Unit Parts Listing ThinkPad 390 i Series 1700 83...
Страница 101: ...IBM Part Number 10L9626 Printed in U S A S1 L 9626...


