background image

2.


Make


sure


that


the


server


cover


is


in


place


and


fully


closed.


3.


Turn


off


the


server


and


peripheral


devices,


and


disconnect


the


power


cord


and


all


external


cables.


4.


Remove


the


filler


panel


from


the


bay.


5.


Pull


the


loops


of


the


tray


toward


each


other


and


slide


the


drive


into


the


server


until


the


drive


connects


to


the


back


panel.


6.


Insert


the


filler


panel


into


the


bay


to


cover


the


drive.

Notes:


1.


If


the


server


has


a


RAID


controller


or


adapter,


you


might


have


to


reconfigure


the


disk


arrays


after


you


install


hard


disk


drives.


See


the


information


on


your


RAID


controller


documentation.


2.


To


remove


a


simple-swap


SATA


drive


from


the


bay,


make


sure


that


the


server


is


turned


off


and


the


power


cord


is


removed;


then,


remove


the


filler


panel,


pull


the


loops


of


the


drive


tray


toward


each


other


and


pull


the


tray


out


of


the


bay.


If


you


have


other


devices


to


install,


do


so


now.


Otherwise,


go


to


“Completing


the


installation”


on


page


18.


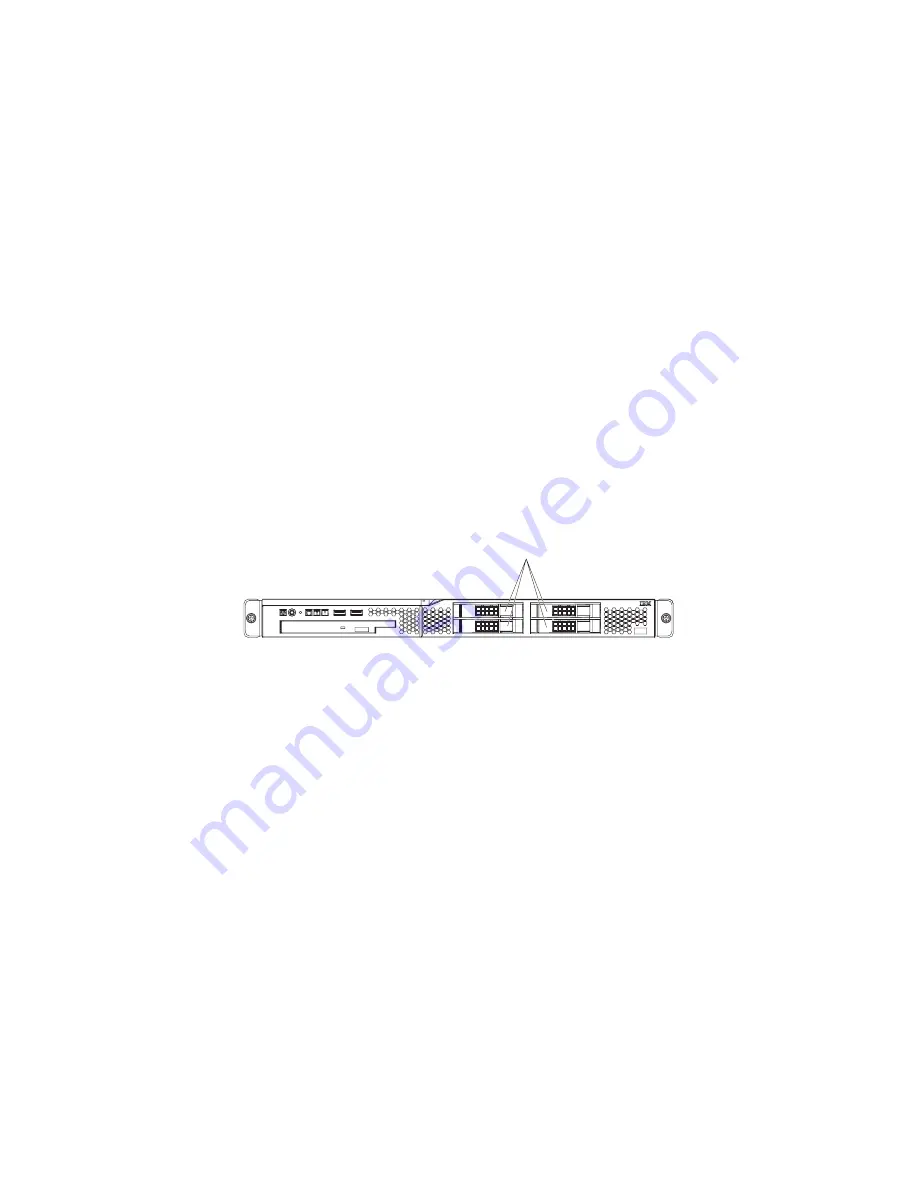
Installing


a


hot-swap


hard


disk


drive


The


3.5-inch


drive


hot-swap


server


models


support


either


two


SAS


3.5-inch


hard


disk


drives


or


two


SATA


3.5-inch


hard


disk


drives.


The


2.5-inch


drive


hot-swap


server


models


support


four


2.5-inch


SAS


hard


disk


drives.


2.5-inch drives


The


installation


procedure


is


the


same


for


any


of


these


drives.


The


illustrations


in


this


procedure


show


3.5-inch


SAS


drives.


To


install


a


hot-swap


hard


disk


drive,


complete


the


following


steps:


Note:


If


you


have


only


one


hard


disk


drive,


install


it


in


the


left


or


upper-left


drive


bay.


12


IBM


System


x3250


Types


4364


and


4365:


Installation


Guide

Содержание System x3250

Страница 1: ...options Did the server start correctly Yes No Go to the Server Support flow chart on the reverse side of this page Start the server Did the server start correctly Yes No Install the server in a rack c...

Страница 2: ...tions and verify that all optional devices you installed are on the ServerProven list at http www ibm com servers eserver serverproven compat us Is the server working correctly Is the problem solved H...

Страница 3: ...IBM System x3250 Types 4364 and 4365 Installation Guide...

Страница 4: ...e 51 and the Warranty and Support Information document on the IBM System x Documentation CD Third Edition January 2007 Copyright International Business Machines Corporation 2007 All rights reserved US...

Страница 5: ...SlimLine 17 Completing the installation 18 Installing the cover 18 Connecting the cables 19 Updating the server configuration 19 Chapter 3 Server controls LEDs and power 21 Front view 21 Rear view 22...

Страница 6: ...ppendix B Notices 51 Trademarks 51 Important notes 52 Product recycling and disposal 53 Battery return program 54 Electronic emission notices 55 Federal Communications Commission FCC statement 55 Indu...

Страница 7: ...alleert eerst de veiligheidsvoorschriften Ennen kuin asennat t m n tuotteen lue turvaohjeet kohdasta Safety Information Avant d installer ce produit lisez les consignes de s curit Vor der Installation...

Страница 8: ...ated versions of the caution or danger statement in the Safety Information document For example if a caution statement is labeled Statement 1 translations for that caution statement are in the Safety...

Страница 9: ...quipment when there is evidence of fire water or structural damage v Disconnect the attached power cords telecommunications systems networks and modems before you open the device covers unless instruc...

Страница 10: ...um battery replace it only with the same module type made by the same manufacturer The battery contains lithium and can explode if not properly used handled or disposed of Do not v Throw or immerse in...

Страница 11: ...he device v Use of controls or adjustments or performance of procedures other than those specified herein might result in hazardous radiation exposure DANGER Some laser products contain an embedded Cl...

Страница 12: ...the device and the power switch on the power supply do not turn off the electrical current supplied to the device The device also might have more than one power cord To remove all electrical current f...

Страница 13: ...as this label attached There are no serviceable parts inside these components If you suspect a problem with one of these parts contact a service technician Statement 26 CAUTION Do not place any object...

Страница 14: ...xii IBM System x3250 Types 4364 and 4365 Installation Guide...

Страница 15: ...rver support xseries index html select System x3250 from the Hardware list and click Go For firmware updates click the Download tab For documentation updates click the Install and use tab and click Pr...

Страница 16: ...BM Documentation Browser to help you find information quickly Hardware and software requirements The IBM System x Documentation CD requires the following minimum hardware and software v Microsoft Wind...

Страница 17: ...s in which the word or word string appears are listed in order of the most occurrences Click a document to view it and press Crtl F to use the Acrobat search function or Alt F to use the xpdf search f...

Страница 18: ...v Serial port v Four USB ports two on front and two on rear of server v Keyboard port v Mouse port v Systems management port if an optional Remote Supervisor Adapter II SlimLine is installed Hard disk...

Страница 19: ...dures that you might have to perform before you remove or install the component The following illustration shows the major components in the server Note The illustrations in this document might differ...

Страница 20: ...er systems management adapter connector Battery connector SAS SATA controller connector DIMM 1 connector DIMM 2 connector DIMM 3 connector DIMM 4 connector Riser card connector The following illustrat...

Страница 21: ...server is otherwise working correctly If the server is not working correctly see Chapter 5 Solving problems on page 29 for diagnostic information v Observe good housekeeping in the area where you are...

Страница 22: ...that come with optional adapters v You have replaced a failed fan within 48 hours v You have replaced a hot swap drive within 2 minutes of removal Handling static sensitive devices Attention Static el...

Страница 23: ...rverproven compat us for a list of memory modules that you can use with the server v The amount of usable memory will be reduced depending on the system configuration A certain amount of memory must b...

Страница 24: ...l external cables Remove the cover Attention To avoid breaking the retaining clips or damaging the DIMM connectors open and close the clips gently 3 Open the retaining clip on each end of the DIMM con...

Страница 25: ...install or remove a hard disk drive Installing a simple swap Serial ATA hard disk drive Attention Simple swap hard disk drives are not hot swappable Disconnect all power from the server before removi...

Страница 26: ...rned off and the power cord is removed then remove the filler panel pull the loops of the drive tray toward each other and pull the tray out of the bay If you have other devices to install do so now O...

Страница 27: ...is operating correctly If the amber hard disk drive status LED for a drive is lit continuously that drive is faulty and needs to be replaced If the green hard disk drive activity LED is flashing the...

Страница 28: ...ides RAID level 5 support to the hot swap drives A ServeRAID 8s controller supports the 2 5 inch hard disk drives without modification To use a ServeRAID 8s controller with hot swap 3 5 inch drives yo...

Страница 29: ...that it is completely and correctly seated in the expansion slot in the riser card Incomplete insertion might cause damage to the riser card system board or the adapter when you turn on the server 6 C...

Страница 30: ...ignal cable as shown in the following illustration and connect it to the hard disk drive backplane If you have other devices to install do so now Otherwise go to Completing the installation on page 18...

Страница 31: ...stall a Remote Supervisor Adapter II SlimLine complete the following steps Remote Supervisor Adapter II SlimLine Mounting bracket Mounting bracket Mounting bracket retention latch Remote Supervisor Ad...

Страница 32: ...ing the installation To complete the installation complete the following steps 1 Install the cover See Installing the cover for more information 2 Install the server in the rack cabinet See the Rack I...

Страница 33: ...erver Use this connector to connect the server to a keyboard or optional console switch You can also connect a USB keyboard to the server by using one of the USB connectors After you install a USB key...

Страница 34: ...nd you have installed or removed a hard disk drive you might have to reconfigure the disk arrays If the server has an optional RAID adapter and you have installed or removed a hard disk drive see the...

Страница 35: ...ectrical outlet Power control button Press this button to turn the server on and off manually A power control button shield comes installed around the button to prevent the server from being turned of...

Страница 36: ...tor Serial connector Video connector Ethernet 2 connector Ethernet 1 connector USB 3 connector USB 4 connector Systems management connector Power cord connector Connect the power cord to this connecto...

Страница 37: ...an optional Remote Supervisor Adapter II SlimLine the systems management software can turn on the server v If your operating system supports the Wake on LAN feature the Wake on LAN feature can turn on...

Страница 38: ...rned off automatically v You can press the power control button to start an orderly shutdown of the operating system and turn off the server if your operating system supports this feature v If the ope...

Страница 39: ...lity CTRL C ServerGuide MyStorage for monitoring storage only ServeRAID 8s adapter installed ServeRAID Manager Hardware Boot CD BIOS Utility CTRL A ServerGuide ServeRAID Manager ARCCONF CLI For more i...

Страница 40: ...tions on the screen See the User s Guide that is on the IBM System x Documentation CD for more information about using the Configuration Setup Utility program Using the LSI Logic Configuration Utility...

Страница 41: ...dition exceeds a threshold or if a system component fails the baseboard management controller lights LEDs to help you diagnose the problem and also records the error in the BMC system event log The ba...

Страница 42: ...28 IBM System x3250 Types 4364 and 4365 Installation Guide...

Страница 43: ...and Service Guide on the IBM System x Documentation CD for more information v Troubleshooting charts These charts list problem symptoms and steps to correct the problems See Troubleshooting tables on...

Страница 44: ...ice technician only that step must be performed only by a trained service technician Error code Description Action 062 Three consecutive boot failures using the default configuration 1 Flash the syste...

Страница 45: ...Replace the system board 163 The time of day has not been set Run the Configuration Setup Utility program set the date and time and save the settings 164 Memory size has changed 1 Run the Configuratio...

Страница 46: ...d keyboard controller error 1 If you have installed a USB keyboard run the Configuration Setup Utility program and enable keyboardless operation to prevent the POST error message 301 from being displa...

Страница 47: ...the diagnostic programs in the Problem Determination and Service Guide on the IBM System x Documentation CD 2 Reseat the following components depending on the server model v Hot swap models Hard disk...

Страница 48: ...e cable b DVD drive 3 Replace the following components one at a time in the order shown restarting the server each time a DVD drive cable b DVD drive c Trained service technician only System board 860...

Страница 49: ...only by a trained service technician Error code Description Action 01298001 No update data for microprocessor 1 1 Update the BIOS code again see the Problem Determination and Service Guide on the IBM...

Страница 50: ...n Error code Description Action I9990301 Hard disk drive boot sector error 1 Reseat the following components depending on the server model v Hot swap models a Hard disk drive b SAS SATA controller v S...

Страница 51: ...ustomer replaceable units CRU and which components are field replaceable units FRU v If an action step is preceded by Trained service technician only that step must be performed only by a trained serv...

Страница 52: ...tep is preceded by Trained service technician only that step must be performed only by a trained service technician Symptom Action Not all drives are recognized by the hard disk drive diagnostic test...

Страница 53: ...e problem is solved v See the parts listing in the Problem Determination and Service Guide to determine which components are customer replaceable units CRU and which components are field replaceable u...

Страница 54: ...which they are listed in the Action column until the problem is solved v See the parts listing in the Problem Determination and Service Guide to determine which components are customer replaceable un...

Страница 55: ...processor Monitor problems Some IBM monitors have their own self tests If you suspect a problem with your monitor see the documentation that comes with the monitor for instructions for testing and adj...

Страница 56: ...onitor screen If this occurs and the Boot Fail Count option in the Start Options of the Configuration Setup Utility program is enabled you must restart the server three times to reset the configuratio...

Страница 57: ...tor Attention Moving a color monitor while it is turned on might cause screen discoloration Move the device and the monitor at least 305 mm 12 in apart and turn on the monitor Notes a To prevent diske...

Страница 58: ...http www ibm com servers eserver serverproven compat us v You followed the installation instructions that came with the device and the device is installed correctly v You have not loosened any other...

Страница 59: ...technician only The microprocessor is correctly installed 3 If you just installed an optional device remove it and restart the server If the server now starts you might have installed more devices tha...

Страница 60: ...nts one at a time in the order shown restarting the server each time a Failing serial device b Serial cable c Trained service technician only System board ServerGuide problems v Follow the suggested a...

Страница 61: ...hat setup is complete Software problems v Follow the suggested actions in the order in which they are listed in the Action column until the problem is solved v See the parts listing in the Problem Det...

Страница 62: ...service technician Symptom Action A USB device does not work 1 Make sure that v The correct USB device driver is installed v The operating system supports USB devices v A standard PS 2 keyboard or mou...

Страница 63: ...device drivers or to submit a request for information You can solve many problems without outside assistance by following the troubleshooting procedures that IBM provides in the online help or in the...

Страница 64: ...products For more information about Support Line and other IBM services see http www ibm com services or see http www ibm com planetwide for support telephone numbers In the U S and Canada call 1 800...

Страница 65: ...CLUDING BUT NOT LIMITED TO THE IMPLIED WARRANTIES OF NON INFRINGEMENT MERCHANTABILITY OR FITNESS FOR A PARTICULAR PURPOSE Some states do not allow disclaimer of express or implied warranties in certai...

Страница 66: ...ks of Red Hat Inc in the United States and other countries Other company product or service names may be trademarks or service marks of others Important notes Processor speeds indicate the internal cl...

Страница 67: ...found on IBM s Internet site at http www ibm com ibm environment products prp shtml Esta unidad debe reciclarse o desecharse de acuerdo con lo establecido en la normativa nacional o local aplicable I...

Страница 68: ...ntial effects of EEE on the environment and human health due to the potential presence of hazardous substances in EEE For proper collection and treatment contact your local IBM representative Battery...

Страница 69: ...nd grounded cables and connectors must be used in order to meet FCC emission limits IBM is not responsible for any radio or television interference caused by using other than recommended cables and co...

Страница 70: ...found to comply with the limits for Class A Information Technology Equipment according to CISPR 22 European Standard EN 55022 The limits for Class A equipment were derived for commercial and industria...

Страница 71: ...41 documentation CD 2 drives 4 DVD drive problems 37 E electrical input 4 electronic emission Class A notice 55 environment 4 error messages POST 30 error symptoms CD ROM drive DVD ROM drive 37 gener...

Страница 72: ...nline documentation 1 optional device problems 44 optional device connectors 6 order of installation memory modules 10 P POST error messages 30 power problems 45 requirement 4 supply 4 power control b...

Страница 73: ...dress 1 system error LED 21 systems management connector 22 T temperature 4 trademarks 51 troubleshooting chart 37 turning off the server 23 turning on the server 23 U United States electronic emissio...

Страница 74: ...60 IBM System x3250 Types 4364 and 4365 Installation Guide...

Страница 75: ......

Страница 76: ...Part Number 42C5004 Printed in USA 1P P N 42C5004...

Отзывы: