background image

Connecting power to the EXN3200

Use these instructions to connect power to the EXN3200.

1.

Make sure all power supply switches of the storage expansion unit (or units) are in the Off position.

2.

Connect the power cords to each EXN3200 and secure the power cords in place with the power cord
retainer. Make sure that the power supplies on the left side of the system are connected to a separate
AC source than the power supplies on the right side of the system. This ensures redundant power.

Notes:

v

Connect power supplies in slots 1 and 3 to one power source and power supplies in slots 2 and 4
to a different power source.

v

EXN3200 storage expansion units do not need additional grounding.

3.

Turn on power to the storage expansion units and wait for the disk drives to spin up.

Note:

When the storage expansion unit has the maximum number of supported power supplies, all

disk drives or carriers spin up at the same time. However, if one or two power supplies have faulted
in a storage expansion unit with four power supplies, disk drives spin up in sets of six at 12 second
intervals.

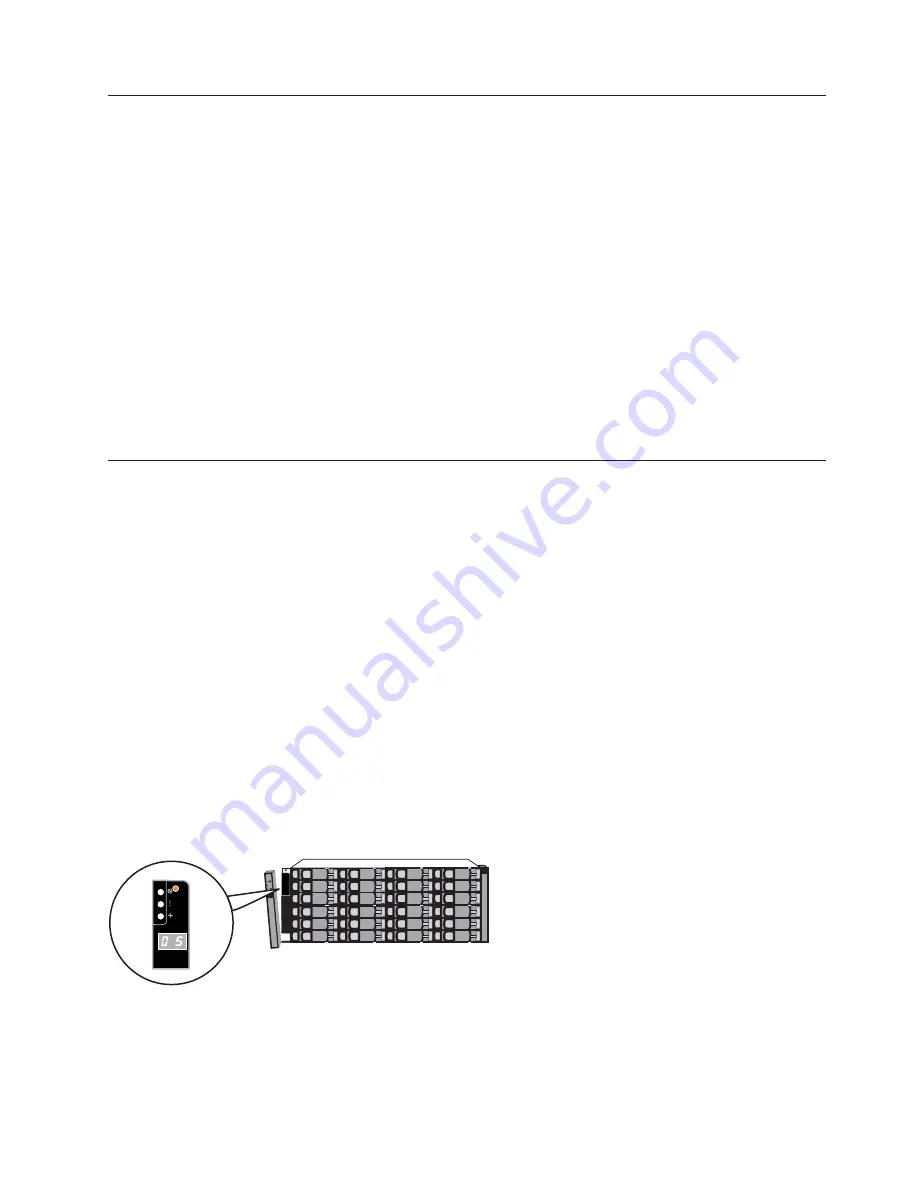
Setting the storage expansion unit shelf IDs

A unique shelf ID is required for each SAS storage expansion unit within the entire storage system.

A valid EXN3200 storage expansion unit shelf ID is 00 - 98.

Note:

N3400 and N3600 systems have an internal shelf ID preset to 00, so for N3400 and N3600

configurations, valid EXN3200 shelf IDs are 01 - 98.

If your storage system has SAS and Fibre Channel (FC) storage expansion units, the storage expansion
unit shelf IDs do not need to be unique between the SAS and FC expansion units. (FC expansion unit
shelf IDs continue to be unique within each FC loop. SAS expansion unit shelf IDs continue to be unique
to all other SAS expansion units in the storage system, including the N3400 or N3600 system's internal
shelf ID.)

Visually verify that the shelf ID for each storage expansion unit is unique. If not, set the shelf ID as
follows. For additional details, see the

IBM System Storage EXN3200 Storage Expansion Unit Hardware and

Service Guide

.

1.

Remove the front bezel if you have not already removed it.

2.

Press and hold the button above the LEDs until the first digit flashes.

3.

Press the button until the correct number is displayed.

4.

Repeat steps 2 and 3 for the second digit.

5.

Press and hold the button until the second number stops flashing.

!

exn30007

Figure 7. Expansion unit shelf ID tab

Installation and setup instructions

5

Содержание System Storage EXN3200

Страница 1: ...IBM System Storage EXN3200 Storage Expansion Unit Installation and Setup Instructions GC27 4217 00...

Страница 2: ...Business Machines Corporation in the United States other countries or both A complete and current list of other IBM trademarks is available on the web at www ibm com legal copytrade shtml Data ONTAP N...

Страница 3: ...IBM 19 inch rack 1 Installing the EXN3200 in the rack 3 Connecting power to the EXN3200 5 Setting the storage expansion unit shelf IDs 5 Cabling the EXN3200 6 Alternate Control Path ACP capability 6 C...

Страница 4: ...iv...

Страница 5: ...system adapters or any electrical outlets until you have reviewed the safety information and followed the procedures in this document Need help If you encounter any difficulties while setting up your...

Страница 6: ...ew of the EXN3200 storage expansion unit Refer to the following figures to familiarize yourself with the EXN3200 storage expansion unit 1 Bezel 4 Shelf activity LED 2 Shelf power LED 5 Two digit shelf...

Страница 7: ...the lower right position 1 IOM fault LED 2 ACP ports 3 Two I O modules IOM6 4 SAS ports 5 SAS port link LEDs 6 IOM A and power supplies one and two 7 IOM B and power supplies three and four 8 Four pow...

Страница 8: ...viii...

Страница 9: ...isk shelf to approximately 53 lbs 24 kg remove all the IOMs and power supplies before lifting A disk shelf containing the two IOMs four power supplies and four disk carriers weighs 82 lbs 37 kg exn300...

Страница 10: ...k position the right hand rail into the rack at the appropriate EIA location make sure that the two locating pins seat properly The bottom of the rail should line up with the bottom EIA boundary Right...

Страница 11: ...e four rail adjustment screws on the installed rail 5 Repeat steps 2 through 5 for the left hand rail 6 Repeat steps 1 through 6 for each additional EXN3200 that you are installing in the rack making...

Страница 12: ...t is flush with the frame rails of the rack Attention The EXN3200 ships with IOMs power supplies and four disk carriers installed in the storage expansion unit The four disk carriers contain the Data...

Страница 13: ...IDs A unique shelf ID is required for each SAS storage expansion unit within the entire storage system A valid EXN3200 storage expansion unit shelf ID is 00 98 Note N3400 and N3600 systems have an int...

Страница 14: ...hich makes the first connections to the N series controller and to the last or ending shelf in a stack For SAS and ACP cabling rules and for more cabling configurations see the IBM System Storage N se...

Страница 15: ...n in Figure 8 2 Cable the first shelf connections as shown in Figure 9 3 Cable the last shelf connections as shown in Figure 10 on page 8 Controller 1 ACP SAS Stack 1 ACP SAS Stack 2 IOM A IOM B Ether...

Страница 16: ...ack 1 ACP SAS Stack 2 IOM A IOM B Ethernet port B A C D HBA 1 B A C D HBA 2 exn30010 Figure 10 Cable the last shelf connections Controller 1 ACP SAS Stack 1 ACP SAS Stack 2 IOM A IOM B Ethernet port B...

Страница 17: ...s as shown in Figure 13 3 Cable the last shelf connections as shown in Figure 14 on page 10 ACP SAS Stack 1 ACP SAS Stack 2 IOM A IOM B Controller 2 Ethernet port B A C D HBA 1 B A C D HBA 2 Controlle...

Страница 18: ...the Data ONTAP Software Setup Guide for 7 Mode for the setup worksheet and other setup information ACP SAS Stack 1 ACP SAS Stack 2 IOM A IOM B Controller 2 Ethernet port B A C D HBA 1 B A C D HBA 2 C...

Страница 19: ......

Страница 20: ...Part Number 35P1601 Printed in USA GC27 4217 00 1P P N 35P1601...

Отзывы: