


Figure 16. Removing enclosure end caps
2. Align the enclosure with the front of the rack cabinet.
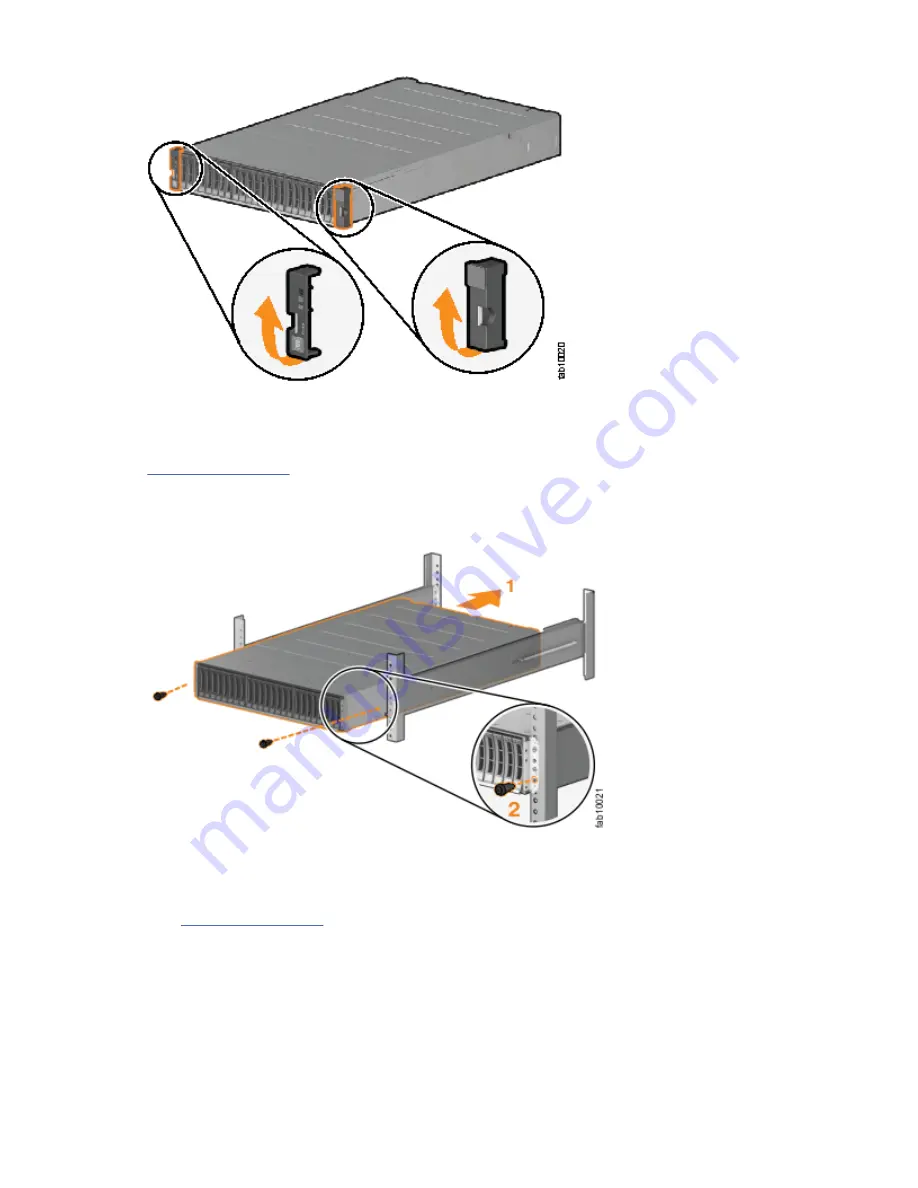
3. Carefully slide the enclosure into the rack along the rails until the enclosure is fully inserted (see
Figure 17 on page 20).
Note: The rails are not designed to hold an enclosure that is partially inserted. The enclosure must
always be in a fully inserted position.
Figure 17. Inserting the enclosure in the rack
4. Secure the enclosure with a screw in the rack mounting screw hole.
5. Reinstall the left and right end caps.
(See Figure 17 on page 20.) The left end cap has indicator windows that align with the status LEDs
(light-emitting diodes) on the edge of the enclosure.
a) Ensure that the serial number of the end cap matches the serial number on the rear of the
enclosure.
b) Fit the slot on the top of the end cap over the tab on the chassis flange.
c) Rotate the end cap down until it snaps into place.
d) Ensure that the inside surface of the end cap is flush with the chassis.
20 Storwize V5000 Gen2: Quick Installation Guide
Содержание Storwize V5000 Gen2
Страница 1: ...IBM Storwize V5000 Gen2 Quick Installation Guide IBM...
Страница 5: ...Index 149 v...
Страница 6: ...vi...
Страница 156: ...130 Storwize V5000 Gen2 Quick Installation Guide...
Страница 164: ...138 Storwize V5000 Gen2 Quick Installation Guide...
Страница 166: ...140 Storwize V5000 Gen2 Quick Installation Guide...
Страница 168: ...142 Storwize V5000 Gen2 Quick Installation Guide...
Страница 177: ......
Страница 178: ...IBM...


