


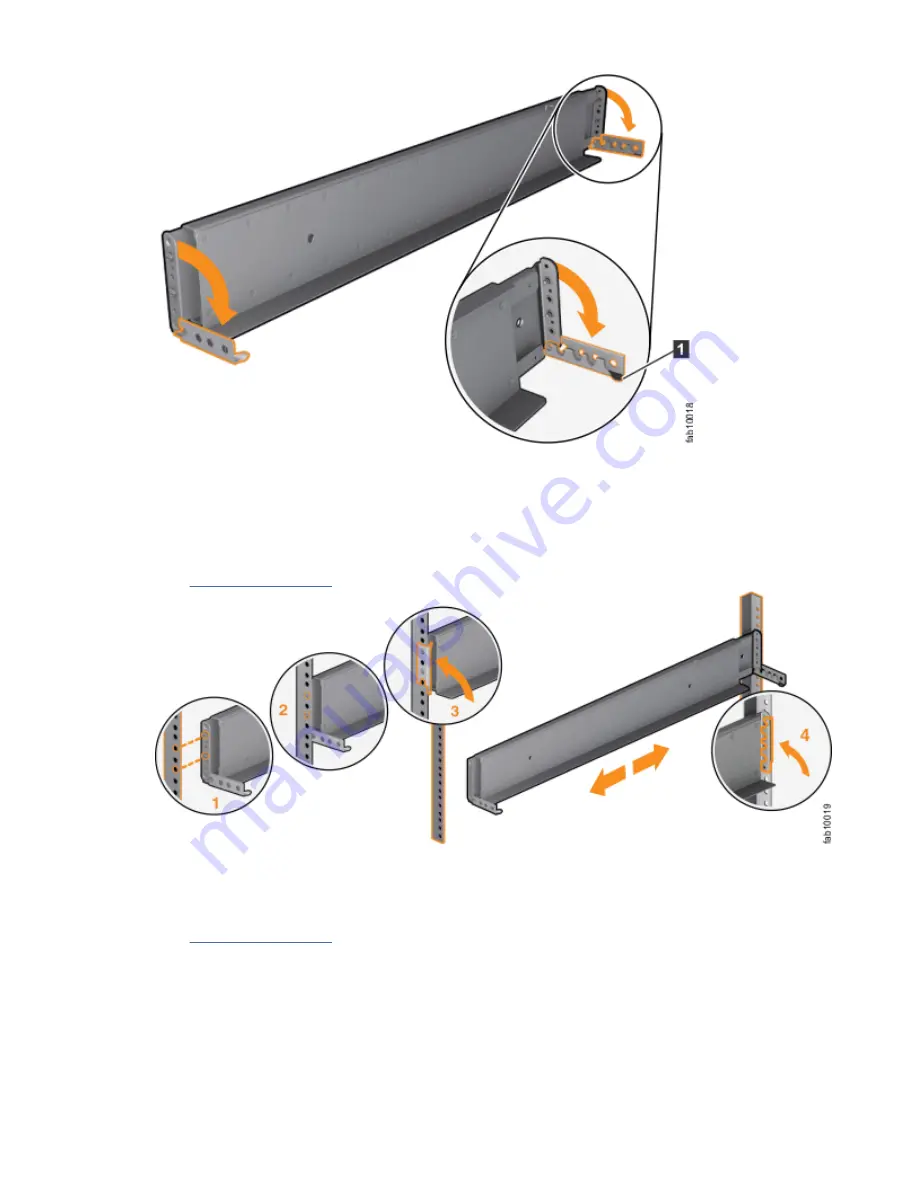
Figure 38. Opening the hinge brackets
7. Align the holes in the rail bracket with the holes on the front and rear rack cabinet flanges.
Ensure that the rails are aligned on the inside of the rack cabinet.
8. On the rear of the rail, press the two bracket pins into the holes in the rack flanges.
9. Close the rear hinge bracket to secure the rail to the rack cabinet flange.
Figure 39. Closing the hinge brackets
10. On the front of the rail, press the two bracket pins into the holes in the rack flanges.
11. Close the front hinge bracket to secure the rail to the rack cabinet flange.
12. Secure the rear of the rail to the rear rack flange with an M5 screw that is provided with the rack kit.
13. Repeat the steps to secure the opposite rail to the rack cabinet.
14. Repeat the procedure to install rails for each additional expansion enclosure.
34 SAN Volume Controller : Model 2145-SV1 Hardware Installation Guide
Содержание SAN Volume Controller 2145-SV1
Страница 1: ...IBM SAN Volume Controller Hardware Installation Guide IBM...
Страница 6: ...vi...
Страница 48: ...16 SAN Volume Controller Model 2145 SV1 Hardware Installation Guide...
Страница 62: ...30 SAN Volume Controller Model 2145 SV1 Hardware Installation Guide...
Страница 72: ...40 SAN Volume Controller Model 2145 SV1 Hardware Installation Guide...
Страница 156: ...Figure 136 Connecting the SAS cables 124 SAN Volume Controller Model 2145 SV1 Hardware Installation Guide...
Страница 168: ...136 SAN Volume Controller Model 2145 SV1 Hardware Installation Guide...
Страница 176: ...144 SAN Volume Controller Model 2145 SV1 Hardware Installation Guide...
Страница 178: ...146 SAN Volume Controller Model 2145 SV1 Hardware Installation Guide...
Страница 182: ...150 SAN Volume Controller Model 2145 SV1 Hardware Installation Guide...
Страница 192: ...160 SAN Volume Controller Model 2145 SV1 Hardware Installation Guide...
Страница 193: ......
Страница 194: ...IBM...


