background image

c.

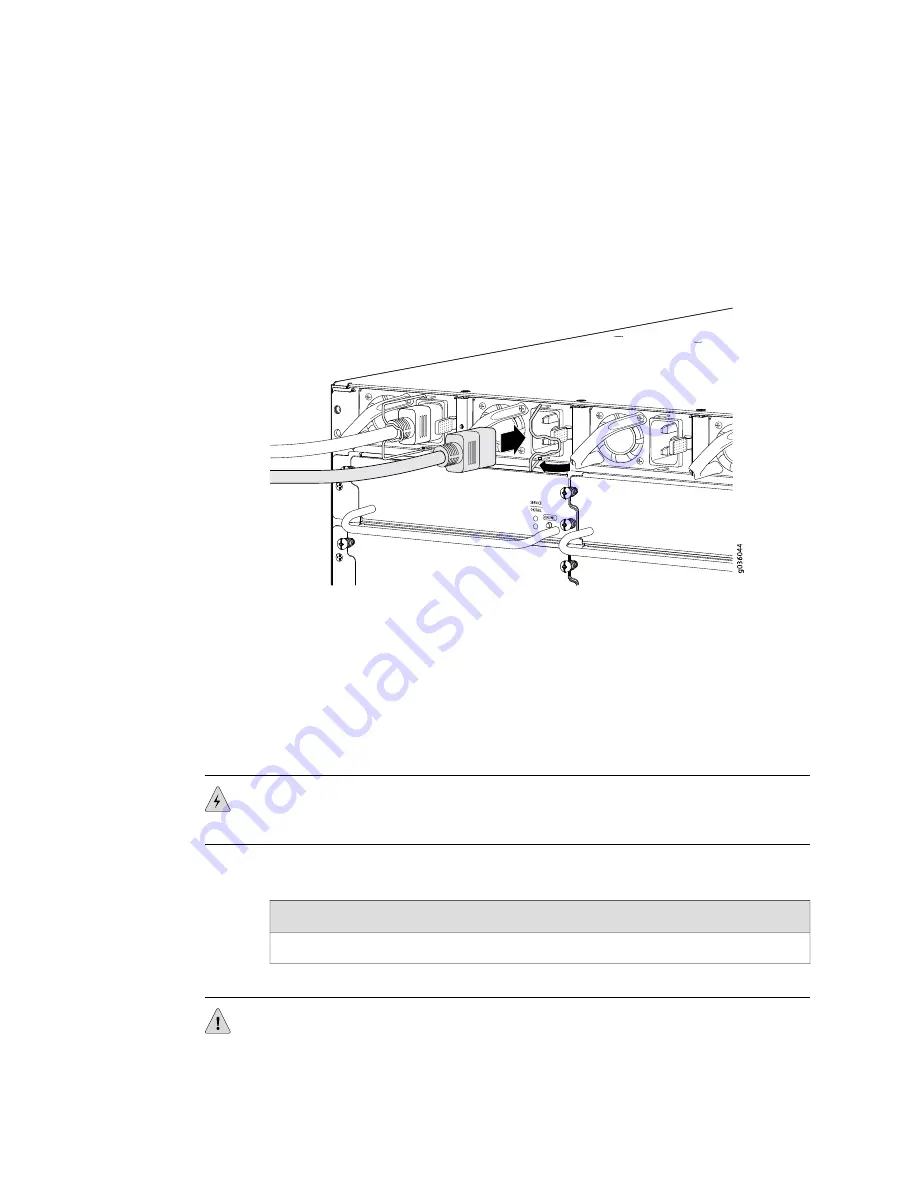
Snap the wire bail over the power cord as shown in Figure 14 on page 17
to prevent the power cord from accidentally disengaging.

d.

Dress the power cord appropriately. Verify that the power cord does not
block the air exhaust and access to device components or drape where
people could trip on it.

Figure 14: Connecting AC Power to the Ethernet Appliance

4.

If sufficient power is available and the AC power supply is correctly installed,
the power supply powers up automatically. If the AC power supply is installed
correctly, the 

PWR

 LED on the SFB lights steadily.

If the 

PWR

 LED indicates that the power supply is not functioning normally,

repeat the installation and cabling procedures.

Connect Power to a DC-Powered Ethernet Appliance

WARNING:

The device must be properly grounded before you connect the DC power

cables.

Table 2: DC Power System Input Voltage

Specification

Item

Operating range: –40.5 to –72 VDC

DC input voltage

CAUTION:

You must ensure that power connections maintain the proper polarity.

The power source cables might be labeled 

(+)

 and 

(–)

 to indicate their polarity. There

Step 5: Connect the Ground and Power Cables

17

Step 5: Connect the Ground and Power Cables

Содержание J36S

Страница 1: ...the Chassis into the Rack 12 Reinstall Components 13 Step 4 Connect the External Devices and IOC Cables 13 Connect to a Network for Out of Band Management 13 Connect a Management Console 14 Connect t...

Страница 2: ...Requesting Technical Support 26 Revision History 26 2 IBM Ethernet Appliance J36S Getting Started Guide...

Страница 3: ...thernet Appliance J36S is a high performance scalable carrier class security device with multi processor architecture The Ethernet appliance has a capacity of up to 30 gigabits per second Gbps full du...

Страница 4: ...Appliance J36S Table 1 Minimum System Configuration for the IBM Ethernet Appliance J36S Minimum Component 1 SFB 1 SPC 1 NPC 1 Routing Engine 2 Power Supply 1 Fan Tray Three types of IOC interface car...

Страница 5: ...must be capable of supporting up to 926 lb 421 kg For service personnel to service the device there must be adequate space at the front and back of the device Allow at least 30 in 76 2 cm in front of...

Страница 6: ...se the screws provided to secure the rack mount brackets to the sides of the chassis For a two post rack mount the brackets at the mid mount holes as shown in Figure 3 on page 6 For a four post rack m...

Страница 7: ...ce depends on whether you use a mechanical lift Install the Device Using a Lift on page 7 Install the Device Without a Mechanical Lift on page 10 Install the Device Using a Lift 1 Ensure the rack is i...

Страница 8: ...ing position the device so that the bottom rear edge of the chassis rests on the support shelf you installed earlier as shown in Figure 5 on page 7 4 Install a mounting screw into each of the two alig...

Страница 9: ...unting bracket 6 Move the lift away from the rack 7 Visually inspect the alignment of the device If the device is installed properly in the rack all the mounting screws on one side of the rack should...

Страница 10: ...net appliance light enough to install manually you first remove most components from the chassis as shown in Figure 9 on page 10 and Figure 10 on page 11 Power supplies Switch Fabric Board SFB Routing...

Страница 11: ...nt by loosening its retaining screws and unlatching its ejector handles as appropriate For full instructions on removing device components see the IBM Ethernet Appliance J36S Hardware Guide 3 Slide ea...

Страница 12: ...the device so that the bottom rear edge of the chassis rests on the support shelf you installed earlier as shown in Figure 5 on page 7 WARNING Do not attempt to lift the chassis by the handles on the...

Страница 13: ...e covered with blank panels before operating the device Step 4 Connect the External Devices and IOC Cables To connect external devices and IOC cables Connect to a Network for Out of Band Management on...

Страница 14: ...er light that can damage your eyes CAUTION Do not leave a fiber optic transceiver uncovered except when inserting or removing cable The safety cap keeps the port clean and prevents accidental exposure...

Страница 15: ...SD grounding strap to your bare wrist and connect the strap to an approved site ESD grounding point See the instructions for your site 3 Ensure that all grounding surfaces are clean and brought to a b...

Страница 16: ...out ESD see the IBM Ethernet Appliance J36S Hardware Guide 2 Locate the power cord or cords you will use to connect the device to AC power See the IBM Ethernet Appliance J36S Hardware Guide for specif...

Страница 17: ...AC power supply is installed correctly the PWR LED on the SFB lights steadily If the PWR LED indicates that the power supply is not functioning normally repeat the installation and cabling procedures...

Страница 18: ...nal studs on the faceplate b Attach the positive DC source power cable lug to the RTN return terminal Figure 15 Connect DC Power Cables c Secure the cable lug to the terminal on the power supply first...

Страница 19: ...o forward traffic For complete information about enabling the device to forward traffic including examples see the appropriate JUNOS Software configuration guides To configure the software 1 Verify th...

Страница 20: ...uting options static route 0 0 0 0 0 next hop gateway 13 Configure basic security zones and bind them to traffic interfaces edit admin set security zones security zone trust interfaces ge 0 0 0 admin...

Страница 21: ...vreBsJkNR1EF0uurTBkE SECRET DATA services ssh web management http interface ge 0 0 0 0 syslog user any emergency file messages any any authorization info file interactive commands interactive commands...

Страница 22: ...nation address any application any then permit 18 Commit the configuration to activate it on the device edit admin commit 19 Optionally configure additional properties by adding the necessary configur...

Страница 23: ...vice attach an ESD strap to an ESD point and place the other end of the strap around your bare wrist Failure to use an ESD strap could result in damage to the device CAUTION An external Surge Protecti...

Страница 24: ...ire the DC power supply using the appropriate lugs When connecting power the proper wiring sequence is ground to ground RTN to RTN then 48 V to 48 V When disconnecting power the proper wiring sequence...

Страница 25: ...tions firewall and security services system alarms and events and network performance This guide also shows how to administer user authentication and access upgrade software and diagnose common proble...

Страница 26: ...tial Release Copyright International Business Machines Corporation 2008 2009 All rights reserved Printed in USA US Government Users Restricted Rights Use duplication or disclosure restricted by GSA AD...

Отзывы: