v
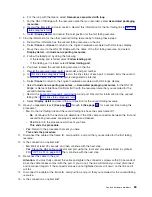
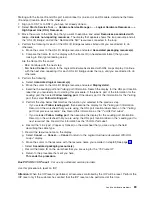
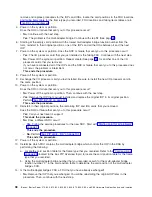
No
:
You
have
found
the
first
half
of
a
″
failing
″
link.
Choose
from
the
following
options:
–
If
this
is
your
first
time
through
steps
1
through
7,
go
to
step
8
(See
page
.
–
If
this
is
your
second
time
through
steps
1
through
7,
go
to
step
9
(See
page
6.
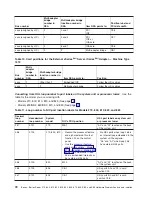
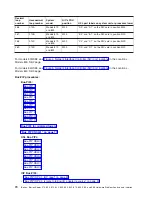
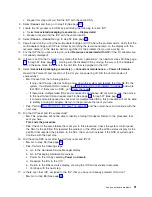
Record
the
HSL
resource
name,
type-model,
part
number,
and
port.
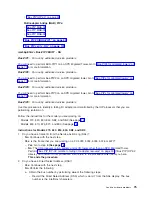
7.
Is
the
resource
name
the
same
name
that
you
recorded
for
the
NIC
in
step
4
(See
page
?
v
No
:
The
display
that
appears
is
showing
the
status
of
the
HSL
ports
for
the
next
I/O
Bridge
resource
on
the
loop.
Go
to
step
5
(See
page
.
v
Yes
:
You
have
followed
the
HSL
links
around
the
loop
and
back
to
the
NIC
on
the
system.
You
did
not
find
a
failed
link.
Return
to
the
procedure
that
sent
you
here.
This
ends
the
procedure.
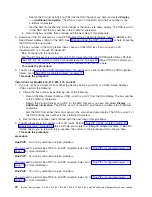
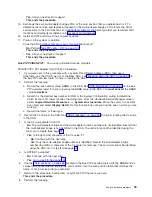
8.
Follow
the
steps
in
the
Clean
and
properly
seat
the
cables
(See
page
procedure
below.
9.
Choose
from
the
following
options:
v
If
the
status
of
the
″
Leading
port
to
next
resource
″
has
become
″
operational
″
,
the
problem
has
been
corrected.
Return
to
the
procedure
that
sent
you
here.
v
If
the
status
is
still
not
″
operational
″
,
continue
with
the
next
step.
10.
If
the
resource
type
(shown
near
the
top
of
the
screen,
just
below
the
bus
number)
is
an
HSL
I/O
Bridge,
then,
perform
the
Collect
the
resource
information
(See
page
procedure
below.
Then,
continue
with
the
next
step.
11.
Select
Follow
leading
port
to
move
to
the
resource
with
the
failed
link
on
the
trailing
port.
If
that
resource
is
an
HSL
I/O
Bridge,
then
perform
the
Collect
the
resource
information
(See
page
procedure
below.
Then,
return
to
the
procedure
that
sent
you
here.
This
ends
the
procedure.
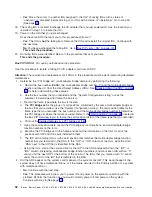
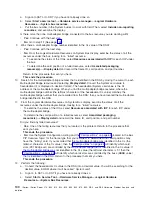
Collect
the
resource
information
Find
the
information
for
the
failing
HSL
I/O
Bridge
using
the
following
steps:
1.
Record
the
resource
name,
card
type-model,
part
number,
and
port.
2.
Select
Cancel
to
return
to
the
Work
with
high-speed
link
(HSL)
resources
display.
3.
Select
Resources
associated
with
loop
for
the
loop
with
the
failure.
4.
Select
Associated
packaging
resources
for
the
HSL
I/O
Bridge
with
the
resource
name
that
you
recorded.
5.
Record
the
frame
ID.
6.
Select
Display
detail
and
record
the
card
position.
7.
Go
to
step
11
(See
page
Clean
and
properly
seat
the
cables
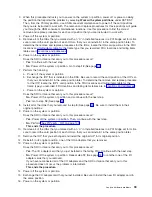
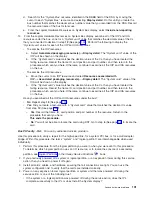
Determine
if
the
HSL
cable
connectors
for
this
HSL
I/O
Bridge
are
properly
seated
and
clean:
1.
Disconnect
the
cable
labeled
port
0
at
the
frame
ID
of
the
HSL
I/O
bridge
.
2.
Is
the
connection
an
optical
link?
v
No
:
Wait
at
least
30
seconds,
and
then
continue
with
the
next
step.
v
Yes
:
Clean
the
HSL
cable
connector
and
port
using
the
tools
and
procedures
listed
in
symbolic
FRU
Then,
continue
with
the
next
step.
3.
Reconnect
the
cable
to
the
port.
Attention:
You
must
fully
connect
the
cable
and
tighten
the
connector’s
screws
within
30
seconds
of
when
the
cable
makes
contact
with
the
port.
Otherwise,
the
link
will
fail
and
you
must
disconnect
and
reconnect
the
cable
again.
If
the
connector
screws
are
not
tightened,
errors
will
occur
on
the
link
and
it
will
fail.
4.
Disconnect
the
cable
labeled
port
1
at
the
frame
ID
of
the
HSL
I/O
Bridge
.
86
iSeries:
iSeries
Server
270,
800,
810,
820,
825,
830,
840,
870,
890,
SB2,
and
SB3
Hardware
Problem
Analysis
and
Isolation
Содержание iSeries Series
Страница 2: ......
Страница 504: ...492 iSeries iSeries Server 270 800 810 820 825 830 840 870 890 SB2 and SB3 Hardware Problem Analysis and Isolation...
Страница 508: ...496 iSeries iSeries Server 270 800 810 820 825 830 840 870 890 SB2 and SB3 Hardware Problem Analysis and Isolation...
Страница 511: ......
Страница 512: ...Printed in USA SY44 5914 01...

