5.
Verify
that
the
dc
power
LED
and
the
ac
power
LED
on
the
power
supply
are
lit,
indicating
that
the
power
supply
is
operating
properly.
Completing
the
installation
To
complete
the
installation,
you
must
reinstall
the
bezel,
reinstall
the
frame-support
bracket
(see
“Removing
and
installing
the
support
bracket”
on
page
12),
reinstall
the
side
cover,
connect
all
the
cables
and,
for
certain
options,
run
the
Configuration/Setup
Utility
program.
Follow
the
instructions
in
this
section.
Replacing
the
bezel
Complete
the
following
steps
to
replace
the
bezel.
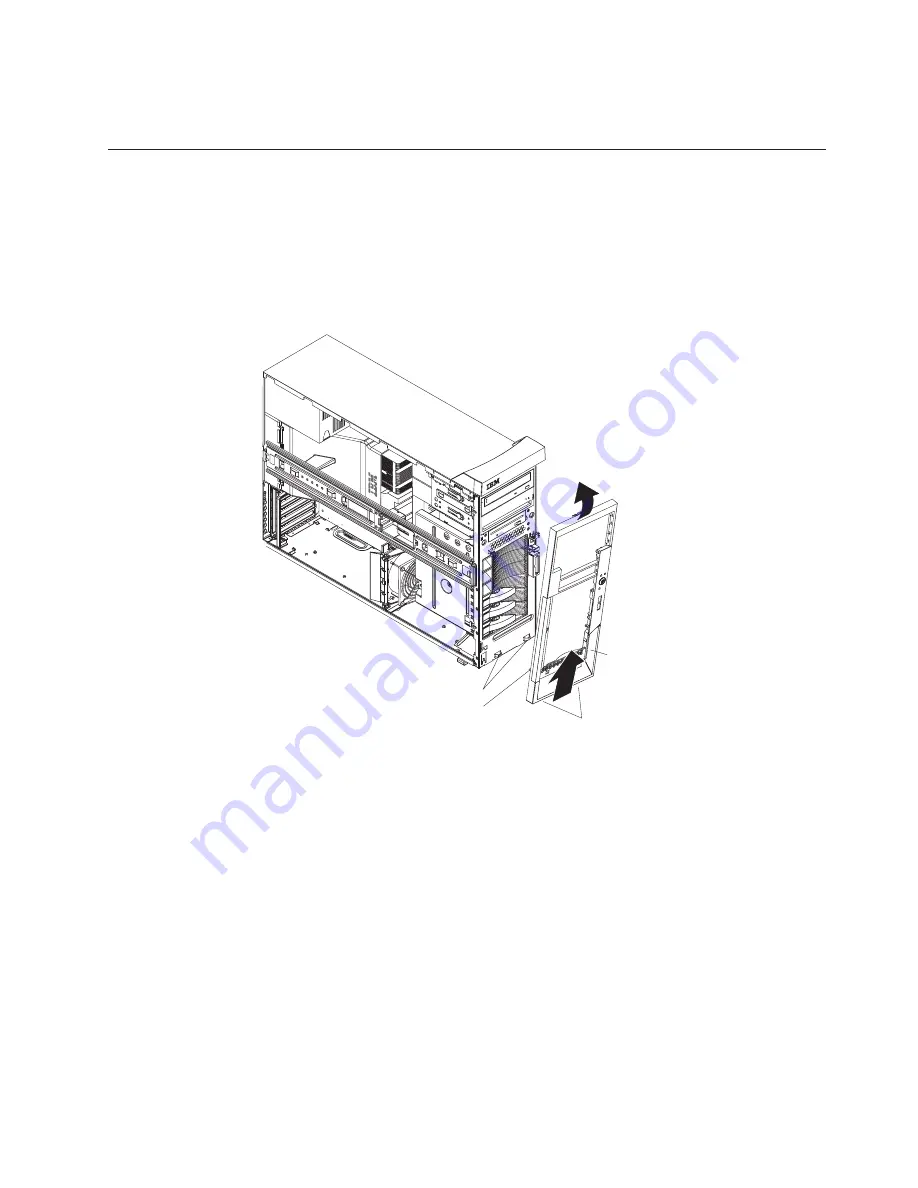
Openings
Hooks
Tab
Bezel
Note:
For
hot-swap
hard
disk
drive
models,
make
sure
the
side
cover
is
unlocked;
then,
slide
the
lock
bar
on
the
bezel
to
the
left
(unlocked)
before
you
begin.
1.
Insert
the
two
hooks
on
the
bottom
rear
of
the
bezel
onto
the
matching
openings
on
the
server
chassis.
2.
Insert
the
tab
on
the
left
side
of
the
bezel
into
the
matching
hole
on
the
chassis
left
front.
3.
Push
the
top
of
the
bezel
toward
the
server
until
the
two
tabs
at
the
top
of
the
bezel
snap
into
place.
4.
For
hot-swap
hard
disk
drive
models,
slide
the
lock
bar
to
the
right.
The
hot-swap
lock
bar
locks
when
you
lock
the
side
cover
key
lock.
5.
Lock
the
side
cover.
Replacing
the
side
cover
If
you
removed
the
support
bracket
or
bezel,
reinstall
it
before
you
replace
the
side
cover.
See
“Removing
and
installing
the
support
bracket”
on
page
12
and
“Replacing
the
bezel.”
Chapter
2.
Installing
options
41
Содержание eServer xSeries 226 Type 8648
Страница 1: ...xSeries 226 Type 8648 Option Installation Guide ERserver...
Страница 2: ......
Страница 3: ...xSeries 226 Type 8648 Option Installation Guide ERserver...
Страница 56: ...44 xSeries 226 Type 8648 Option Installation Guide...
Страница 62: ...50 xSeries 226 Type 8648 Option Installation Guide...
Страница 70: ...58 xSeries 226 Type 8648 Option Installation Guide...
Страница 74: ...62 xSeries 226 Type 8648 Option Installation Guide...
Страница 75: ......
Страница 76: ...Part Number 88P8978 Printed in USA 1P P N 88P8978...


