


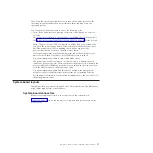


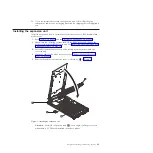
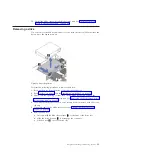


6.
Use your thumb to back out the expansion blade retention thumb screw (
4
)
by rotating the screw counterclockwise until the connection between the
expansion unit and the base unit is loose and the expansion unit is fully
separated from the base unit.
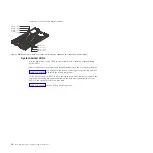
7.
Pivot the expansion unit (
1
in Figure 10) up on the cover pins of the base
unit (
2
).
Attention:
Remove the expansion unit at an angle of 40 degrees or less when
there is a CFFh card installed on the base planar.
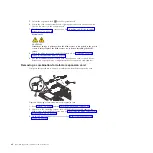
8.
Lift the expansion unit from the blade server base unit and store it for future
use.
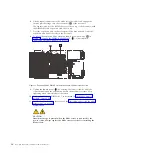
9.
Replace the DIMM in DIMM slot 1 (
5
in step 5 on page 27) of the expansion
unit or redeploy the DIMM in the base unit, as described in “Installing a
memory module” on page 34.
10.
If you are not installing another expansion unit, replace the expansion
connector cover (
3
in Figure 10).
Figure 10. Removing the expansion unit
28
JS23/JS43 Type 7778: Installation and User’s Guide
Содержание BladeCenter JS23
Страница 3: ...BladeCenter JS23 and BladeCenter JS43 Type 7778 Installation and User s Guide ...
Страница 6: ...iv JS23 JS43 Type 7778 Installation and User s Guide ...
Страница 24: ...12 JS23 JS43 Type 7778 Installation and User s Guide ...
Страница 86: ...74 JS23 JS43 Type 7778 Installation and User s Guide ...
Страница 87: ......
Страница 88: ... Part Number 44R5338 Printed in USA 1P P N 44R5338 ...


