


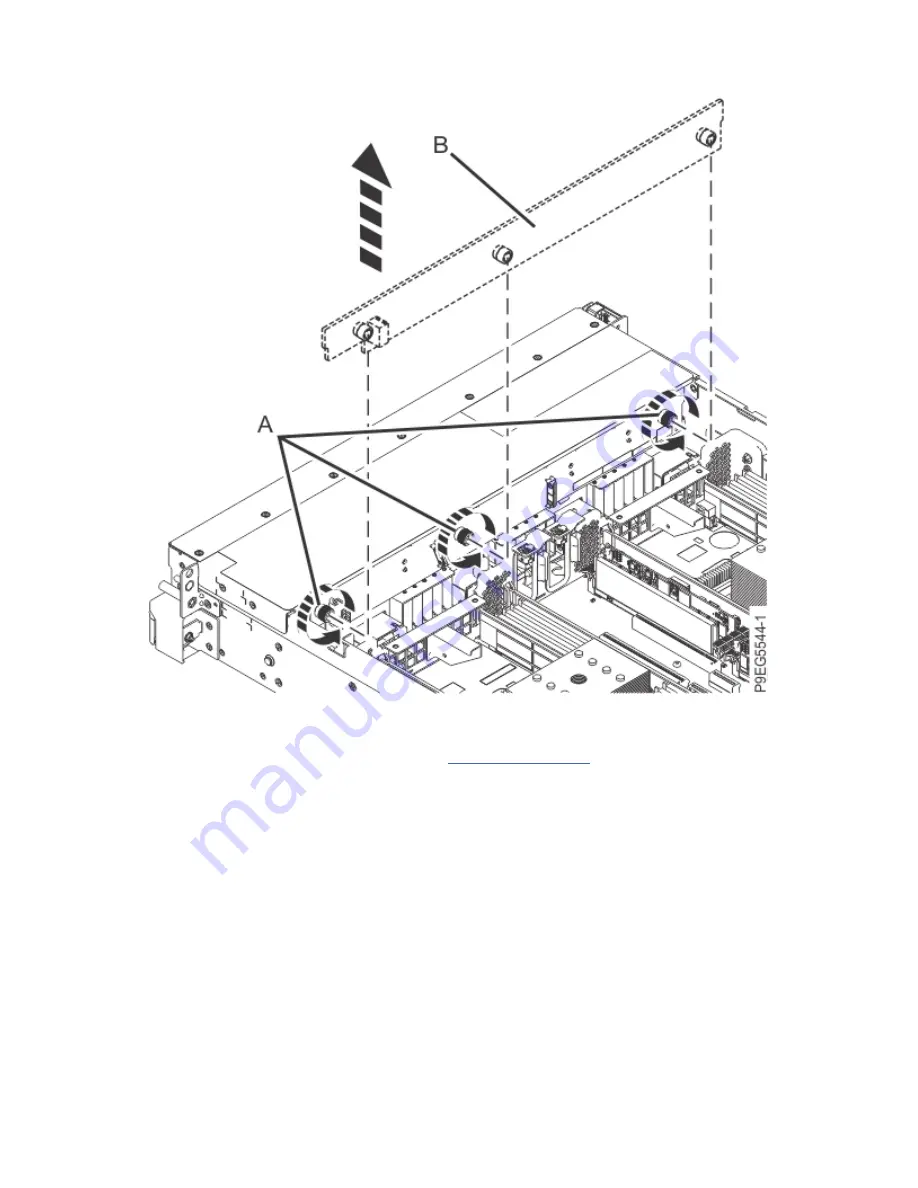
Figure 54. Loosening the NVMe drive backplane screws
8. Pull the NVMe drive backplane (B) away from the chassis that uses the thumbscrews, then lift the
NVMe drive backplane from the chassis. See Figure 54 on page 59.
9. If the removed part is used again, place the part on an electrostatic discharge (ESD) mat.
Replacing the NVMe drive backplane in the 9009-22G or 9223-22S system
To replace a NVMe drive backplane in the system, complete the steps in this procedure.
Procedure
1. Ensure that you have the electrostatic discharge (ESD) wrist strap on and that the ESD clip is plugged
into a ground jack or connected to an unpainted metal surface. If not, do so now.
2. The chassis has four alignment pins (B) to secure the NVMe drive backplane (A). Insert the NVMe drive
backplane as shown in the following figure. Ensure that the alignment pins fit through the holes in the
NVMe drive backplane.
Drive backplanes for the 5105-22E, 9008-22L, 9009-22A, 9009-22G, 9223-22H, or 9223-22S 59
Содержание 9009-22A
Страница 1: ...Power Systems Drive backplane for the 5105 22E 9008 22L 9009 22A 9009 22G 9223 22H or 9223 22S IBM...
Страница 4: ...iv...
Страница 14: ...xiv Power Systems Power Systems Drive backplane...
Страница 16: ...Figure 1 Removing the power cords L003 or or 2 Power Systems Power Systems Drive backplane...
Страница 80: ...66 Power Systems Power Systems Drive backplane...
Страница 82: ...Figure 61 Removing the power cords L003 or or 68 Power Systems Power Systems Drive backplane...
Страница 94: ...Figure 70 Removing the power cords L003 or or 80 Power Systems Power Systems Drive backplane...
Страница 115: ......
Страница 116: ...IBM...