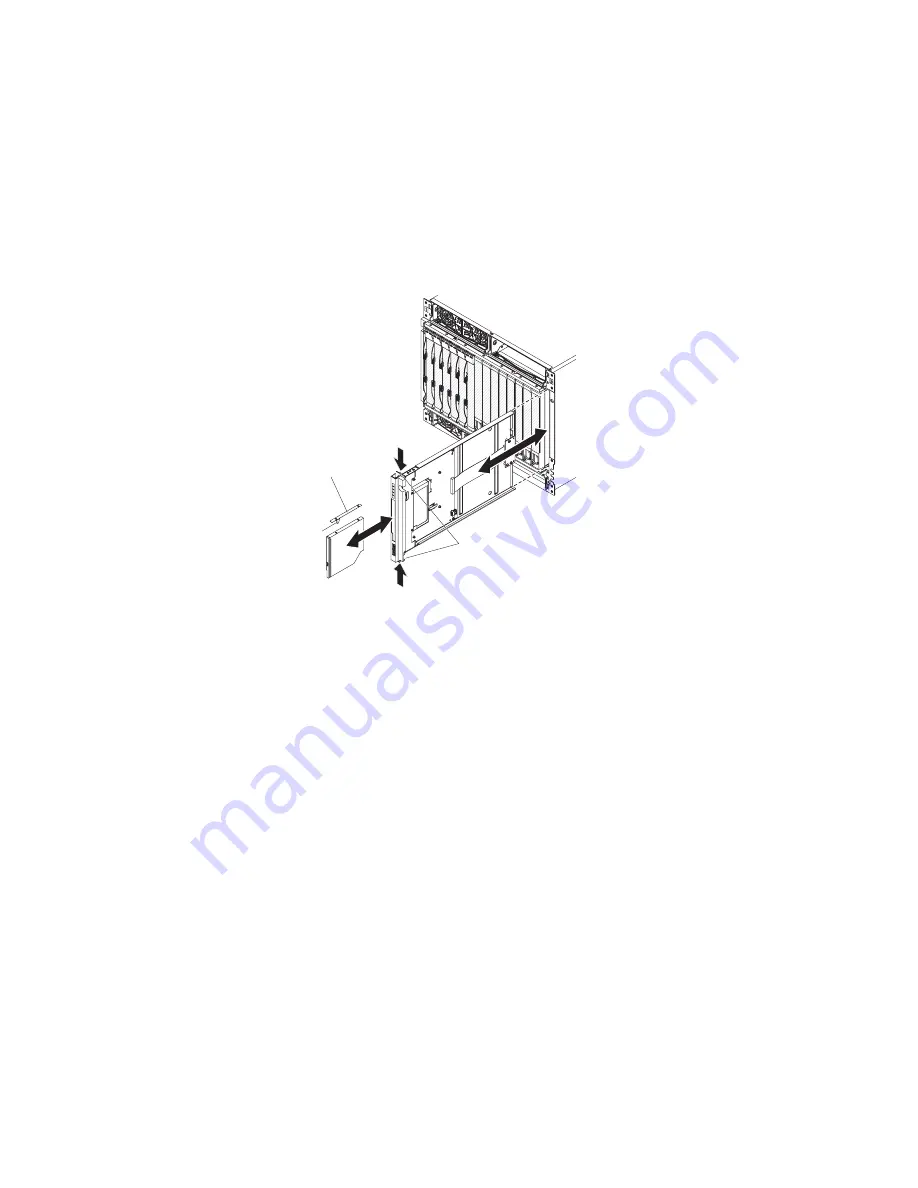
5.
Press the optical drive retainer tab and slide the optical drive or optical drive
filler out of the media tray.
6.
Remove the retainer clip from the side of the optical drive or optical drive filler.
7.
If you are instructed to return the media tray, optical drive, or optical drive
filler, follow all packaging instructions, and use any packaging materials for
shipping that are supplied to you.
Installing the media tray and optical drive or optical drive filler
To install the media tray and optical drive or optical drive filler, complete the
following steps.
Media tray
release tabs
Optical drive
retainer tab
Retainer clip
Note:
These instructions assume that the BladeCenter unit is connected to power.
1.
Make sure that the media tray is on a clean, static-free surface with the circuit
board facing up.
Attention:
To prevent damage to the circuit board, do not touch or apply
pressure to the circuit board or any of its components.
2.
Install the retainer clip on the side of the optical drive or optical drive filler.
3.
Carefully slide the optical drive or optical drive filler into the bay on the media
tray until it fully engages the connector and the retainer tab locks into place.
4.
Carefully slide the media tray into the BladeCenter unit until the release tabs
lock it into place.
5.
Install the top and bottom bezels (see “Installing a bezel” on page 32).
34
BladeCenter H Type 8852, 7989, and 1886: Problem Determination and Service Guide
Содержание 8852 - BladeCenter H Rack-mountable
Страница 1: ...BladeCenter H Type 8852 7989 and 1886 Problem Determination and Service Guide...
Страница 2: ......
Страница 3: ...BladeCenter H Type 8852 7989 and 1886 Problem Determination and Service Guide...
Страница 24: ...10 BladeCenter H Type 8852 7989 and 1886 Problem Determination and Service Guide...
Страница 36: ...22 BladeCenter H Type 8852 7989 and 1886 Problem Determination and Service Guide...
Страница 84: ...70 BladeCenter H Type 8852 7989 and 1886 Problem Determination and Service Guide...
Страница 87: ......
Страница 88: ...Part Number 81Y1107 Printed in USA 1P P N 81Y1107...


