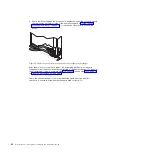
8. Attach the air-purging tool to the drain valve at the bottom of the heat
exchanger. Make sure you attach the end of the hose with a valve stem in the
center of the connector to the heat exchanger drain valve. If you connect the
wrong end of the hose, no water will flow.
9. Attach the end of the extension hose with a valve stem in the center of the
connector to the air-purging valve at the top of the heat exchanger to allow air
to enter the manifolds.
Note:
Instead of using the extension hose, if filtered and oil-free compressed
air is available, you can attach the compressed-air hose to the
air-purging valve to force water out of the exchanger. Keep the air
pressure at 50 pounds per square inch gage (psig) or less to avoid
excessive spray at the drain valve.
10. When the water has drained completely from the manifolds, complete the
following steps:
a. Remove the air-purging-tool extension hose or compressed-air hose from
the air-purging valve.
b. Remove the air-purging tool from the drain valve on the hear exchanger.
c. Screw the valve caps onto the air-purging valve and drain valve and
hand-tighten them to provide a secondary seal.
Chapter 5. Maintaining the heat exchanger
59
Содержание 1756
Страница 1: ...Rear Door Heat eXchanger V2 Type 1756 Installation and Maintenance Guide ...
Страница 2: ......
Страница 3: ...Rear Door Heat eXchanger V2 Type 1756 Installation and Maintenance Guide ...
Страница 38: ...28 Rear Door Heat eXchanger V2 Installation and Maintenance Guide ...
Страница 64: ...54 Rear Door Heat eXchanger V2 Installation and Maintenance Guide ...
Страница 90: ...80 Rear Door Heat eXchanger V2 Installation and Maintenance Guide ...
Страница 98: ...88 Rear Door Heat eXchanger V2 Installation and Maintenance Guide ...
Страница 101: ...website continued support line telephone numbers 79 Index 91 ...
Страница 102: ...92 Rear Door Heat eXchanger V2 Installation and Maintenance Guide ...
Страница 103: ......
Страница 104: ... Part Number 00D2434 Printed in USA 1P P N 00D2434 ...


