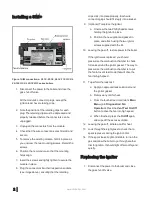
2. Remove the ignition wire and ground wire from
the ignitor.
3. Remove the two mounting screws holding the
ignitor in place, and retain them.
4. Remove the existing ignitor and gasket, and
replace with the new parts.
5. Install the retained mounting screws and firmly
tighten.
6. Re-attach the ignition wire and ground wire from
the module.
If the ignitor was replaced, you should pressurize
the combustion chamber to check for leaks
around the ignitor gasket. The way to pressurize
the combustion chamber is to put the fan into vent
test mode that will drive the fan into high speed.
7. To perform the leak test:
a. Apply an approved leak solution around the
ignitor gasket.
b. Remove any call for heat.
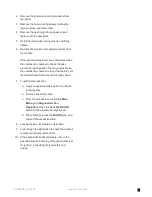
c. From the touchscreen controller's
Main
Menu
go to
Diagnostics
>
Fan
Operation
>Press the
Vent Test On/Off
button to drive the fan into high speed.
d. When finished, press the
On/Off
again, and
wipe off the excess solution.
8. Leaving the gas off, initiate a call for heat.
9. Look through the sight glass to check that a spark
is present during the ignition trial.
10. If the spark looks bright and stable, turn on the
gas and allow the boiler to go through another trial
for ignition. It should light off smoothly and
quietly.
120-284R3
|
4/4/2018
www.ibcboiler.com
|
3


