iBaby Monitor User Manual
7
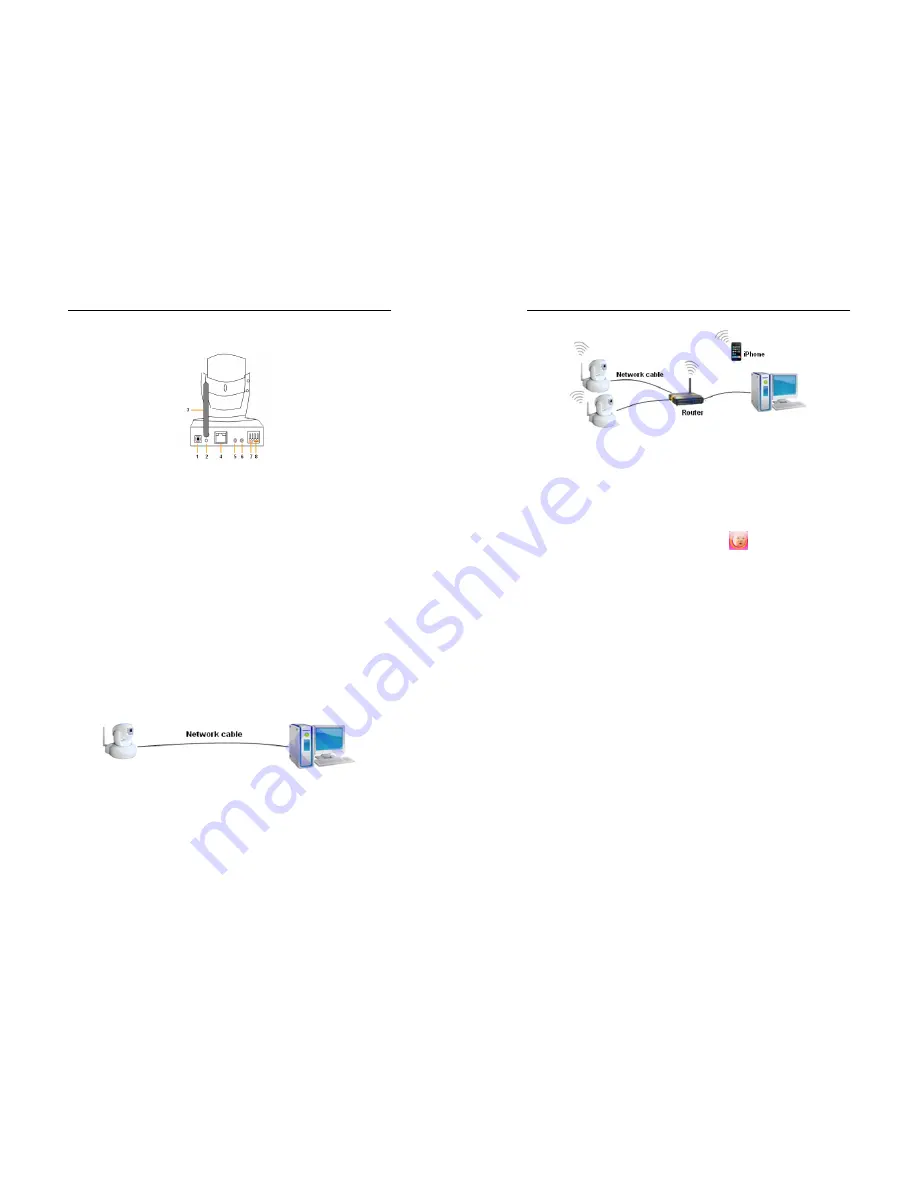
2.2 Interface of the camera
Figure 2
1
)
Power Input Socket:
Connect Power adaptor,
the adaptor‘s output is 5V 1.5A.
2
)
RESET Button:
Press the RESET button and hold on more than 10 seconds, the
camera will restart and recover to the factory default settings.
3
)
WIFI Antenna Connector:
Install the WIFI antenna.
4
)
RJ45 Ethernet Socket:
RJ45 Ethernet socket is 10/100M self-adjust.
5
)
Audio Input Socket:
Audio input socket is designed for connecting external
microphone. The built-in microphone will be invalidation when the external
microphone plug in.
6
)
Audio Output Socket:
Audio output socket is for line-out audio player, such as
headphone, speaker, etc.
7
)
Alarm Output Socket
8
)
Alarming Input Pin
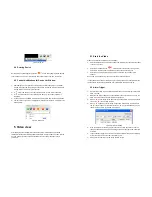
3 Visit Camera from Local Area Network
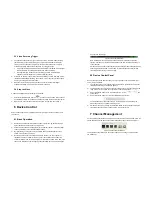
3.1 Local Area Network connection
Figure 3
iBaby Monitor User Manual
8
Figure 4
3.2 Visit camera with a iPod Touch, iPhone and iPad
Prior to using you must first install the iBaby Monitor App from the App Store. THIS IS A
FREE DOWNLOAD. Please confirm the iOS is V4.0 or later. If not, update your iOS
before using this product.
If you have not install that, please launch the App Store, and search using the keyword
“iBaby Monitor”, be sure your web function is enabled.
After downloading, a icon should be appeared like this:
.
Launch the iBaby Monitor App, it will automatically search the camera in your
local area network, and follow the instruction on the App, you can set up the
camera easily.
3.3 Search and set the IP address of the camera
Run “BSearch_en.exe” in the CD, the setting interface as figure 5.


