background image

23 


RS-232C CODE


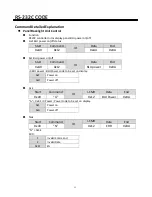
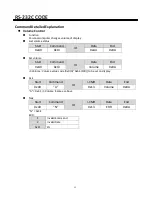
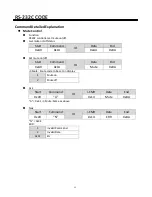
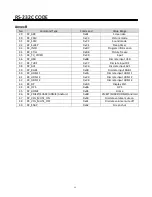
Command Detailed Explanation


Mute Control 


Function 

RS232 controller set mute on/off. 


Get mute on/off status 

Start 

Command 

ID 

Data 

End 

0xA9 

0x14 

0xAA 

0x8A 


Set mute on/off 

Start 

Command 

ID 

Data 

End 

0xA9 

0x14 

Mute 

0x8A 

Mute : Mute code to be set on display 

Mute on 

Mute off 


Ack 

Start 

Command 

ID 

r-CMD 

Data 

End 

0xA9 

“A” 

0x14 

Mute 

0x8A 

“A” = 0x41 

Mute :Same as above 


Nak 

Start 

Command 

ID 

r-CMD 

Data 

End 

0xA9 

“N” 

0x14 

ERR 

0x8A 

“N” = 0x4E 

ERR :   

Invalid Command 

Invalid Data 

0xFF 

Etc 


Содержание P7511

Страница 1: ...User Manual i3TOUCH P7511 i3TOUCH P8611 Before connecting operating or adjusting this product please read the manual completely Please keep this manual for future reference...

Страница 2: ...4 Identification of Controls 6 Remote Control 8 Connections 9 Basic Operations 10 Operating the navigation bar 11 Menu List 12 System Settings 14 Connecting to the internet 15 Wireless Presenting Ann...

Страница 3: ...horing both the furniture and the screen to a suitable support Do not position the screen on cloth or place any material between the screen and supporting furniture Increase children s awareness of da...

Страница 4: ...uct to fall from the trolley Careful move and be careful please point of strength should not in display screen Never attempt to move the screen unless the AC power cord has been disconnected This symb...

Страница 5: ...ils or appear slightly delayed This is not a malfunction The unit will recover when the temperature returns to normal Do not leave the unit in a hot or cold location Also do not leave the unit in a lo...

Страница 6: ...he AC cord into this jack and into a power outlet AC 100 240V 50 60Hz Notes This product should be operated only from the type of power source indicated on the marking label Always unplug the AC cord...

Страница 7: ...d home theater receiver to this jack 8 DP INPUT Connect an external device to DP out jack 9 PC IN Connect the video audio of a computer to these ports 10 RS 232C For remote control service and other u...

Страница 8: ...8 REMOTE CONTROL NOTES This operation manual provides a description based on operating functions with the remote control In different mode some buttons may have different function...

Страница 9: ...urely inserted into the jacks Loose connections can result in image or color problems The illustration of the external device may be different depending on your model Refer to the operating manual of...

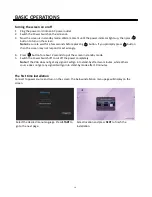
Страница 10: ...nd or act wrongly 4 Press button for about 2 seconds to put the screen in standby mode 5 Switch the Power Switch off to cut off the power completely Note If the VGA does not get any signal it will go...

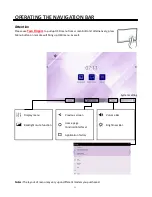
Страница 11: ...en bottom Alternatively press Menu button on remote will bring up OSD menu as well Display menu Previous screen Volume Bar Backlight mute function Home page Android Interface Brightness Bar Applicatio...

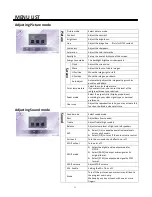
Страница 12: ...elect the aspect ratio display proportions according to your video signal type or personal preference Over scan Adjust the reproduction ratio you may activate this function to obtain a cleaner picture...

Страница 13: ...otion Wake up Select on to auto power on of human induction when the screen is in standby mode Motion Detection Set a time if the screen does not get any induction it will go into standby at a specifi...

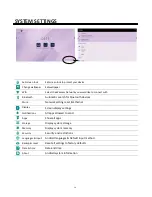
Страница 14: ...luetooth devices More Network setting reset Ethernet Display Screen display settings Notifications All apps allowed to send Apps Show all apps Storage Display system storage Memory Display system memo...

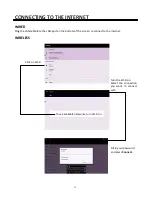
Страница 15: ...cable into the LAN port on the bottom of the screen to connect to the internet WIRELESS Click on Wi Fi Turn the Wi Fi on Select the connection you want to connect with Fill in your password and press...

Страница 16: ...ddress to download and install i3ALLSYNC application on the transmitting device More information about i3ALLSYNC is available on www i3 technologies com Click to exit the annotation Click to eraser al...

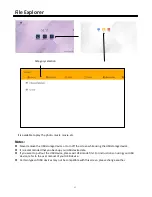
Страница 17: ...g the USB storage device It is recommended that you back up your USB device data If you want to pull out the USB device please exit USB mode first For instructions on using your USB device refer to th...

Страница 18: ...olutions Some items cannot be accessed If a setting option appears in gray this indicates that the settings option is unavailable in current input mode Some display menu items may be different when th...

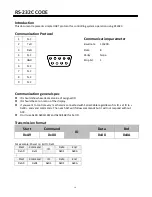
Страница 19: ...ow hexadecimal value of assigned ID ID should be set on menu of the display If you want to control every mechanism connected with Serial Cable regardless of its ID set ID to 0x00 and send commands The...

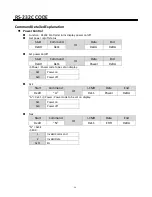
Страница 20: ...0x8A Set power on off Start Command ID Data End 0xA9 0x11 Power 0x8A Power Power code to be set on display 0x1 Power on 0x0 Power off Ack Start Command ID r CMD Data End 0xA9 A 0x11 Power 0x8A A 0x41...

Страница 21: ...0xAA 0x8A Set BLU power on off Start Command ID Data End 0xA9 0x12 BLU power 0x8A BLU power BLU Power code to be set on display 0x1 Power on 0x0 Power off Ack Start Command ID r CMD Data End 0xA9 A 0...

Страница 22: ...Data End 0xA9 0x13 0xAA 0x8A Set volume Start Command ID Data End 0xA9 0x13 Volume 0x8A Volume Volume value code 0x0 0 0x64 100 to be set on display Ack Start Command ID r CMD Data End 0xA9 A 0x13 Vo...

Страница 23: ...ata End 0xA9 0x14 0xAA 0x8A Set mute on off Start Command ID Data End 0xA9 0x14 Mute 0x8A Mute Mute code to be set on display 1 Mute on 2 Mute off Ack Start Command ID r CMD Data End 0xA9 A 0x14 Mute...

Страница 24: ...5 Input 0x8A Input Input source code to be set on display Data Input TV 0x00 AV1 0x01 Component 1 0x03 VGA 0x04 VGA 1 0x14 VGA 2 0x24 VGA 3 0x34 HDMI 1 0x05 HDMI 2 0x06 DP 0x07 HDMI 3 0x08 Inside PC 0...

Страница 25: ...ller Command remote key Start Command ID Data End 0xA9 0x16 Key code 0x8A Key code Remote key cod as Annex B Ack Start Command ID r CMD Data End 0xA9 A 0x16 Key code 0x8A Key code Same as Annex B Nak...

Страница 26: ...d 0xA9 0x17 0xAA 0x8A Set Key lock on off Start Command ID Data End 0xA9 0x17 Lock 0x8A Lock Key lock code to be set on display 1 Key lock ON 0 Key lock OFF Ack Start Command ID r CMD Data End 0xA9 A...

Страница 27: ...Key Picture Mode Start Command ID Data End 0xA9 0x18 Mode 0x8A Picture mode Picture mode code to be set on display Data Input Dynamic 0x00 Standard 0x01 Soft 0x02 User 0x03 Gamer 0x04 Writing 0x06 Ack...

Страница 28: ...A 0x8A Set Sound Mode Start Command ID Data End 0xA9 0x19 Mode 0x8A Picture mode Sound mode code to be set on display Data Input Standard 0x00 Music 0x01 Movie 0x02 Sports 0x03 User 0x04 Ack Start Com...

Страница 29: ...0xA9 0x1A Baud rate 0x8A Baud rate Baud rate code to be set on display Data Input BAUD_1200 0x00 BAUD_2400 0x01 BAUD_4800 0x02 BAUD_9600 0x03 BAUD_19200 0x04 BAUD_38400 0x05 BAUD_57600 0x06 BAUD_1152...

Страница 30: ...ta End 0xA9 0x1B 0xAA 0x8A Set Freeze control on off Start Command ID Data End 0xA9 0x1B Freeze 0x8A Freeze Freeze code to be set on display 1 Freeze On 0 Freeze Off Ack Start Command ID r CMD Data En...

Страница 31: ...End 0xA9 0x1C 0xAA 0x8A Set Source info Visible control on off Start Command ID Data End 0xA9 0x1C Info 0x8A Info Source info visible code to be set on display 1 Source info visible ON 0 Source info...

Страница 32: ..._NUM0 0xD9 Number 0 3 RC_NUM1 0x95 Number 1 4 RC_NUM2 0x99 Number 2 5 RC_NUM3 0x9D Number 3 6 RC_NUM4 0xD6 Number 4 7 RC_NUM5 0xDA Number 5 8 RC_NUM6 0xDE Number 6 9 RC_NUM7 0x96 Number 7 10 RC_NUM8 0...

Страница 33: ...input USB 37 RC_TVRF 0xC7 Discrete input RF 38 RC_AV1 0xC6 Discrete input AV1 39 RC_RGB1 0xCB Discrete input RGB1 40 RC_HDMI 1 0xCA Discrete input HDMI 1 41 RC_HDMI 2 0xC9 Discrete input HDMI 2 42 RC_...

Отзывы: