


9
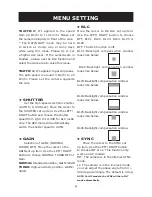
Move the cursor to the BLC set up item.
Use the LEFT/ RIGHT button to choose
OFF, BLC1, BLC2, BLC3, BLC4, BLC5 or
BLC6.
OFF: The BLC function is off.
BLC1:Backlight compensation window
looks like below:
BLC2:Backlight compensation window
looks like below:
BLC3:Backlight compensation window
looks like below:
BLC4:Backlight compensation window
looks like below:
BLC5:Backlight compensation window
looks like below:
BLC6:Backlight compensation window
MENU SETTING
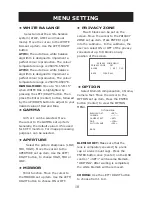
Set the high-speed electronic shutter
(AUTO to 1/100K sec). Move the cursor to
the SHUTTER set up item. Use the LEFT/
RIGHT button and choose the shutter
speed from 1/50 to 1/100K for ALC mode
only. The AES mode will automatically
switch the shutter speed to AUTO.
Selection of GAIN: (NORMAL/
TURBO/ OFF). Move the cursor to the
GAIN set up item. Use the LEFT/ RIGHT
button to choose NORMAL, TURBO OFF,or
Gain.
NORMAL:
Standard position, GAIN=24dB
TURBO:
High-sensitivity position, GAIN=
30dB.
Move the cursor to the SYNC set
up item. Use the LEFT/ RIGHT button
to choose INT or LL. This function only
works on AC models.
INT: The camera is in the internal SYNC
mode.
LL: The camera is in the line lock mode,
you can adjust the phase angle from 0 ~
300 deg accordingly. The default is 0 deg.
NOTE: For DC models, the SYNC will be in INT
mode automatically.
• SHUTTER
• GAIN
• SYNC
• BLC
TRAFFIC 3:
It’s applied to the speed
from 20 km/hr to 110 km/hr. Please set
the camera obliquely in front of the cars.
* The DAY/NIGHT mode may be hard
to switch at cloudy day or rainy days
while using this mode. Please try to set
a higher ALC level . If the camera sets in
shadow , please use the BLC function and
select the dark area to solve this issue.
TRAFFIC 4:
It’s applied to parking areas.
The auto speed is around 0 km/hr to 20
km/hr. Please set the camera opposite
the cars.
Содержание i3B265i
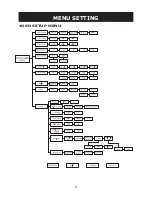
Страница 6: ...6 MENU SETTING OSD SETUP MENU LPR ...


