64
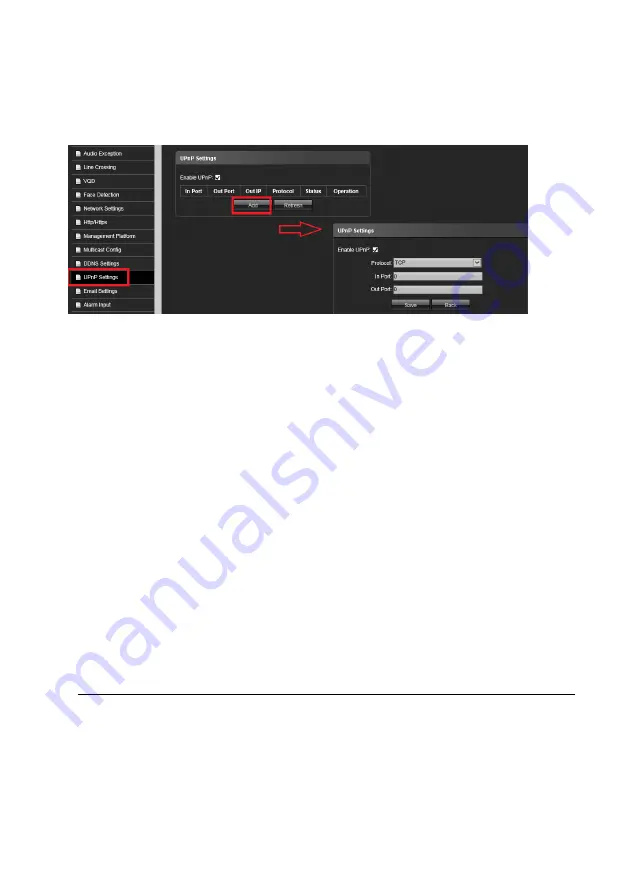
UPnP Settings:
Click this button to setup UPuP function..
1.
Click “
Add
“ icon to setup UPnP function.
.
2.
Check “
Enabl e UPnp “
, then
select the Protocol
, In port and Out port.
3.
Click “
Save”
icon to complete the parameters settings or click
”
Back
“to cancel the setting.
UPnP:
Click this button to enable the UPnP (Universal Plug and Play) function.
UPnP™ is a networking architecture that provides
compatibility among networking equipment,
software and other hardware devices. The UPnP protocol allows devices to connect seamlessly
and to simplify the implementation of networks in the house and corporate environments. With
the function enabled, you don’t need to configure the port mapping for each
port, and the camera
is connected to the Wide Area Network via the router.
1. Check “
Enable UPnP
™ icon from settings interface.
2. Entry the Device Port and then click the
Save
icon to save the setting.
You can edit the Friendly Name of the IP Camera. This name can be detected by corresponding
device, such as a router.
Enable UPnP presentation:
Select this option to enable UPnP presentation for your Network
Camera
so that whenever a Network Camera is presented to the LAN, shortcuts of connected
Network Cameras will be listed in My Network Places You can click the shortcut to link to the
web browser Currently,
UPnP is supported by Windows XP or later.
Note:
T
hat to utilize this function,
make sure the UPnP component is installed on your computer.
Enable UPnP port forwarding:
To access the Network Camera from the Internet, select this
option to allow the Network Camera to open ports on the router automatically so that video
streams can be sent out from a LAN.
To utilize of this feature, make sure that your router
supports UPnP and it is activate.
Содержание ANYCAM DM-2MIPR03 Series
Страница 18: ...18...


