background image

52

   www.i-sens.com

www.i-sens.com 

53

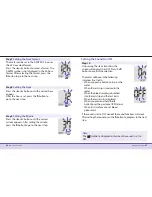
Step 1 

Without inserting a test strip, press the 


and 

buttons simultaneously for 3 seconds 

to enter the time alarm mode.  ‘alarm1’ 

will be displayed while ‘OFF’  blinks on the 

screen.

Step 2

On pressing the 

 button,  ‘alarm1’  is set and  

‘On’  is displayed on the screen. Press the 


button again to cancel  ‘alarm1’.  ‘OFF’  will 

blink on the screen.

Step 3

Press the 

 button while 'On' blinks to 

adjust the time of  ‘alarm1’. A number 

indicating the hour will blink on the screen. 

Press the 

 button to set the hour. 

Setting the Time Alarms (alarm 1–3)

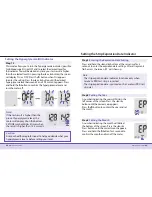
Setting the Alarm Function

Step 1 

Turning the PP2 alarm On

Without inserting a test strip,

press and hold the 

 button for 

3 seconds to set the post-meal 

alarm. 

'PP2’ , bell (     ) symbol and ‘On’ 

will be displayed. The screen will 

then automatically change to 

the memory recall mode. At this

time, bell (     ) symbol, indicating 

that the PP2 alarm has been set, will be displayed on the screen.

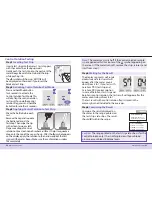
Step 2 

Turning the PP2 alarm OFF

To turn off the PP2 alarm, press

and hold the 

 button for 3 

seconds. ‘PP2’ , bell (     ) symbol 

and ‘OFF’ will appear on the 

screen. Then the screen will 

change automatically to the 

memory recall mode without 

bell (     ) symbol displayed.

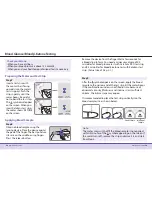
Four types of alarms can be set in the CareSens Dual Meter: one 

post-meal alarm (PP2 alarm) and three time set alarms (alarm1–

3). The PP2 alarm goes off 2 hours after setting the alarm. The 

alarms ring for 15 seconds and can be silenced by pressing any 


button or by inserting a test strip.

Setting the Post-meal Alarm (PP2 alarm)

'       ' disappears

Note: 

The PP2 alarm will automatically turn off if the meter's time 

setting is adjusted to more than two hours before or just past 

the currently activated PP2 alarm time.

Содержание CARESENS DUAL

Страница 1: ...646 Korea www i sens com Medical Technology Promedt Consulting GmbH Altenhofstrasse 80 D 66386 St Ingbert Germany Owner s Booklet Blood Glucose Monitoring System Blood Ketone Monitoring System Visit t...

Страница 2: ...Meter is designed to work with the SmartLog mobile app When using the CareSens Dual System we suggest you pair your CareSens Dual Meter with your smartphone and track your results The process of creat...

Страница 3: ...er license All other trademarks and trade names are those of their respective owners WARNING Turn off the Bluetooth feature in areas where the use of wireless devices is restricted such as hospitals s...

Страница 4: ...Indicator 27 Setting the Hyperglycemia HI Indicator 28 Setting the Strip Expiration Date Indicator 29 Checking the System 30 Control Solution Testing 32 Comparing the Control Solution Test Results 34...

Страница 5: ...lated errors in monitoring by using the no coding function The CareSens Dual Blood Glucose Blood Ketone Meter should only be used with CareSens PRO blood glucose and KetoSens ketone test strips An abn...

Страница 6: ...835 GHz technology Operating range distance maximum 10 metres unobstructed Operating channels 40 channels Security encryption 128 bit AES Advanced encryption standard Relative humidity 10 90 Measureme...

Страница 7: ...rt two new batteries with the side facing up and make sure the batteries are inserted firmly Step 3 Place the cover on the battery compartment Push it down until you hear the tab click into place Note...

Страница 8: ...been applied Edge to apply blood sample Apply blood sample here for testing Caring for Your System Use a soft cloth or tissue to wipe the meter exterior If necessary dip the soft cloth or tissue in a...

Страница 9: ...t strips within twelve 12 months of opening the vial Record the discard date the date the vial was opened plus twelve 12 months on the vial label Store test strips in a cool and dry place at a tempera...

Страница 10: ...e test strips Do not use test strips past the expiration or discard date Test strips can be used up until the expiration date printed on the foil packet if the test strips are used and stored accordin...

Страница 11: ...ode appears when test results stored in the memory are displayed PP2 alarm appears when the post meal alarm has been set Bluetooth symbol appears when Bluetooth Smart feature is on Mute symbol appears...

Страница 12: ...number 1 The symbol and PIn will appear if you press the S button when the meter screen shows PAIr 2 On your smartphone launch the SmartLog mobile app and select more at the bottom of the screen Sele...

Страница 13: ...displays the correct date Press the S button to confirm the date and to go to the next step 6 When your meter and smartphone are paired and connected the meter will display SUCCESS and the saved test...

Страница 14: ...te The symbol is displayed only when the sound is set to OFF If the sound is set to OFF none of the sound functions will work After setting the sound press the S button to progress to the next step St...

Страница 15: ...setting your level Note If the test result is lower than the pre set hypoglycemia level the meter will display the following Lowarning willblink ontheleft bottomcorner Step 11 This mode allows you to...

Страница 16: ...l the correct month appears Press and hold the S button for 3 seconds to confirm the month and turn off the meter Step 13 This mode allows you to turn the hyperglycemia indicator possible high blood s...

Страница 17: ...e System You may check your meter and CareSens PRO test strips using the CareSens PRO Control Solution control L and or H The CareSens PRO Control Solution contains a known amount of glucose and is us...

Страница 18: ...blood glucose or your blood ketone levels Control Solution Range Control L 0 4 1 0 mmol L Control M 1 9 2 9 mmol L Control H 3 4 5 4 mmol L Step 3 Applying Control Solution to Test Strip Shake the bo...

Страница 19: ...s The test result of each control solution should be within the range printed on the label of the test strip vial or on the test strip box Repeat the control solution test if the test result falls out...

Страница 20: ...for various people at different sample sites The lancing device s adjustable tip allows the best depth of skin penetration to get an adequate sample size 3 4 5 6 7 Note 1 least penetration of lancet...

Страница 21: ...If the confirmation window is not filled in time because of abnormal viscosity thickness and stickiness or insufficient volume the Er4 message may appear Step 8 Obtain a blood sample using the lancin...

Страница 22: ...tooth feature on the meter must be turned on The meter and a smartphone must be paired The SmartLog mobile app must be launched The meter will transmit data in the following cases When the strip is ej...

Страница 23: ...ative Site Blood Sampling forearm and palm Select a clean soft and fleshy sample site area free of visible veins and hair and away from bones Gently massage the sample site to help blood circulation t...

Страница 24: ...glycemic shock or symptoms If the sample drop of blood runs or spreads due to contact with hair or with a line in your palm do not use that sample Try puncturing again in a smoother area Things to Kno...

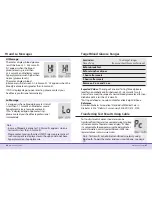
Страница 25: ...thorisedi SENSsales representativeorvisitwww i sens com Note Test results can also be transferred wirelessly using Bluetooth To pair the meter and your smartphone see page 19 HI and Lo Messages HI Mes...

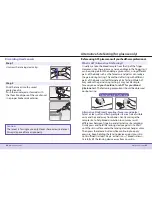
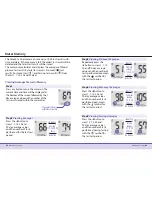
Страница 26: ...re meal average 1 7 14 30 90 days Meter Memory Step 1 Press any button to turn the meter on The current date and time will be displayed at the bottom of the screen followed by the 1 day average value...

Страница 27: ...the button to scroll through the test results starting from the most recent and ending with the oldest Press the button to return to the results seen previously After checking the stored test results...

Страница 28: ...ll be displayed The screen will then automatically change to the memory recall mode At this time bell symbol indicating that the PP2 alarm has been set will be displayed on the screen Step 2 Turning t...

Страница 29: ...The temperature during the test was above or below the operating range Move to an area where the temperature is within the operating range for blood glucose test 5 45 C or the operating range for blo...

Страница 30: ...n after applying the blood sample on the strip The test result does not match the way you feel General Troubleshooting Note If the problem is not resolved please contact your authorised i SENS sales r...

Страница 31: ...1 mmol L 5 3 to 8 0 3 6 1 7 215 5 to 23 3 8 9 6 2 Range mmol L Average of difference Hct 15 65 Performance Characteristics The performance of CareSens Dual Blood Glucose Blood Ketone Monitoring Syste...

Страница 32: ...thin 15 of the medical laboratory values at glucose concentrations at or above 5 55 mmol L Compounds of xylose 0 54 mmol L at glucose concentrations of 2 8 5 6 mmol L may cause overestimation of blood...

Страница 33: ...r part along with proof of purchase to your nearest i SENS sales or customer service representative Ketone Accuracy The accuracy of the CareSens Dual Blood Glucose Blood Ketone System Model GM01HAC wa...

Страница 34: ...64 www i sens com www i sens com 65 MEMO MEMO...

Страница 35: ...66 www i sens com MEMO...

Отзывы: