background image


CABLINE-CX II PLUG With Cover Assembly Manual


Document No. 

ASM-17008


16

  / 

16


Confidential C                                                                   

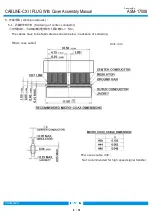
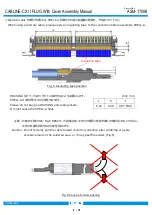
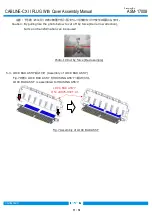
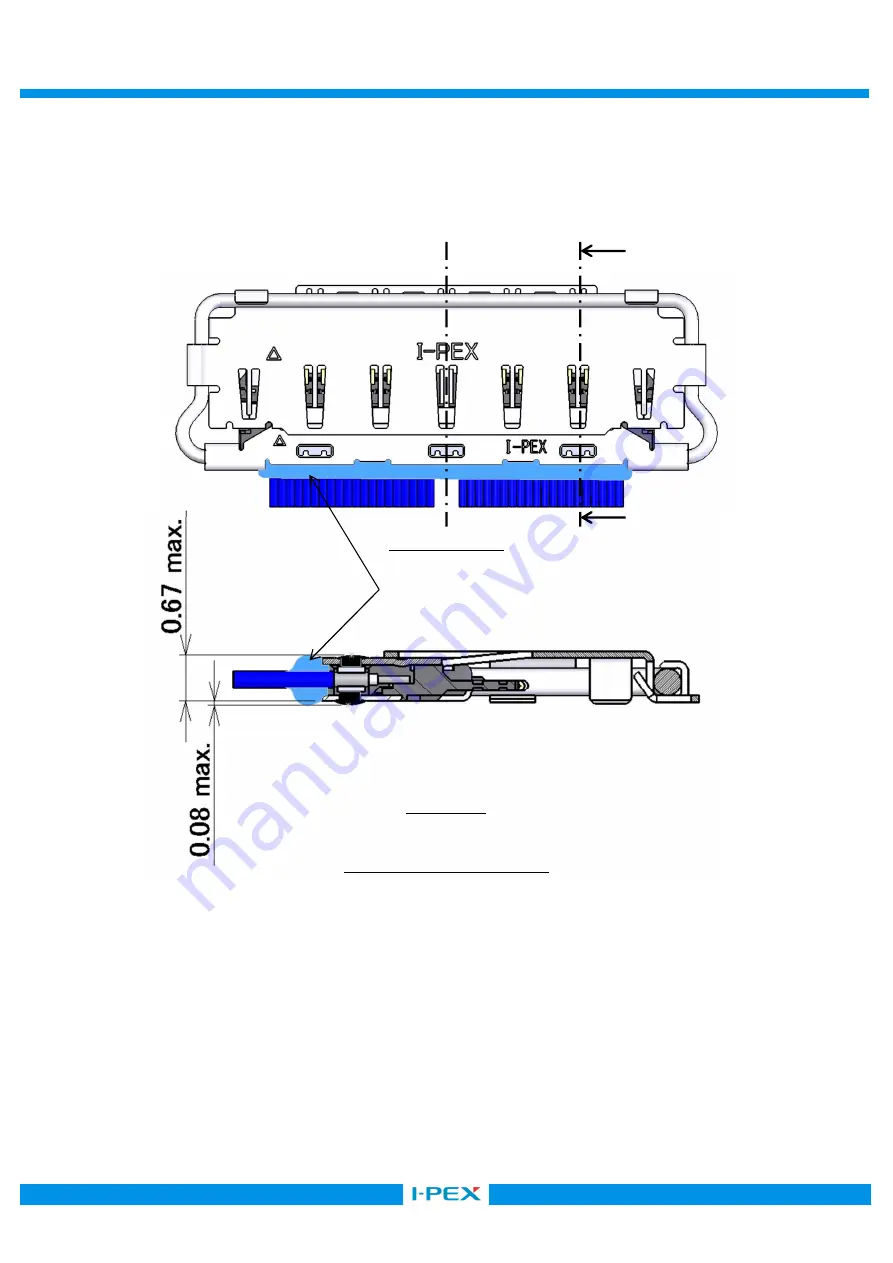
5-5.  ケーブル固定  (Cable fixation) 

        ケーブルと SHELL を接着剤にて固定する。 
                                        推奨接着剤:  LOCTITE 352 
      Fix the cable and SHELL with the bond. 

Recommended Bond: LOCTITE 352 


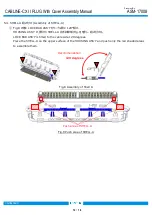
Fig.14 Bonding 


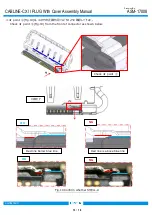
Fig.15 Soldering / Bonding 

SECT. Z-Z 

Bonding 

Содержание 20977-040T-01

Страница 1: ...BLINE CX II PLUG With Cover Part No 20977 Assembly Manual 2 S19503 September 4 2019 S Yamaguchi T Kurachi H Ikari 1 S17876 November 28 2017 R Hoshino T Yayoshi M Takemoto 0 S17752 October 13 2017 R Ho...

Страница 2: ...COVER CABLE ASS Y 20977 040T 01 Discrete P N HOUSING ASS Y 20974 040T 01 LOCK BAR ASS Y 20975 040T 01 SHELL A 3655 0401 3 Fixtures 3 1 Components and Instruments used in the condition confirmation Pu...

Страница 3: ...g time 2 0sec 2nd 2nd heat temp 320 rise time 0 5sec holding time 5 0sec Heater tip Pressure 11N This pulse heat condition was evaluated and confirmed by our pulse heat jig and instruments The most op...

Страница 4: ...nt No ASM 17008 4 16 Confidential C 5 Work procedures 5 1 Soldering of center conductor The cables have to be fabricated as shown below in advance of soldering Micro coax cable Unit mm Micro coax cabl...

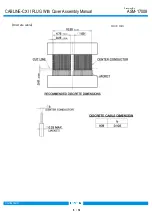
Страница 5: ...CABLINE CX II PLUG With Cover Assembly Manual Document No ASM 17008 5 16 Confidential C Discrete cable Unit mm...

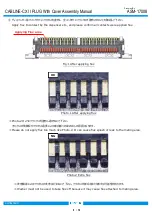
Страница 6: ...ase confirm all contacts were applied flux Fig 1 After applying flux Photo 1 After applying flux Photo 2 Please do not apply flux too much like Photo 2 It can cause flux splash or leak to the mating a...

Страница 7: ...and locate solder bar at center of soldering point Fig 2 Set solder bar Set the cable Fig 3 Setting Cable MCX Discrete cable Jacket When using a discrete cable set it so that the end of the jacket an...

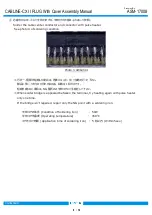
Страница 8: ...lse heater See photo 3 of soldering condition Photo 3 AWG 44 1 NG When solder bridge is appeared between the terminal try heating again with pulse heater only one time If the bridge isn t repaired rep...

Страница 9: ...ore assemble SHELL A Fig 6 Caution Do not forcedly pull the cable toward red arrow direction after soldering or apply excessive load on the soldered area or it may peel the solder Fig 6 Fig 6 Cause of...

Страница 10: ...below picture green line by a scissors for metal SHELL A 45 1 Photo 7 Hold the center of Plug shell A and cut it off from Notch by 45 degrees of reciprocating work When it does not be cut try again th...

Страница 11: ...photo below to cut off by force Red arrow direction burrs and transformation can be caused 5 3 LOCK BAR ASS Y Assembly of LOCK BAR ASS Y Fig 7 LOCK BAR ASS Y HOUSING ASS Y LOCK BAR ASS Y is assembled...

Страница 12: ...Fig 8 LOCK BAR ASS Y 120 HOUSING ASS Y SHELL A Fig 9 LOCK BAR ASS Y is tilted to the cable side 120 degrees Place the SHELL A on the upper surface of the HOUSING ASS Y and push only the red shaded are...

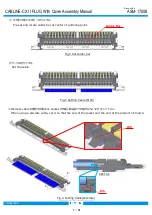
Страница 13: ...anual Document No ASM 17008 13 16 Confidential C point Fig 10 Check point Fig 10 from the front of connector as shown below Fig 10 Confirm whether SHELL A Check point Y OK NG Red line below blue line...

Страница 14: ...Assembly Manual Document No ASM 17008 14 16 Confidential C points Confirm whether Fig 11 points is assembled properly and SHELL A locks properly Fig 11 Assembly of SHELL A LOCK BAR ASS Y Closed LOCK...

Страница 15: ...ignated points Fig 12 13 point Conditions of Soldering iron refer to sheet 8 Fig 12 Soldering of Shell A and Ground Bar Fig 13 Soldering of Shell B and Ground bar Shell A and Shell B When soldering do...

Страница 16: ...er Assembly Manual Document No ASM 17008 16 16 Confidential C 5 5 Cable fixation SHELL LOCTITE 352 Fix the cable and SHELL with the bond Recommended Bond LOCTITE 352 Fig 14 Bonding Fig 15 Soldering Bo...

Отзывы: