background image

31

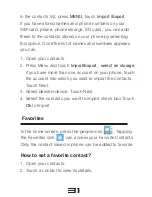
In the contacts list, press 

MENU

, touch


Import /Export

.

If you have stored names and phone numbers on your 

SIM card, phone, phone storage, SD card , you can add 

these to the contacts stored on your phone by selecting 

this option. Once the list of names and numbers appears 

you can:

Open your contacts.

Press Menu and touch

 Import/Export , select an storage

if you have more than one account on your phone, touch 

the account into which you want to import the contacts. 

Touch Next.

Select desired device. Touch Next.

Select the contacts you want to import check box Touch 

Ok

 to Import 

1.

2.

3.

4.

Favorites

In the home screen, press the people icon         . Tapping 

the Favorites icon         can access your Favorite Contacts.

Only the contact saved in phone can be added to favorite.

How to set a favorite contact?

Open your contacts.

Touch a contact to view its details.

1.

2.

Содержание i-style 2.8

Страница 1: ...USER MANUAL 2 8...

Страница 2: ...orks properly please follow the instructions in this manual To prevent any possible incidents or malfunctions please follow all safety warnings Screen displays and illustrations in this user s manual...

Страница 3: ...Contents...

Страница 4: ......

Страница 5: ...Key Press to return to the Home screen from anywhere on your phone Press and hold to bring up the recent applications window Home Key Key Function Headset Port USB Port Back Key Volume Key Menu Key Ho...

Страница 6: ...n keyboard is open press to close the onscreen keyboard Back Key Power key Press to adjust the volume Volume Keys Press in this manual means to press and release the key press and hold means to press...

Страница 7: ...one number and a small amount of memory in which you can store phone numbers and messages Some SIM cards may not function with your phone You should consult your wireless service provider for a replac...

Страница 8: ...You need to remove the back cover of your phone before you can insert the SIM card Insert the SIM card Make sure that the clipped corner of the SIM card is facing the correct direction and the metall...

Страница 9: ...5 Install the back cover Align and hook the back cover to the top of the battery slot and then press the back cover down until it locks into place...

Страница 10: ...operator To power off your phone press and hold the Power Key On release the phone options menu opens select Power off Charging the Battery Your phone is powered by a rechargeable battery The new bat...

Страница 11: ...recommend that you remove the battery If the battery is not charged the battery icon will reappear after a few minutes of charging Inserting a micro SD Card Your phone has a slot for a micro SD Card...

Страница 12: ...n the notifications panel touch connected as USB Storage and then select USB storage check box to turn on the USB storage To turn off the USB storage you must select the other options check box to cle...

Страница 13: ...e check box Selection To select an item or button on the screen touch the item with your fingertip The button will illuminate when it is selected Your mobile phone features a touch screen which provid...

Страница 14: ...for using all the applications on your phone You can customize your Home screen to display applications shortcuts and widgets as you like Press the HOME button to return to the Home screen Extended Ho...

Страница 15: ...the Home screen 1 Set wallpaper Start from the Home screen press MENU to access the context menus You can also touch hold an empty area of the home screen and in the menu touch Wallpapers Tap Desktop...

Страница 16: ...ion tab turns into a Remove button Drag the item to the Remove button When the icon and application tab turn red release it Move objects on the Home screen To move an icon or other item on the Home sc...

Страница 17: ...er select a contact or a call log Press the Call icon to dial the number 1 2 3 To end the call press the End Call icon Adjusting speaker earpiece volume During a call press the Volume Keys up down to...

Страница 18: ...ore you can make an emergency call If your phone is in sleep mode press the power key to wake up the phone and then unlock the screen Making a Second Call You can make a second call by putting the cur...

Страница 19: ...g a Second Call You can make a second call by putting the current call on hold Drag to the right to answer the second call The first call will be put on hold automatically Select The two calls will be...

Страница 20: ...e the ringer before answering the call press the Volume Down button Rejecting a Call Drag to tthe left Answering a Second Call If you have activated Call Waiting a new incoming call screen is shown to...

Страница 21: ...ysical connection the phone can connect to a Bluetooth hands free headset or a Bluetooth car kit and use those devices to send and or receive calls Before you can use a Bluetooth hands free headset or...

Страница 22: ...fer to the above chapter for details Press HOME and tap the application tab to select Settings Bluetooth open Bluetooth Select the Visibility timeout to set your phone visible time to other Bluetooth...

Страница 23: ...h devices Touch a particular device in the list to pair with it Once paired you can select the file to send via Bluetooth 1 2 3 4 5 Rescan for Bluetooth devices If you want to update the list of Bluet...

Страница 24: ...open Alarm Clock press HOME to return to the home screen tap the application tab to enter the main menu select Clock and then touch the alarm icon Touch to add an alarm and you can also edit the exist...

Страница 25: ...ur alarm does not notify you on Saturday or Sunday 4 Delete an alarm To turn alarm off you can directly change the icon to turn alarm off To delete an alarm press and hold the alarm until the trash ic...

Страница 26: ...xt message Note Adjust Browser settings On the browser screen press Menu key and then touch Enter web address Open the Browser screen and tap the Web address tab to open the web address screen Type wi...

Страница 27: ...also select Other Type the URL of the page you want to set as the homepage and then touch OK 1 2 You can set your home page from the settings screen Zoom and navigation in web pages You can place two...

Страница 28: ...windows click To close the window touch the X in the right corner of the window that you want to close On the windows view you can press MENU to refresh Save to bookmarks and Close 1 2 3 4 5 To find...

Страница 29: ...ebsite To edit the bookmark touch hold the bookmark that you want to edit in the bookmark screen The context menu will open Now select Edit bookmark Type your change and select OK To delete a bookmark...

Страница 30: ...rame your subject on the screen Touch onscreen to take a picture 1 2 3 4 you to take and share pictures and videos Please ensure that the camera lens is clean before you take pictures as small dust pa...

Страница 31: ...ngs Touch to shoot video Recording a video In camera mode press to Switch to video You can change the capture video quality by touching the related icons on the top of the screen Touch to starting rec...

Страница 32: ...o your favorite FM radio station anytime with frequencies ranging from 87 5 MHz to 108 0 MHz To open FM radio press Home Key touch the application tab and touch FM radio The FM radio will not work unl...

Страница 33: ...you quick and easy access to the people you want to search You can view and create contacts on your phone and can also import contacts stored on your SIM card To access this menu press HOME and touch...

Страница 34: ...irst and last name etc Slide your finger up or down to see more labels Touch a category of contact information such as phone numbers and email addresses to enter that kind of information about your co...

Страница 35: ...port Export select an storage if you have more than one account on your phone touch the account into which you want to import the contacts Touch Next Select desired device Touch Next Select the contac...

Страница 36: ...ap the tab to access the call log menu Accessing a call log Slide your finger to scroll through the call list Touch the selected log to view its detailed information send an SMS message or add the num...

Страница 37: ...detail see calling chapter Dial by using Bluetooth devices You can place and receive calls using a hands free Bluetooth headset Before you can use your Bluetooth device follow the following steps Go t...

Страница 38: ...pictures and videos press Home Key and touch the application tab Then touch the Gallery icon Viewing an image Gallery presents the pictures and videos on your phone storage including those you ve tak...

Страница 39: ...view it Return to the main Gallery screen at any time by touching its icon at the top left of the screen Place two fingers on the screen at once pinch them together to zoom in and spreading them apart...

Страница 40: ...you can create a new message or open an ongoing message thread Reading text messages Press Home Key touch and hold the status bar and then slide it down to open the notifications panel Touch the new...

Страница 41: ...e message has downloaded touch the attachment to view the message Reply to a message Simply start by typing your message in the text box at the bottom of the screen to reply to a message You can press...

Страница 42: ...ur categories Songs Album Artists and Playlists Select a category to view the lists within each Once in a category keep selecting until you reach the music you want to play For example if you select t...

Страница 43: ...ble on the playback screen Shuffle songs Shuffle songs in random order Touch to toggle shuffle on or off When the icon is grey shuffle is off Go to any point in song Slide fingertip in progress bar to...

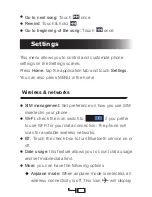
Страница 44: ...SIM management Set preference on how you use SIM inserted in your phone Wi Fi check the icon switch to if you prefer to use Wi Fi for your data connection The phone will scan for available wireless ne...

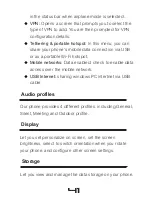
Страница 45: ...le Wi Fi hotspot Mobile networks Data enabled check to enable data access over the mobile network USB Internet sharing windows PC intertnet via USB cable Audio profiles Our phone provides 4 different...

Страница 46: ...enu allows you to manage applications Location access Use the Location settings to set your preferences for using Backup reset This feature let you backup app data wifi passwords and other settings to...

Страница 47: ...ze user data automatically Date time Set time time zone and date Use Automatic date time unless you need to override the network values Automatic time zone Use network provided time Use 24 hour format...

Страница 48: ...strength roaming status any Wi Fi addresses you re connected to and more Select Legal information for copyright and licensing information as well as the Google Terms of Service for the Google applica...

Страница 49: ...de press Home Key touch the application tab and then touch Sound Recorder Touch button to start recording During the recording you can pause the voice recording anytime by touching button Then choose...

Страница 50: ...re testing please make sure 1 WIFI is available 2 Battery power is more than 40 Check the firmware Check the firmware version before the System Software Update Settings About phone Build number Pic 1...

Страница 51: ...e 1 Click the icon System Software Update in Application Manager Pic 2 System Software Update initializing interface will pop up Pic 3 2 Pic 3 Press Yes will try to connect to server 3 cases will happ...

Страница 52: ...ll pop up The current system is up to date if you press OK the application will exit Pic 6 Pic 4 Pic 5 Case 1 Connect to server successfully a new firmware is found on server Pic 4 Pic 5 will show you...

Страница 53: ...49 Pic 6 Case 3 Fail to connect to server It will pop up Error occurred then if you press OK the application will exit Pic 7 Pic 7...

Страница 54: ...p the downloading interface or if you press Cancel the application will exit Pic 8 4 Updating interface 4 1 Update Now Update confirmation interface If you press Yes the phone will reboot enter the Re...

Страница 55: ...51 Pic 11 Pic 9 Pic 10...

Страница 56: ...l show you Step 4 directly Recovery Mode Some codes and a progress bar will show in phone screen Phone will reboot after the recovery is finished Then the phone will enter the Android mode again Andro...

Страница 57: ...53 Pic 13 Check the firmware again Check the firmware version again after the System Software Update Settings About phone Build number...

Страница 58: ...charger and AC adapter are not waterproof Keep them away from rain and liquid Using the Mobile Phone and Charger Warning Do not bump shake or tamper with the phone or charger This may cause battery le...

Страница 59: ...rference with electronic medical devices Follow any rules or regulations in such places Do not use the phone at a gas station near fuel or near chemicals Do not use the phone near electronic medical d...

Страница 60: ...by the phone s receiver magnet which may cause harm If you intend not to use your mobile phone for a long period of time please remove the battery from the phone Leaving the battery inside the mobile...

Страница 61: ...e your phone in high temperature areas This may cause battery leakage overheating explosion or even fire Warning If battery liquid leaks onto your skin or clothes immediately wash the affected parts w...

Страница 62: ...does spill onto the charger immediately unplug the power cable to prevent overheating fire or another type of breakdown Do not use the charger in places with high humidity like a bathroom This may cau...

Страница 63: ...apter Please confirm if the environment temperature is within the range of 0 C 40 C while charging Cleaning and Maintenance The mobile phone the battery and the charger are not waterproof Do not use t...

Страница 64: ...osure guidelines employ a unit of measurement known as the Specific Absorption Rate or SAR Tests for SAR are conducted by using standardized method with the phone transmitting at its highest certified...

Страница 65: ...d 0 62 GSM1800 Head 0 66 SAR data information for residents in countries regions that have adopted the SAR limit recommended by the Institute of Electrical and Electronics Engineers IEEE which is 1 6...

Страница 66: ...c player will consume more battery power The standby time is shorter when the network is not available than in the standard status For power saving the backlight turns off automatically if your phone...

Страница 67: ...om Shop namely I mobile by Samart and Authorized Distributor or Authorized Service Center as appointed in Thailand only The condition of the warranty for mobile phone and accessory that are purchased...

Страница 68: ...mation arising of the use or inability to use In cellular network signal and sounds that are used with mobile phone and accessory is the service of independent operators not i mobile Therefore i mobil...

Страница 69: ...nment the interference that can cause damage including unforeseeable accident spill with liquid or food or any actions that cause damages to mobile phone and accessories Mobile phone and accessory are...

Страница 70: ...xel defect of 2 pixels is considered acceptable Small alteration in a picture taken by a camera might occur in each mobile phone and accessory is considered normal and it is not the camera module to b...

Страница 71: ...on from virus or unauthorized access which cause the damage in the banking transaction E banking or any important information or using the mobile phone illegally The warranty will not cover the loss o...

Страница 72: ...urs from the use of any device under i mobile brand with other products which are not the product of i mobile The warranty will not cover any expenses in the co ordination with i mobile for solving th...

Отзывы: