


12
13
Operation
Operation
MOVE
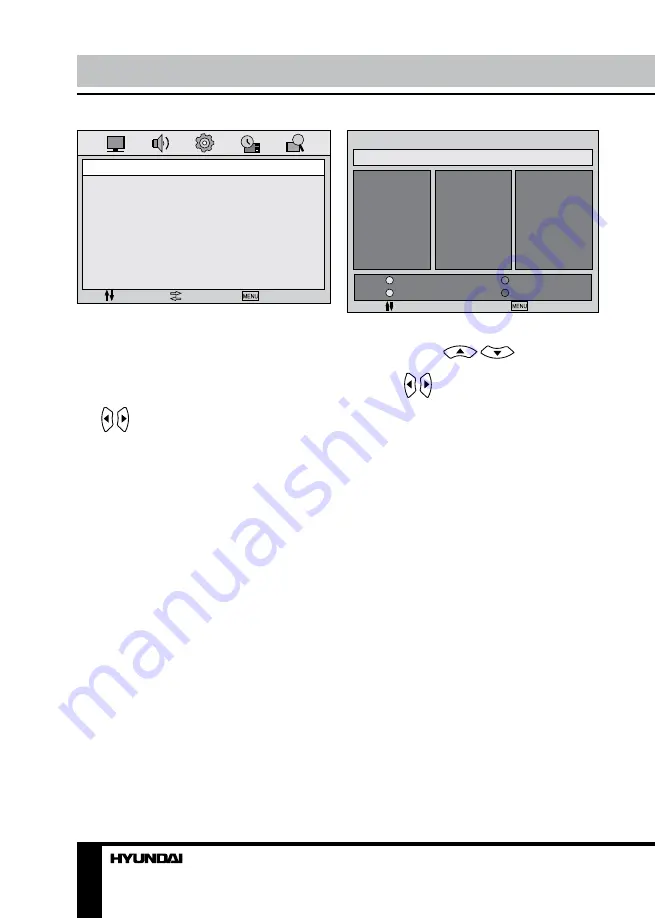
PROGRAM EDIT
Name
01
02
03
04
05
06
07
08
09
10
11
12
13
14
15
16
17
18
19
20
21
22
23
24
25
26
27
28
29
30
Lock
Fav
Insert
EXIT
• Name
Highlight the needed channel. Press GREEN
button; then press
/
buttons to
select a symbol. Press GREEN button again;
then press / buttons to select the next
symbol. Press GREEN button to confirm.
Maximum 5 symbols are possible for the name.
• Lock
Highlight the needed channel. Press RED
button; the current program will be locked and
could not be watched. Press RED button again
to unlock program selection.
• Insert
Highlight the channel you want to insert.
Press YELLOW button; then select the needed
channel. Press YELLOW button to insert the
selected channel.
• Favorite
Highlight the needed channel. Press CYAN
button to add the current channel to your
favorite list.
CHANNEL
MOVE
SELECT
EXIT
PROGRAM
COLOR SYS.
SOUND SYS.
MANUAL SEARCH
AFT
FINE
SKIP
• Program: select lower or upper program.
• Colour System: select corresponding
colour system.
• Sound System: select corresponding
sound system.
• Manual Search: this item allows you to
select preset channel’s frequency one by one
with / buttons.
• AFT (Auto Fine Tune): this item allows
you to fine tune a channel selected due to
weak or wrong antenna configuration, some
of the channels may not be turned to the best
reception. Select AFT On/Off.
• Fine: perform fine adjustment of the
current frequency.
• Skip: select On/Off. When set On, the
corresponding channel will be skipped while
listing channels up/down.
•
Program Edit
: this item allows you to sort
TV programs according to your preferences.
Enter into program edit menu:
Содержание Excellence H-LED19V3
Страница 1: ...LCD LCD TV Instruction manual H LED24V1...
Страница 16: ...16 16 17 17 17 19 19 19 19 20 21 21 21 21 22 22 23 23 23 24 24 24 24 25 26 26 26 28 28 28 29 30...
Страница 17: ...17 RS 330 120 S325...
Страница 18: ...18 20 50 LCD 10 18 2...
Страница 19: ...19 75 DVD VCDR CAMCORDER L R PAL NTSC SECAM RCA SCART DVD Y Pb Pr VGA VGA VGA HDMI HDMI HDMI 75...
Страница 20: ...20 1 2 2822 3 x 8...
Страница 24: ...24 0001 RED GREEN YELLOW CYAN VGA VGA MENU ENTER MENU EXIT NTSC AVL...
Страница 25: ...25 AVL HDMI 0000 0000 ENTER...
Страница 27: ...27 YELLOW YELLOW CYAN VGA...
Страница 28: ...28...
Страница 29: ...29 1 1 2 1 3 RCA 1 4 1 5 1 6 1 5 2 7 1 8 2822 3X8 1 9 1 10 1 11 1...
Страница 31: ......


