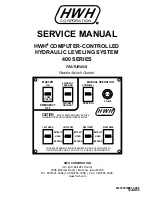
TROUBLE SHOOTING STEPS
MI91.1065
17MAR98
LOW
VOLTS
FUSE
HORIZONTAL
VERTICAL
5 AMP.
ON
AUTOMATIC
LEVELING
AUTOMATIC
RETRACT
LEFT REAR
LEFT FRONT
RETRACT
HOLD
EXTEND
EXTEND
HOLD
RETRACT
RIGHT FRONT
RIGHT REAR
RETRACT
HOLD
EXTEND
TO PREVENT DAMAGE FROM OVERHEATING DO NOT HOLD SWITCH
ON FOR MORE THAN TWO OUT OF EVERY FOUR MINUTES.
BLOCK FRAME SECURELY BEFORE
CHANGING TIRES OR WORKING UNDER VEHICLE.
CAUTION!
MASTER
EMERGENCY
OFF
MANUAL OPERATION
H
HW
CORPORATION
R
AUTOMATIC "LEVELING"
& "RETRACT" SWITCH
SYSTEM ON LIGHT
MASTER ON/EMERGENCY OFF
SWITCH
LOW VOLTS LIGHT
(OPTIONAL)
INDIVIDUAL JACK CONTROL
SWITCHES (4)
WARNING LIGHTS
(4 Red)
AUTOMATIC LEVELING
LIGHT
"HORIZONTAL/VERTICAL"
SWITCH
CONTROL FUSE
(5 AMP)
AUTOMATIC RETRACT
LIGHT
LEVELING LIGHTS
(4 Yellow)
1. Make sure the transmission is in the proper position for park-
ing and the park brake is set. With the ignition switch off, no
lights on the leveling system panel should be on. If any lights
are on, see Part 1 of the Repair Steps.
2. Turn the ignition switch to the ACC or ON position. The con-
trol panel should remain off. If any control panel lights come
on see Part 2 of the Repair Steps.
NOTE: The red warning lights will come on when the control
panel is off if a jack is extended and the ignition is on.
3. Push the "MASTER" switch to "ON". Some panels have a
two position switch. Some panels have a three position mo-
mentary switch. The system on light should come on. One or
two yellow lights may come on. If the pump starts running or
anything else occurs see Part 3 of the Repair Steps.
NOTE: If the vehicle is equipped with straight-acting jacks,
proceed to Step 5.
4. Push and hold the "HORIZONTAL/VERTICAL" switch to
"VERTICAL". The pump should come on. The four jacks should
drop and stay in the vertical position. The red warning lights
should come on. The pump should shut off when the switch
is released. If this is not so, see Part 4 of the Repair Steps.
5. Push each individual JACK CONTROL switch to "EXTEND".
These are momentary switches and the jack will stop extend-
ing when the switch is released. If the vehicle has straight-
acting jacks, the respective red light for each jack should
come on when the jack is extended 2 or more inches.
Make sure each jack will extend to the ground, lift the coach
and remain extended when the switch is released. Be care-
full not to twist the vehicle frame while performing this test. Lift-
ing with two jacks at a time will help reduce frame twist. If the
jacks do not extend properly, see Part 5 of the Repair Steps.
6. The yellow lights on the "RETRACT" side of the jack control
switches are the level indicator lights. A lit yellow light indicates
that corner or the vehicle is low. When all 4 yellow lights are
out, the vehicle should be level. Use 2 control switches at a
NOTE: Extending the jacks in pairs, two front, two side, or two
rear, will lift the vehicle without twisting the frame.
Check that the vehicle is level with all four yellow lights out. If
the yellow lights are not working properly see Part 6 of the Repair
Steps.
NOTE: SOME SYSTEM HAVE A REMOTE "MASTER" AND "AUTOMATIC LEVEL/RETRACT" SWITCH PANEL.
time to make sure all 4 yellow lights will come on at different
times.


