HCT User Guide
page 19
Copyright © 2001 HutchColor, LLC
User_Guide_43.docx 2/10/19
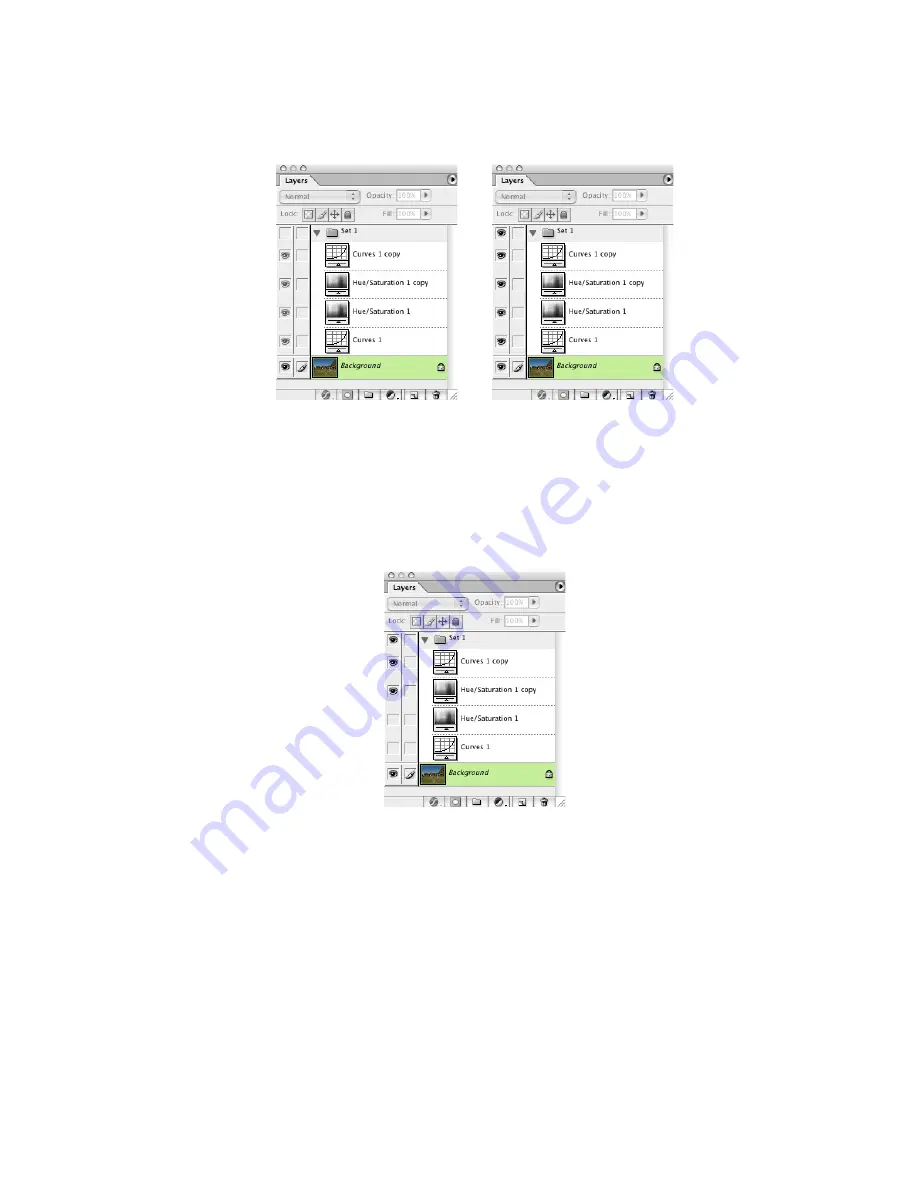
Switching the whole Layers Set off (left) and on (right) by clicking the Set 1 eyeball
•
Save a copy of the edited HCT image in PSD format with “Layers” checked to simplify any later
fine-tuning of your new profile.
Saving the modified HCT scan
•
Disable the “Curves 1” and “Hue/Saturation 1” layers by clicking their eyeballs, as shown in the
next diagram.
Switching off the correction layers leaves only the inverted layers active
NOTE
: The image of the HCT target should now look as if it had been created on Kodachrome film (or
whatever emulsion you are trying to profile). Typically this means it will look bluer than the actual HCT
transparency target in the viewer, but the actual difference depends on scanner and film involved.
•
Flatten the HCT image (Layer – Flatten Image) and “Discard hidden layers”.
•
Save a TIFF copy of the flattened HCT image. Name the flattened image something different
from the original scan, for example “
Pseudo-Kodachrome HCT”
.
Making the “pseudo-chrome” profile
•
Make a new profile from the modified HCT scan and include the name of the film type you are
working with (e.g. “Kodachrome”) in the profile title.
Содержание HCT
Страница 1: ...USER GUIDE Version 43 February 2019 ...


