background image

Low Temperature 

Excel

P/N 0467434_P 

5-1

HUSSMANN CORPORATION • BRIDGETON, MO 63044-2483 U.S.A.

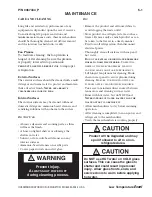
CARE AND CLEANING 

Long life and satisfactory performance of any 
equipment is dependent upon the care it receives. 
To ensure long life, proper sanitation and 
minimum maintenance costs, these merchandisers 
should be thoroughly cleaned, all debris removed 
and the interiors washed down, weekly. 

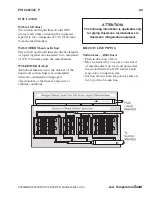
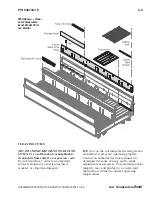
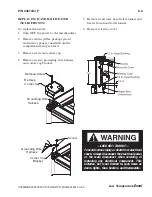
Fan Plenum

To facilitate cleaning, the fan plenum is 
hinged. After cleaning be sure the plenum 
is properly lowered into position 

or


produCt


loss


will


result


due to improper 

refrigeration.

Exterior Surfaces

The exterior surfaces should be cleaned with a mild 
detergent and warm water to protect and maintain 
their attractive finish. 

n

ever


use


abrasive


Cleansers


or


sCouring


pads

.

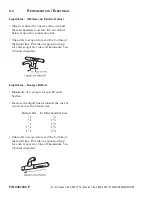
Interior Surfaces

The interior surfaces may be cleaned with most 
domestic detergents, ammonia based cleaners and 
sanitizing solutions with no harm to the surface.

D

o

 N

ot

 U

se

:

•  Abrasive cleansers and scouring pads, as these 

will mar the finish.

•  A hose on lighted shelves or submerge the 

shelves in water.

• Solvent, oil or acidic based cleaners on any 

interior surfaces.

• Ammonia-based cleaners on acrylic parts.
• Coarse paper towels on coated glass.

D

o

:

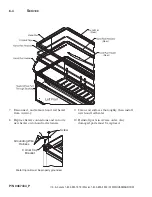
•  Remove the product and all loose debris to 

avoid clogging the waste outlet.

•  Store product in a refrigerated area such as a 

freezer. Remove only as much product as can 
be taken to the freezer in a timely manner.

• 

First turn off refrigeration, then disconnect 
electrical power.

•  Thoroughly clean all surfaces with soap and 

hot water. 


d

o


not


use


steam


or


high


water


pressure


hoses


to


wash


the


interior

.

 t

hese


will


destroy


the


merChandisers

’ 

sealing


Causing


leaks


and


Poor


PerformanCe

.

•  Lift hinged fan plenum for cleaning. Hook 

chain in rear panel to secure plenum during 
cleaning. 

B

e


sure


to


rePosition


the


fan


Plenum


after


Cleaning


merChandiser

.

•  Take care to minimize direct contact between 

fan motors and cleaning or rinse water.

•  Rinse with hot water, but do NOT flood. 
 

n

ever


introduCe


water


faster


than


the


waste


outlet


Can


remove


it

.

•  Allow merchandisers to dry before resuming 

operation.

•  After cleaning is completed, turn on power and 

refrigerant to the merchandiser.

•  Verify that merchandiser is working properly.

Prevent injury. 

a

lwaYs


shut


PoweR


off


during cleaning process.

MAINTENANCE

Product will be degraded and may 

spoil if allowed to sit in a non-

refrigerated area.

Do NOT use HOT water on COLD glass 
surfaces. This can cause the glass to 
shatter and could result in personal 
injury. Allow glass fronts, ends, and 
service doors to warm before applying 
hot water.

Содержание Excel F

Страница 1: ...ck Wall Island Merchandisers Installation Operation Manual Shipped with Merchandiser Data Sheets P N 0467434_P Excel Series December 2021 IMPORTANT Keep in store for future reference MANUAL I O EXCEL...

Страница 2: ...vice Contact your Hussmann representative to arrange servicing ANSI Z535 5 DEFINITIONS DANGER Indicate s a hazardous situation which if not avoided will result in death or serious injury WARNING Indic...

Страница 3: ...e Glass Clamp FWGH FWEGH 1 22 Installing Partitions 1 22 Installing End Assemblies 1 23 REFRIGERATION ELECTRICAL Refrigerant 2 1 Refrigerant Piping 2 1 Connection Location 2 1 Multiplexing 2 2 Line Si...

Страница 4: ...FIG FNG 5 4 Removing Scratches from Bumper 5 4 Cleaning Under Merchandisers 5 4 SERVICE General 6 1 Replacing Fan Motors and Blades 6 1 Replacing Electric Defrost Heater 6 2 Replacing Hand Rail Heater...

Страница 5: ...result in damage to equipment EXCEL INSTALLATION TOOL LIST Unloading From Trailer Lever Bar also known as a Mule Johnson Bar J bar Lever Dolly and pry lever Moving Dolly two for 12 ft merchandiser Se...

Страница 6: ...ged bumper tool information page 1 14 10 Added Replacing Hand Rail Heater page 6 3 to 6 4 REVISION E 1 Added ANSI definitions page iv 2 Added bumper removal instruction to Offsetting Bumper pages 1 12...

Страница 7: ...ve humidity is maintained at or below 55 Placing refrigerated merchandisers in direct sunlight near hot tables or near other heat sources could impair their efficiency Like other merchandisers these a...

Страница 8: ...lineup SERIAL PLATE LOCATION Direct a flashlight through the return air grille to locate the serial plate Be sure to position wide island merchandiser fronts properly The front of a wide island mercha...

Страница 9: ...the rider until the case has been positioned Once the rider is removed the case must be lifted NOT PUSHED to reposition To remove the rider remove bolts attaching rider to each leg MERCHANDISER LEVEL...

Страница 10: ...handiser For leveling the merchandiser front to rear a 24 inch 610 mm level should be placed on the flange of the merchandiser end frame Suggested level locations are shown in the following illustrati...

Страница 11: ...erchandisers NOTE To avoid removing concrete flooring begin lineup leveling from the highest point of the store floor JOINING INSTRUCTIONS Sectional construction means that two or more merchandisers m...

Страница 12: ...sket and merchandiser 2 Apply the 1 in 25 mm gasket across the end shoe as shown Each end of the gasket should extend onto the 15 8 inch gasket but not over Check to be sure that there are no gaps bet...

Страница 13: ...erchandisers and shim as necessary Panels and Top Rail must have equal overhang at each end of merchandiser NOTE Merchandisers must be leveled before joining Verify all top rails panels and bumper ret...

Страница 14: ...astic handrail if necessary NOTE H shaped joining clip is not used when joining end merchandisers with stainless steel rails Bumper retainer design that allows for slight lateral movement for both sol...

Страница 15: ...nt panel bumper retainer and top rail alignment before joining cases and shim cases as necessary NOTE Merchandiser must be leveled before joining Verify all top rails panels and bumper retainers of ea...

Страница 16: ...th stainless steel rails Bumper retainers allow for slight lateral movement for both solid and glass front merchandisers 6 Join bumper retainers Joining brackets are installed in factory Be sure to lo...

Страница 17: ...1 3 4 in Hex Head Screw V 5 16 18 X 3 1 2 in Hex Head Screw W 5 16 18 X 1 3 4 in Hex Head Screw X Used for End Case Only Y M6 1 0 X 25 mm Hex Head Screw Z Joining Clip Parent to Parent Installation K...

Страница 18: ...1 12 Installation P N 0467434_P U S Canada 1 800 922 1919 Mexico 1 800 890 2900 WWW HUSSMANN COM FNG to FNG FN to FN FG to FG F to F FIG to FIG FI to FI...

Страница 19: ...3 4 in Hex Head Screw V 5 16 18 X 3 1 2 in Hex Head Screw W 5 16 18 X 1 3 4 in Hex Head Screw X 5 16 18 X 4 1 2 in Tap Bolt Y M6 1 0 X 25 mm Hex Head Screw Z Joining Clip Parent to End Installation KE...

Страница 20: ...n the order shown until gaskets are compressed and merchandisers join smoothly Work from the lower front to lower back to upper back Fasten the upper front last When joining End merchandisers to Wide...

Страница 21: ...ndiser Tighten screws to secure the brackets Important Install splashguard brackets before installing drip piping REPLACING INTERIOR PANELS AND DISCHARGE AIR LOUVERS After case joining is complete and...

Страница 22: ...val Although bumpers can usually be removed by hand a simple tool to remove bumpers can be created by wrapping tape over the claw of a small pry bar as shown here The pry bar is available at most loca...

Страница 23: ...Cases with rubber bumper retainers may be removed by lifting the end as shown below Prying on the long edges is likely to damage the retainer For merchandisers with rubber retainers and glass fronts...

Страница 24: ...stall full length bumpers and internal trims offset across joints Make sure that no gaps exist between sections Continue installing the bumpers the length of the lineup 4 Once all except the last sect...

Страница 25: ...To install offsetting bumpers a Remove bumpers from cooler Measure bumpers and cut to appropriate length Use a miter box and fine tooth saw b Insert internal joint trims first Install bumpers offset...

Страница 26: ...e it flush against the starter without any gaps 3 Refer to 3 in illustration below Install a full length top rail leaving no gaps Continue installing the top rails the length of the lineup 4 Once all...

Страница 27: ...ve been installed refrigerate the merchandiser lineup for at least six 6 hours The last section of top rail should be kept inside a cooler or refrigerated merchandiser during this time This will allow...

Страница 28: ...o factory installed nut retainers The flue glass is packed inside of the case Remove the packaging and slide flue glass securely into top lip of flue glass retainer Fasten 4 bolts into nut retainers 7...

Страница 29: ...en End Assembly to Merchandiser a Use Bolt and washer to fasten end assembly to merchandiser in the same way the end merchandiser is fastened b Tighten in order shown for joining 4 Seal End to End Fra...

Страница 30: ...1 24 Installation P N 0467434_P U S Canada 1 800 922 1919 Mexico 1 800 890 2900 WWW HUSSMANN COM NOTES...

Страница 31: ...hat when the shroud is rotated into place it will be in the upright position The Figure 2 1 shows the correct orientation Be careful not to burn scorch or overheat the shroud when making connections O...

Страница 32: ...trol and compressor failure Interconnecting piping inside the merchandiser must be located as shown below for clearance beneath the display pans Alternately the interconnecting piping may be run outsi...

Страница 33: ...ndiser With EITHER of Above Additional insulation for the balance of the liquid and suction lines is recommended wherever condensation drippage is objectionable or the lines are exposed to ambient con...

Страница 34: ...t the bottom of the liquid line Provide an expansion loop for each evaporator take off minimum 3 in 76 mm diameter Liquid Line Koolgas Defrost Maximum of 6 evaporators per Branch System Increase the l...

Страница 35: ...let tube CDA SENSOR OPTIONAL Factory installed optional CDA sensor is located where the thermostat bulb would normally be located Its leads will be routed through the electrical wireway and to the rac...

Страница 36: ...NEC and local codes All electrical connections are to be made in the electrical wireway or Handy Box IDENTIFICATION OF WIRING Leads for all electrical circuits are identified by colored plastic bands...

Страница 37: ...m from either end of the merchandiser Depending on the model tees with clean outs or elbows are supplied for each merchandiser One water seal is supplied for each merchandiser The water seal must be i...

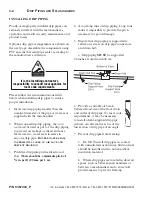
Страница 38: ...r lock and prevent draining 3 Pitch the drip piping in the direction of flow There should be a minimum pitch of 1 4 in per ft 20 mm per 1 m 4 Avoid long runs of drip piping Long runs make it impossibl...

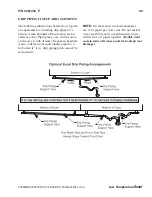
Страница 39: ...lustrations are for reference only Piping may vary with location and access to hub drain s Each merchandiser waste outlet must be individually piped to a hub drain if 1 4 in drip piping pitch cannot b...

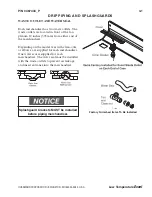
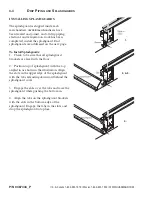
Страница 40: ...the next page To Install Splashguards 1 Check to be sure that all splashguard brackets are level with the floor 2 Position top of splashguard with the top angled in as shown in the illustration Align...

Страница 41: ...to ensure a secure installation 2 Apply a good contact cement to the cove trim and allow proper drying time according to the directions supplied with the cement 3 Install the trim to the splashguard...

Страница 42: ...guards 1 Check to be sure that all splashguard brackets are level with the floor 2 Position top of splashguard with the top angled in behind the lower panel bracket 3 Raise the splashguard enough to a...

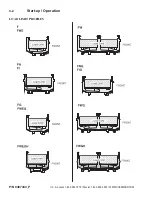
Страница 43: ...etc to block these grilles Do not use non approved shelving baskets display racks or any accessory that could hamper air curtain performance LOAD LIMITS Each merchandiser has a load limit decal Shelf...

Страница 44: ...4 2 Start up Operation P N 0467434_P U S Canada 1 800 922 1919 Mexico 1 800 890 2900 WWW HUSSMANN COM LOAD LIMIT PROFILES...

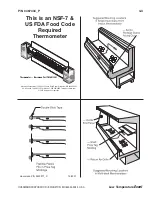
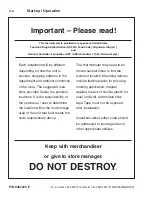
Страница 45: ...A This is an NSF 7 US FDA Food Code Required Thermometer Hussmann P N 0429971_C 10 2007 Hussmann Corporation 12999 St Charles Rock Road Bridgeton MO 63044 2483 U S Canada 1 800 922 1919 Mexico 1 800...

Страница 46: ...bove The thermometer may need to be moved several times to find the warmest location Mounting options include flexible plastic for price tag molding application magnet applied to back of flexible plas...

Страница 47: ...wels on coated glass Do Remove the product and all loose debris to avoid clogging the waste outlet Store product in a refrigerated area such as a freezer Remove only as much product as can be taken to...

Страница 48: ...remove clips from panel Lift out return air grilles The glass may be cleaned with most domestic detergents ammonia based cleaners and sanitizing solutions with no harm to the surface Never use abrasiv...

Страница 49: ...zed service technician if a coil is punctured cracked or otherwise damaged ICE in or on the coil indicates the refrigeration and defrost cycle is not operating properly Contact an authorized service t...

Страница 50: ...3 Reinstall in reverse order REMOVING SCRATCHES FROM BUMPER Most scratches and dings can be removed using the following procedure 1 Use steel wool to smooth out the surface area of the bumper or top r...

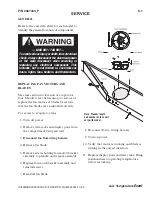
Страница 51: ...e screws holding fan motor bracket assembly to plenum and remove assembly 6 Replace fan motor bracket assembly and reinstall screws 7 Reinstall fan blade 8 Reconnect fan to wiring harness 9 Turn on po...

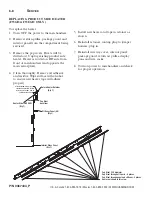
Страница 52: ...g the support tab far enough to free the heater element 6 Position the new heater and rotate the support tab back to the original position 7 Reconnect heater to wiring harness 8 Lower the fan plenum t...

Страница 53: ...ket 5 Remove hand rails hand rail retainers and heater from hand rail retainers 6 Remove wireway cover R emove Screw Grounding Wire Harness Corner Cap Bracket S crew R emove Screw R emove Corner Cap G...

Страница 54: ...r connections and re route new heater onto hand rail retainers 9 Clean rail surfaces thoroughly then install new hand rail heater 10 Reinstall parts in reverse order Any damaged parts must be replaced...

Страница 55: ...nections are located in left front corner of merchandiser near serial plate FWEG heater connections are at right rear corner of merchandiser 3 Remove screw and corner cap 4 Remove screws grounding wir...

Страница 56: ...e route new heater through internal front joint trim and onto hand rail retainers as shown 9 Clean rail surfaces thoroughly then install new hand rail heater 10 Reinstall parts in reverse order Any da...

Страница 57: ...d heater from the retainer 7 Clean thoroughly Remove all adhesive and residue Wipe surface with alcohol to ensure new heater tape will adhere properly 8 Install new heater and tape in retainer as show...

Страница 58: ...ce with alcohol to ensure new heater tape will adhere properly 5 Install new heater and tape in retainer as shown 6 Reinstall retainer routing plug to jumper harness plug in 7 Reinstall wireway cover...

Страница 59: ...to jumper harness plug in 6 Do the following to reattach exterior nosing extrusion to interior nosing extrusion There are two joining locations A and B that must be fastened to the interior nosing ex...

Страница 60: ...n Upright Screw Screw 8 x 3 8 8 x 3 8 ucture each side each side 14 14 ers Detail se Figure 19 Detail Screw Location Center Flue Heater Cover 13 Center Insulation 12 Field Installed Lit or Unlit 48 In...

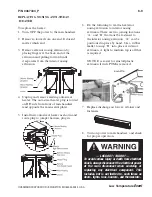
Страница 61: ...from the heater harness 4 Remove heater lead wire from interior panel supports 5 Remove all screws and clips then remove the heater 6 Position the new heater Apply new acrylic sealer to the underside...

Страница 62: ...tainer channel and the end posts 5 To install glass have one person hold each end of the thermopane glass assembly and care fully lower it into the retainer channel and end posts NOTE It may be necess...

Страница 63: ...P N 0467434_P 6 13 Low Temperature Excel HUSSMANN CORPORATION BRIDGETON MO 63044 2483 U S A...

Страница 64: ...glass have one person hold each end of the thermopane glass assembly and carefully lower it into the retainer channel and end posts Note It may be necessary to use a wide thin tool such as a putty kn...

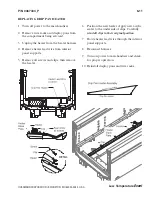
Страница 65: ...as shown in the following illustration 1 Rotate the hand rail in toward the case and press down 2 until back of hand rail snaps over back of retainer REPLACING PANEL EDGE GUARD Beginning at one end o...

Страница 66: ...ring replacement from the supply harness and LED shelf light harness 4 Install the new power supply and connect to harnesses 5 Replace cover NIGHT CURTAIN ADJUSTMENT FW S The night curtain return spri...

Страница 67: ...414 X Ergon 1570 E Northgate P O Box 2102 Irving TX 75062 Phone 1 800 527 9916 NOTE Hussmann Aluminum melts at 1125 F Aladdin 3 in 1 rod at 732 F X Ergon Acid core at 455 F Technique 1 Locate Leak 2 R...

Страница 68: ...ann Corporation Corporate Headquarters Bridgeton Missouri U S A To obtain warranty information or other support contact your Hussmann representative Please include the model and serial number of the p...

Отзывы: