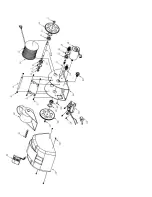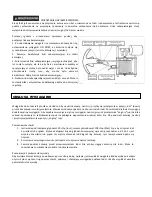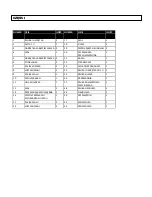
WINCH DESCRIPTION
INSTALLATION
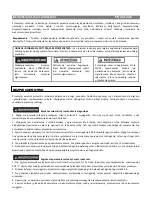
Anchoring hazards
1.
It is a best practice to tie the anchor line off to a cleat (or other secure point) when the boat is anchored. The winch
life may be reduced if it is used to hold the load of the boat while anchored. Damage to the motor could occur.
Tying to a cleat will extend winch life and prevent wear and possible failure.
2.
Do not pull a load greater than the rating for the winch. If the circuit breaker halts operation of the winch during
retrieval or deployment; the winch may have been overloaded and damage may result.
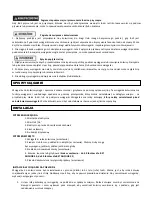
Entanglement hazards
1.
Never place any object or tool in the rope spool while retrieving or deploying the anchor. The tool or object could
become tangled in the rope resulting in serious injury and/or damage to the winch.
2.
Do not wear loose fitting clothing, scarves, or neck ties during the operation of the winch. Loose clothing may
become caught in moving parts resulting in injury or death.
3.
Do not operate the winch under the influence of drugs and/or alcohol.
The anchor winch retrieves and deploys river and mushroom anchors using nylon rope. This anchor winch features power-up
and free-fall down operation with a switch that can be installed at a remote location such as at the boat’s helm or on the
winch cover. The anchor winch has an anchor roller that must be installed before the winch is installed. The anchor roller
must be installed on-center and in-line with the rope spool.
TOOLS REQUIRED:
1.
Electric Drill
2.
5/16” Drill Bit
3.
Electrical Terminal Crimping Tool
4.
Adjustable Wrench
5.
Phillips Screw Driver
MATERIALS REQUIRED
1.
Winch and Anchor Roller (included)
2.
Seven 8mm bolts, washers and nuts (included). Longer bolts may be required if your deck is very thick.
3.
Shackle for anchor attachment (included)
4.
River or Mushroom anchor (not included –up to 40 lbs.)
5.
Battery Wire and Circuit Breaker (included)
INSTALLING ANCHOR WINCH ON BOAT DECK
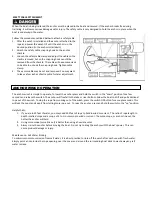
The anchor winch can be installed on the fore (front) or the aft (rear) of the boat. It is important that the anchor roller line up
with the centerline of the rope spool for proper operation. To mount the anchor winch, follow these steps:
1.
Locate anchor roller and winch on deck in desired location. The anchor roller must be located at the edge of the
deck and must extend over the edge to allow the anchor to clear the deck when it is docked in the anchor roller.
2.
Look below the deck and check for any obstructions underneath the desired anchor roller and winch locations.
Also make sure there is enough space for the rope spool on the winch to be centered on the anchor roller.
3.
Using a marker, mark the anchor roller and winch mounting holes on the deck. NOTE: There are several bolt
holes in winch frame to choose from. The easiest to use are the four slots (2 on each end of the frame). There
are also holes for the battery lead wires so you can route the wires through the deck if you desire.
4.
Remove winch and anchor roller. Drill the holes. Bolt to deck.
Use fender washers and/or marine plywood under
the deck to ensure the greatest strength and to spread the load
.


