background image

SERVICE

Service Hydraulics 

Changing Hydraulic Oil and Filters,  ZT-3100

32

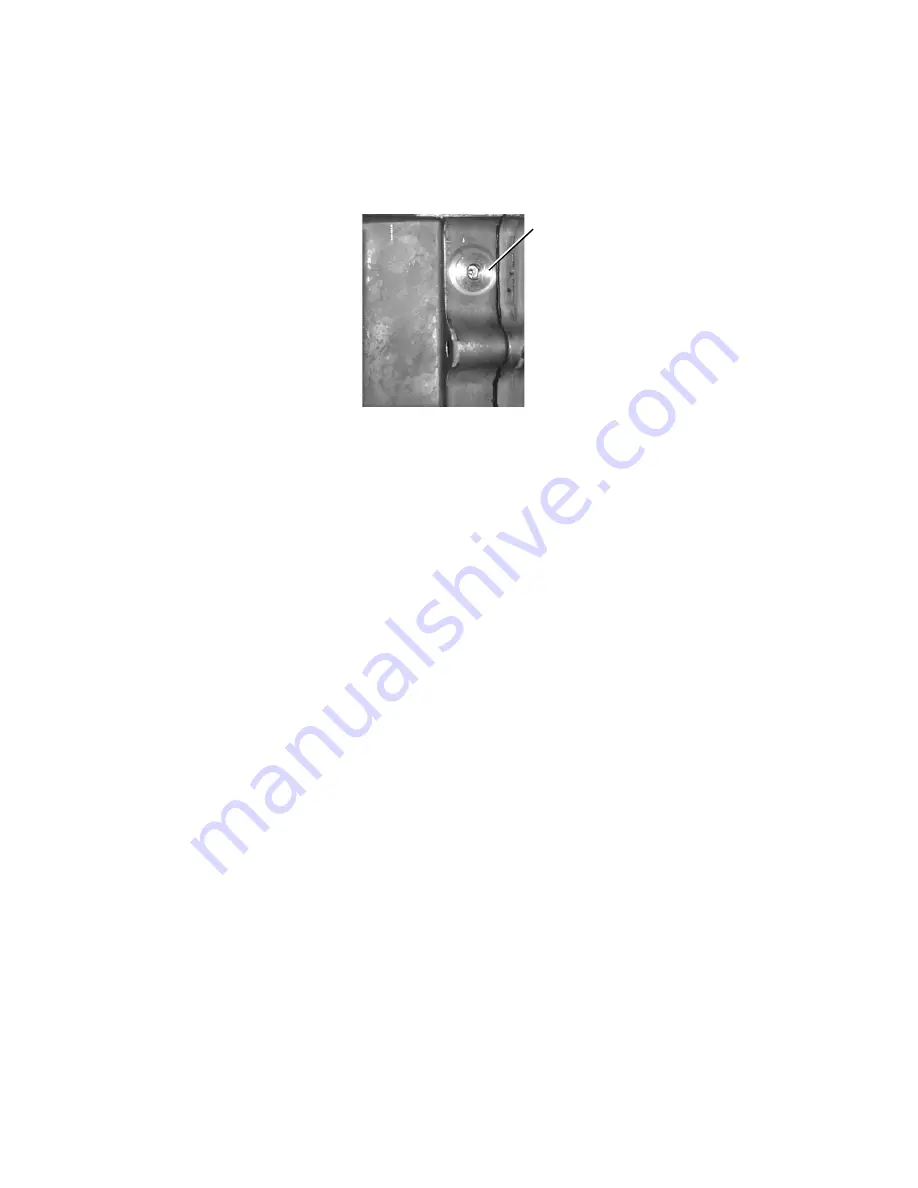
Purge port plug located 
on the top of the pumps

15.  Torque the purge port plugs to 180 in. lbs. 
16.  Continue to fill the transaxles through the expansion tank until the
        “Full Cold” line is reached.
17.  Re-install the expansion tank cap by hand.  Be careful to not overtighten.
18.  Continue with the following purge procedure.

PURGING PROCEDURE 

 *(If starting here,  Follow numbers 1-4 of the proceeding page before continuing).
19. Start engine and idle up to 1800 rpm.  Disengage parking brake.
20. Slowly move the directional controls in both forward and reverse directions
       (5 or 6 times).
21. Release bypass valves.
22. Again, slowly move the directional controls in both forward and reverse 
       directions (5 to 6 times).
23. Stop engine. Engage parking brake. Check the oil level, and add oil as required.
24. It may be necessary to repeat Steps 19  thru 23 until all the air is completely 
       purged from the system.  
25. Re-install rear tires and lower machine.
26.  Operate machine under normal conditions,  when the transaxle operates
        at normal noise levels and moves smoothly forward and reverse at normal speeds, 
        then the transaxle is considered purged.  If nessesary, repeat the purge procedure.

NOTE: Due to the effects air has on hydrostatic drive systems, 
 

it is critical that air is purged from the systems.

The resulting symptoms of air in the hydrostatic systems may be:
 

1. Noisy operation.


2. Lack of power or drive after short term operation.


3. High operation temperature and excessive expansion of oil.

Содержание BLO-VAC 36

Страница 1: ...Commercial Debris Blower Vacuum September 19 2009 Hurricane Inc Muskegon Michigan Operator s Manual TM Patents Pending Model 36 New for 2010...

Страница 2: ......

Страница 3: ...__________________________________ PRODUCT IDENTIFICATION NUMBER Model Number ______________________________________________ Serial Number _______________________________________________ ENGINE MODEL...

Страница 4: ......

Страница 5: ...Operator s Manual This manual is an important part of your machine and should remain with the machine when you sell it Use the safety and operating information in the machine operator s manual to oper...

Страница 6: ...ermine what accessories and attachments are needed to properly and safely perform the job Only use accessories and attachments approved by the manufacturer Wear appropriate clothing including hard hat...

Страница 7: ...feet away from the Intake and discharge Look behind and down before backing up to be sure of a clear path Never carry passengers and keep pets and bystanders away Slow down and use caution when making...

Страница 8: ...orking area Study working area Set up a safe blowing pattern Do not blow where traction or stability is doubtful Test drive through area with blower not running Slow down when you travel over rough gr...

Страница 9: ...he machine Instruct all operators not to give children a ride on the machine or in an attachment Keep children indoors out of the work area and in the watchful eye of a responsible adult other than th...

Страница 10: ...nes can fail due to physical damage kinks age and exposure Check hoses and lines regularly Replace damaged hoses and lines Hydraulic fluid connections can loosen due to physical damage and vibration C...

Страница 11: ...drain indoors Park machine on level ground Never allow untrained personnel to service machine Understand service procedure before doing work Use jack stands or lock service latches to support compone...

Страница 12: ...unt a tire without the proper equipment and experience to perform the job Always maintain the correct tire pressure Do not inflate the tires above the recommended pressure Never weld or heat a wheel a...

Страница 13: ...uel powered equipment from the truck or trailer and refuel it on the ground If this is not possible then refuel such equipment with a portable container rather than from a fuel dispenser nozzle Keep t...

Страница 14: ...ential to the safe and productive use of this machine Parking Brake This photo shows the parking brake engaged with all other controls in the off neutral position The parking brake should be in this p...

Страница 15: ...witch Left Wheel Hydrostat Control Throttle Control Choke Control Fuel Fill Fuel Cap w Guage Parking Brake Handle Brake OFF Oil Alert Front Deflector Control Open Close Rear Deflector Control Open Clo...

Страница 16: ...d Step onto the operator platform disengage parking brake grasp the handle bar to operate the machine Engage parking brake before stepping off the machine Fuel shutoff Air Cleaner Hydraulic Reservoir...

Страница 17: ...p bypass Valves To bypass lift lever remove R key from storage location and install in lower hole as shown Hydraulic Pumps Change hydraulic oil every 400 hours Underside view of machine Misc Controls...

Страница 18: ...rm with motion control levers in the neutral position 4 Turn key switch to the start position Result The engine must not crank Testing Park Brake Switch Start 1 Disengage parking brake 2 Turn key swit...

Страница 19: ...s platform 7 Release the motion control levers allowing them to return to the neutral position Result The engine must stop Testing the Parking Brake 1 Stop machine on a 17 slope 30 grade facing downh...

Страница 20: ...en position after engine start Starting Using the Throttle and Choke Choke Lever Throttle Lever Blower speed and power can be controlled with the throttle control The Tach hour meter shows the engine...

Страница 21: ...ater in fuel can cause engine damage Clean dirt and debris from the fuel tank opening Use clean fresh stabilized fuel Fill the fuel tank at the end of each day s operation to keep condensation out of...

Страница 22: ...everse or reverse to forward position rapidly Sudden direction changes could cause loss of control or damage the machine The functions of the hydrostatic motion control levers are Forward and reverse...

Страница 23: ...ntrol lever further forward than the left motion control lever For a gentle right turn Push the left motion control lever further forward than the right motion control lever For a sharp left turn Pull...

Страница 24: ...cinity Flying debris may damage harm or cause injury to people or objects in air flow range Keep a safe distance between two or more operators and machines when working together in the same areas KEEP...

Страница 25: ...er can see the deflector gear racks and judge the position of the deflectors These photos show the Deflectors in both the closed and open positions With the deflectors at about half open like the fron...

Страница 26: ...gine shrouds as needed Clean behind engine shrouds and exposed fins Clean behind engine cooling fan screen Every 100 Hours Change engine oil and filter Check hydraulic pump drive belt Clean and gap sp...

Страница 27: ...aily could lead to serious engine problems if oil level is low Check oil level before operating Keep oil level between the FULL and the ADD marks Check oil level when engine is stopped level and is co...

Страница 28: ...between the ADD and FULL marks If oil is low add oil to bring oil level no higher than the FULL mark on dipstick If oil level is above the FULL mark drain to proper level Changing Engine Oil and Filte...

Страница 29: ...muffler 10 Apply a film of clean engine oil to gasket of new filter 11 Install filter Turn filter clockwise until gasket makes contact with mounting surface Tighten 1 2 to 3 4 turn after gasket conta...

Страница 30: ...wash paper element Do not attempt to clean paper element by tapping against another object Do not use pressurized air to clean element Do not clean elements only replace element if it is very dirty d...

Страница 31: ...onnecting hoses to new fuel filter Make sure fuel filter is installed in the proper direction 8 Install hose clamps 9 Turn ON fuel shut off valve 10 Start engine and check for fuel leaks Replacing Fue...

Страница 32: ...if the engine has been running Allow the engine to cool before servicing or working near the engine and components Check spark plugs at the intervals recommended in the Service Intervals section See t...

Страница 33: ...only Mobil 1 synthetic 15W 50 oil or equivalent Checking Hydraulic Oil Level Hydraulic Oil tank and fill IMPORTANT Check oil level in reservoir tank when oil is cold Do not overfill oil reservoir tank...

Страница 34: ...and filter guard Clean any loose debris from around the perimeter of the filter Place drain pan beneath the oil filter 7 Remove the oil filter from the transaxle Dispose of used filter properly 8 Afte...

Страница 35: ...22 Again slowly move the directional controls in both forward and reverse directions 5 to 6 times 23 Stop engine Engage parking brake Check the oil level and add oil as required 24 It may be necessary...

Страница 36: ...end wrench on the idler pulley bolt pull against tensioner pulley spring to gain slack in belt 5 Pull belt from left side and slip belt off from the left pump pulley and then the right pump pulley 6 R...

Страница 37: ...Using a 3 4 10 x 6 all thread tap bolt screw bolt into the nut welded on the impeller to remove impeller from the engine crankshaft Continue to tighten bolt until impeller slides off engine shaft Rem...

Страница 38: ...ck machine until both brake adjustment rods pop up then pull up on both rods if rods move up increase spring tension by turning brake engage nut clockwise until rod is held up by spring Do not over ti...

Страница 39: ...e jam nuts on the top and bottom of the adjuster Note The top nuts are left hand thread and the bottom are right hand thread 6 Holding the control forward to the handle bar rotate the adjuster to get...

Страница 40: ...rotates backward rotate the neutral plate counterclockwise If right drive wheel rotates forward rotate the neutral plate counterclockwise If right drive wheel rotates backward rotate the neutral plat...

Страница 41: ...ighten the nuts 5 Make sure to set both sides equally 6 After making adjustments check machine reverse operation for excessive speed and tracking Re adjust if necessary CAUTION Avoid injury Setting th...

Страница 42: ...above the recommended pressure Do not weld or heat a tire and rim assembly Heat can cause an increase in air pressure resulting in an explosion Welding can structurally weaken or deform the rim Do not...

Страница 43: ...ectrical damage Make sure replacement fuse is the correct rating Fuse holder 4 Open the fuse holder by pulling it apart carefully 5 Remove the fuse and replace with the same type and rating The fuse r...

Страница 44: ...talling battery Removing and Installing Battery 1 Park machine safely 2 Remove battery box cover strap 3 Remove box cover 4 Disconnect the Negative battery cable first 5 Disconnect the Positive batter...

Страница 45: ...o 60 F before starting or charging Using Booster Battery or Jump Starting 1 Park machine safely 2 Remove battery box cover strap 3 Remove box cover 4 Connect the positive cable to the discharged batte...

Страница 46: ...r before suspecting machine problems Suppliers blend fuels differently and changing suppliers will generally solve any performance problems Fuel blended with alcohol or ether may contribute to perform...

Страница 47: ...ed correctly Replace spark plugs Choke applied incorrectly Engine knocks Engine oil level low Fuel is bad Fill tank with fresh fuel Idle speed too slow Increase engine rpms Engine overheats Clean cool...

Страница 48: ...Park brake not engaged or switch is faulty Loose or corroded battery connections Motion controls not in neutral or neutral saftey switches faulty Key switch starter relay or starter faulty See your a...

Страница 49: ...s in a neutral position Needs motion control linkage neutral center adjustment Machine Excessive machine vibration Engine speed too slow Increase engine rpms Drive belt not tensioned correctly Impelle...

Страница 50: ...ts to prevent rust 6 Check tire pressure Preparing Machine for Storage Preparing Fuel and Engine For Storage Fuel If you have been using Stabilized Fuel add stabilized fuel to tank until the tank is f...

Страница 51: ...lose fuel shut off valve 9 Store the battery in a cool dry place where it will not freeze NOTE The stored battery should be recharged every 90 days 10 Store the vehicle in a dry protected place NOTE P...

Страница 52: ...dash Fuel Capacity 8 0 gallons Steering and Brakes Steering Dual Hydraulic Control Levers Park Brake Drum brakes Tires Rear 18 x 6 5 8 Front 11 x 4 5 Inflation Rear Maximum 20 28 psi Inflation Front M...

Страница 53: ...ARTING 17 FUELING 18 OPERATING 19 20 BLOWER 21 22 SERVICE INTERVALS 23 SERVICE ENGINE 24 29 SERVICE HYDRAULICS 30 32 SERVICE BELT 33 SERVICE BRAKES 35 SERVICE CONTROLS 36 38 SERVICE TIRES 39 SERVICE E...

Отзывы: