background image

41866-01  02/20/2004 

© 2004 Hunter Fan Company

12

12

12

12

12

controlling the light

cleaning your ceiling fan

caring for finishes

For cleaning, a soft brush or lint-free cloth should be used to pre-
vent scratching the finish.  A vacuum cleaner brush nozzle can re-
move heavier dust.  Surface smudges or an accumulation of dirt
and dust can easily be removed by using a mild detergent and a
slightly  dampened cloth.  An artistic agent may be used, but never
use abrasive cleaning agents as they will damage the finish.

caring for blades

Wood finish blades should be cleaned with a furniture polishing
cloth.  Occasionally, a light coat of furniture polish may be applied
for added protection and beauty.  Painted and high-gloss blades
may be cleaned in the same manner as the fan finish.

troubleshooting

Problem:  Nothing happens; fan does not move.

1.

Turn power on,  replace fuse, or reset breaker.

2.

Loosen canopy, check all connections according to the
w

w

w

w

wir

irir

ir

irin

in

in

in

ing t

g t

g t

g t

g thhhhhe f

e f

e f

e f

e faaaaannnnn section.

3.

Check the plug connection in the switch housing.

4.

Remove the shipping bumpers.

5.

Install a new battery in the remote.

6.

Change dip switch settings.

Problem:  Noisy operation.

1.

Tighten the blade bracket screws until snug.

2.

Tighten the blade screws until snug.

3.

Check to see if the blade is cracked.  If so, replace all the
blades.

4.

Change to an approved speed control.

5.

Check and tighten the screws in the switch housing
mounting plate and in the upper and lower switch hous-
ing.

Problem:  Excessive wobbling.

1.

If your fan wobbles when operating, use the enclosed bal-
ancing kit and instructions to balance the fan.

2.

Tighten all blade and/or blade iron screws.

3.

Turn power off, support fan very carefully, and check that
the hanger ball is properly seated.

If you need parts or service assistance, please call 888-830-1326 or
visit us at our WEB site at http://www.hunterfan.com.

Hunter Fan Company
2500 Frisco Avenue
Memphis, Tennessee 38114

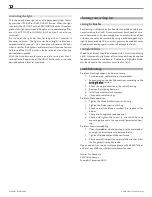
Turn the up and down light on or off independently from the fan 
by press the UP LIGHT or DOWN LIGHT button.  When the light 
is on,press the UP LIGHT or the DOWN LIGHT button 1 time for a 
gradual off (light dims from full brightness to completely off) or 
press the UP LIGHT or DOWN LIGHT button 2 times for an 
instant off.
Press one of the light buttons for longer than 1 second, it 
becomes a dimmer.  The light varies from 'bright' to 'dim' over 
approximately 8 seconds.  This sequence will reverse the light 
when it reaches the brightest or dimmest level if you continue to 
hold one of the LIGHT buttons.  Release the button when the 
desired level is reached.
With the Auto Resume feature, a quick (pressing less than 1 
second) on/off operation of the LIGHT buttons maintains the 
desired brightness level set previously.

Содержание State Street

Страница 1: ... 2004 Hunter Fan Company 41864 01 02 19 2004 1 41866 01 02 20 2004 ...

Страница 2: ... ne e e e el l l l l A A A A All w ll w ll w ll w ll wir ir ir ir irin in in in ing mu g mu g mu g mu g mus s s s st b t b t b t b t be in a e in a e in a e in a e in ac c c c cc c c c co o o o or r r r rd d d d da a a a an n n n nc c c c ce w e w e w e w e wi ii i it t t t th n h n h n h n h na a a a at t t t ti ii i io o o o on n n n na a a a al a l a l a l a l an n n n nd d d d d l ll l lo o o ...

Страница 3: ...t t t t te e e e e section If you plan to use an existing fan site complete the following check list for the support brace ceiling hole outlet box and wiring If you cannot check off every item see the p p p p pr r r r re e e e ep p p p pa a a a ar r r r rin in in in ing a n g a n g a n g a n g a ne e e e ew f w f w f w f w fa a a a an si n si n si n si n sit t t t te e e e e sec tion for instructi...

Страница 4: ...da a a a an n n n nc c c c ce w e w e w e w e wi ii i it t t t th n h n h n h n h na a a a a t t t t ti ii i io o o o on n n n na a a a al a l a l a l a l an n n n nd l d l d l d l d lo o o o oc c c c ca a a a al e l e l e l e l el ll l le e e e ec c c c ct t t t tr r r r ri ii i ic c c c ca a a a al c l c l c l c l co o o o od d d d de e e e es a s a s a s a s an n n n nd A d A d A d A d AN N N N...

Страница 5: ... e do o o o ow w w w wnr nr nr nr nro o o o od d d d d 2 Insert the downrod through the canopy the canopy trim ring the arm mounting ring and the adapter cover as shown in Figure 12 F F F F Fi ii i ig g g g gur ur ur ur ure 12 I e 12 I e 12 I e 12 I e 12 In n n n ns s s s st t t t ta a a a allin llin llin llin lling t g t g t g t g th h h h he d e d e d e d e do o o o ow w w w wnr nr nr nr nro o o...

Страница 6: ... as s s s ss s s s se e e e emb mb mb mb mbl ll l ly y y y y T T T T Tw w w w wi ii i is s s s st t t t tin in in in ing m g m g m g m g ma a a a ay c y c y c y c y ca a a a au u u u us s s s se a e a e a e a e a h h h h ho o o o oo o o o ok t k t k t k t k to b o b o b o b o br r r r re e e e ea a a a ak o k o k o k o k of f f f ff o f o f o f o f of t f t f t f t f th h h h he a e a e a e a e ar...

Страница 7: ... ll l le e e e ec c c c ct t t t tr r r r ri ii i ic c c c ci ii i ia a a a an n n n n F F F F Fi ii i ig g g g gur ur ur ur ure 18 W e 18 W e 18 W e 18 W e 18 Wir ir ir ir irin in in in ing t g t g t g t g th h h h he f e f e f e f e fa a a a an n n n n installing the canopy 1 Rotate the fan 180º clockwise from the initial position when hanging the fan The arrows on the hanger ball and on the cei...

Страница 8: ...5 A e 25 A e 25 A e 25 At t t t tt t t t ta a a a ac c c c ch h h h hin in in in ing t g t g t g t g th h h h he b e b e b e b e bl ll l la a a a ad d d d de t e t e t e t e to t o t o t o t o th h h h he b e b e b e b e bl ll l la a a a ad d d d de ir e ir e ir e ir e iro o o o on a n a n a n a n an n n n nd d d d d m m m m me e e e ed d d d da a a a alli lli lli lli llio o o o on n n n n If you ...

Страница 9: ...ta a a a allin llin llin llin lling w g w g w g w g wi ii i it t t t th h h h ho o o o ou u u u ut t t t t t t t t th h h h he li e li e li e li e lig g g g gh h h h ht f t f t f t f t fi ii i ix x x x xt t t t tur ur ur ur ure e e e e setting up the remote F F F F FC C C C CC I C I C I C I C In n n n nf f f f fo o o o or r r r rm m m m ma a a a at t t t ti ii i io o o o on n n n n 1 This device c...

Страница 10: ...t t t s s s s sw w w w wi ii i it t t t tc c c c ch h h h h 4 Continue to in in in in ins s s s st t t t ta a a a allin llin llin llin lling t g t g t g t g th h h h he b e b e b e b e ba a a a at t t t tt t t t te e e e er r r r ry y y y y installing the remote cradle on the wall 1 Locate a 2 x 4 wall stud in a convenient location 2 Orient the remote cradle as shown in Figure 33 over the 2x4 stud...

Страница 11: ...s well NOTE The s s s s se e e e et t t t tt t t t tin in in in ing t g t g t g t g th h h h he dip s e dip s e dip s e dip s e dip sw w w w wi ii i it t t t tc c c c ch h h h he e e e es s s s s section mustberepeated asdescribedaboveforthepropersettingofthedipswitchcode in the receiver and remote NOTE The receiver has a memory function that retains the last dip switch code setting The setting wi...

Страница 12: ...s until snug 3 Check to see if the blade is cracked If so replace all the blades 4 Change to an approved speed control 5 Check and tighten the screws in the switch housing mounting plate and in the upper and lower switch hous ing Problem Excessive wobbling 1 If your fan wobbles when operating use the enclosed bal ancing kit and instructions to balance the fan 2 Tighten all blade and or blade iron ...

Отзывы: