background image

www.HunterFan.com

1.888.830.1326

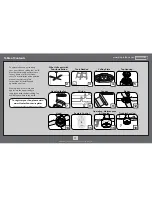
Hood

Feed the wire plug through the center 

hole of the hood, then wrap keyhole 

slots around the screws and twist 

counterclockwise.

Screw two housing assembly screws from 

the   hardware bag halfway into the 

motor housing. It does not matter which 

two screw holes you choose.

Insert the third screw, found in the   

hardware bag, into place and then tighten 

all three screws.

Make sure the hood is securely attached to the 
mounting plate. Failure to properly secure all 3 
assembly screws could result in the switch housing 

fixture falling.

13

M3608-01 • 05/09/16 • © 2016 Hunter Fan Company

Содержание M3608-01

Страница 1: ...your home or office for many years This installation and operation manual contains complete instructions for installing and operating your fan We are proud of our work and appreciate the opportunity t...

Страница 2: ...ou are unfamiliar with wiring use a qualified electrician c 2 Use only Hunter replacement parts This equipment has been tested and found to comply with the limits for a Class B digital device pursuant...

Страница 3: ...Wire Strippers If mounting to a support structure you will also need these tools Do not discard the hardware bags or mix parts from different bags Make note of the symbol printed on each hardware bag...

Страница 4: ...ncluded when securing to support structure with approved electrical outlet box Drill 9 64 pilot holes in support structure to aid in securing ceiling plate with hardware found in the hardware bag Use...

Страница 5: ...th the top housing and the adapter Canopy Adapter Thread the wires through the top housing Place the top housing onto the motor housing so that the holes in the top housing lineup with the holes in th...

Страница 6: ...in the smaller screw hole These screws can be found in the hardware bag Grounding Screw Top Housing Screws Top Housing continued 8 3 8 8 3 8 C U T S T R I P not to scale The wires can be cut but leave...

Страница 7: ...he ceiling plate Note Fan style may vary Place the slots over the ceiling plate hooks to hang the fan Ceiling Plate Hook Ceiling Plate Hook Note To hang the fan you must tilt the canopy to an almost v...

Страница 8: ...he outlet box Refer to CAUTION c 1 on pg 2 Note To connect the wires hold the bare metal leads together and place a wire connector over them then twist clockwise until tight Receiver FROM CEILING FROM...

Страница 9: ...llow blue Using the orange wire connectors from the remote control hardware bag connect the blue wire from the receiver to the blue wire or possibly black with white stripe wire from the fan Connect t...

Страница 10: ...d the canopy up with the screw holes aligned Partially install two canopy screws found in the hardware bag into the holes opposite the ceiling plate hooks Canopy Screw Ceiling Plate Hooks Screw Holes...

Страница 11: ...of the canopy The canopy trim ring will snap and lock into place Note Should you need to remove the trim ring press firmly on opposite sides of the trim ring The tabs will flex out releasing the canop...

Страница 12: ...com 1 888 830 1326 Blades Attach each blade to a blade iron using three blade washers found in the hardware bag and three blade assembly screws found in the hardware bag 12 M3608 01 05 09 16 2016 Hunt...

Страница 13: ...the hardware bag halfway into the motor housing It does not matter which two screw holes you choose Insert the third screw found in the hardware bag into place and then tighten all three screws Make s...

Страница 14: ...to line up the colored markings on the connectors Insert the longer screws found in the hardware bag into place and then tighten all three screws CONGRATULATIONS YOU RE DONE Install the bulb into the...

Страница 15: ...Head Screw Battery Door ON Turn Power The remote transmitter should already be paired to the receiver and ready to use Note If your need to pair your remote turn fan power off and back on at the wall...

Страница 16: ...he lights go out To use Safe Exit Safe Exit Rocker Style Plate Switch Cover Plate Removed Tabs To install the transmitter cradle remove the two screws holding the switch cover plate Do not remove the...

Страница 17: ...ushes or cloths to prevent scratching Cleaning products may damage the finishes Reverse Switch To switch the direction of air flow move the reverse switch to the opposite position Operation Maintenanc...

Страница 18: ...ht to ensure that it is engaged Check the circuit breaker to ensure the power is turned on Make sure the blades spin freely Turn off power from the circuit breaker then loosen the canopy and check all...

Отзывы: