background image

2

532594-2_A

SOLIX® SERIES IN-DASH MOUNTING Installation Guide

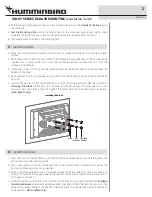
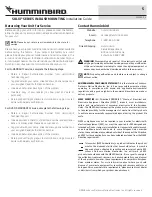
4.  Carefully begin cutting toward the cut line, and continue cutting to the

 inside of the line

 around 

the template.

5. 

Test the Mounting Hole: 

Install the control head in the mounting hole to test the fit. Make 

adjustments to the mounting hole as needed. Remove the template when finished. 

6.  Thoroughly clean and deburr the mounting hole.

3

 | 

Install the Studs

1.  Place the control head on a towel or cloth, with the screen facing down, on a stable and level 

surface.

2.  Determine which size stud to use based on the thickness of your dashboard. The hardware bag 

includes four 2" studs and four 2.5" studs. Studs should protrude no more than 1/4" from the 

surface of the bracket.

3.  Install the 4 studs (#10-24) into the threaded holes on the control head until they contact the 

bottom of the hole.

4.  Back out each stud 3 full revolutions to prevent it from contacting the back of the control head 

housing.

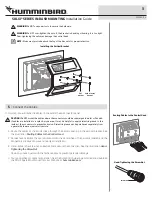
5.  Install a flat washer (#10) and serrated hex nut (#10-24) onto each stud. See the illustration 

Installing the Studs

. Hold each stud in place, and finger-tighten the assembled nut until 

secured. Then, use a 3/8" wrench to tighten the assembled nut an additional 1/2 revolution. 

Hand-tigthen only!

Installing the Studs

serrated 

hex nut

flat 

washer

stud

4


|

  Install the Bracket

1.  From the front of the dashboard, with the control head screen facing out, carefully lower the 

control head into the mounting hole. 

2.  Press down lightly on the control head. Confirm the control head is seated flush against the 

dashboard. Make adjustments, as needed.

3.  From under the dashboard, insert the vertical bracket holes over the studs. Ensure the top and 

bottom of the vertical bracket is evenly aligned with the horizontal edges of the cutout and is 

flush against the dash. 

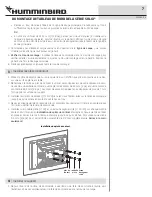
4.  Install a flat washer (#10) and nylon insert hex nut onto each stud. See the illustration 

Installing 

the Vertical Bracket

. Use a 3/8" adjustable socket or wrench to hand-tighten the nuts until they 

contact the washers. None of the washers should be loose. Then tighten the nuts an additional 2 

full revolutions. 

Hand-tighten only!

Содержание SOLIX series

Страница 1: ...hock vibration and water Depth The mounting area should have a depth of 4 102 mm to allow space for the control head and cables Ventilation The area beneath the mounting surface should be well ventila...

Страница 2: ...a flat washer 10 and serrated hex nut 10 24 onto each stud See the illustration Installing the Studs Hold each stud in place and finger tighten the assembled nut until secured Then use a 3 8 wrench t...

Страница 3: ...ease to the inside of the connectors to prevent corrosion Dielectric grease can be purchased separately from a general hardware or automotive store 1 Route the cables to the control head through the b...

Страница 4: ...w limitations on an implied warranty or the exclusion of incidental or consequential damages so the above exclusions may not apply to you You may also have other rights which vary from state to state...

Страница 5: ...serial number or attempt to repair the original equipment or accessories by unauthorized individuals will void the warranty NOTE Product specifications and features are subject to change without noti...

Страница 6: ...t ou moteur lectrique pouvant provoquer des interf rences lectroniques Stabilit La zone de montage doit tre prot g e des vagues des chocs des vibrations et de l eau Profondeur La zone de montage doit...

Страница 7: ...e surface plane et stable 2 D terminez la taille du plot de contact utiliser selon l paisseur de votre tableau de bord Le sac de quincaillerie comprend quatre plots de contact de 51 mm 2 po et quatre...

Страница 8: ...propri e Installation du support vertical crou hexagonal insert en nylon rondelle plate 5 Branchement des c bles Danscette tape vousacheminerezlesc blesverslepanneauduconnecteurdelat tedecommande MISE...

Страница 9: ...rriez galement b n ficier d autres droits qui varient d une province d un tat une un autre Politique de service apr s vente de Humminbird M me si vous n aurez probablement jamais utiliser notre politi...

Страница 10: ...uniquement par un personnel d entretien autoris Toute modification du num ro de s rie ou r paration par un personnel non autoris entra nera l annulation de la garantie REMARQUE Les caract ristiques et...

Отзывы: