CONTROL FUNCTIONS
The LCR W unit uses only four buttons to control all functions. When any button is
pressed, an audible "chirp" will verify the control input.
POWER, as previously discussed, powers the LCR W for normal
operation. Also, if the unit is powered off, press and hold POWER until you hear a
continuous "chirp" to enable simulator operation as discussed in "Simulator
Operation." Pressing POWER when the unit is in normal or simulator operation will
power the unit off.
MENU brings a menu on-screen for adjustment, or if a menu is already
present, the next menu in sequence will appear. Menus will go off-screen and
normal operation will resume after a short period of time.
UP arrow selects the next larger or next sequential adjustment within the
menu. Holding an Arrow button down will cause the unit to continue to make the
adjustment, until a limit is reached, and the limit alarm sounds.
DOWN arrow selects the next smaller adjustment within the menu.
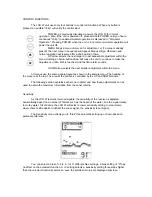
All menus use the same general layout as shown in the sample menu. The heading of
the menu is at the top. The area at the bottom is controlled by the UP and DOWN arrows.
The following section explains each menu in detail, and how these adjustments can be
used to obtain the maximum information from the sonar returns.
Sensitivity
As the LCR W receives returned signals, the sensitivity of the receiver is adjusted
automatically based on a number of factors such as the depth of the water, and the signal clarity.
In murky water, full of debris, the LCR W will select a lower sensitivity setting. In clear water,
where there is little debris to defract the sonar signal, the sensitivity is set higher.
The Sensitivity menu allows you to "bias" this automatic setting up or down based on
personal preference.
You can select a bias of +5 to -5, for 11 different bias settings. A bias setting of "0" has
no effect on the automatic function. A +3 setting selects a sensitivity setting three steps higher
than the unit would normally select, so even the smallest returns are displayed onscreen.
Содержание LCR W
Страница 1: ......
Страница 8: ......
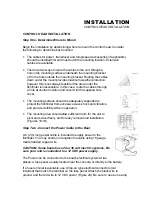
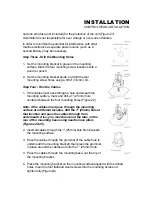
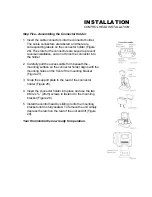
Страница 10: ...mounting bracket Drill this hole and install the screw after final testing and adjustments have been completed...


