background image

MENU Key 

The MENU key is used to access the menu system. 

Start-Up Options Menu 

- Press the MENU key during the power up sequence to view

the Start-Up Options menu. 

X-Press

TM

Menu

-  Press the MENU key once for the Sonar X-Press

TM

Menu. The X-Press

TM

Menu allows you to access frequently-used settings without having to navigate through
the whole menu system. When the X-Press

TM

Menu is displayed, you can use the UP or

DOWN Cursor keys to move to a particular menu choice. As soon as you alter a
parameter (using the RIGHT or LEFT Cursor keys) the X-Press

TM

Menu will collapse

temporarily, and the screen will update if it is affected by your menu setting change,
allowing you to see the effects of your action immediately. Reactivate the X-Press

TM

Menu by using the UP or DOWN Cursor keys.

Main Menu

- Press the MENU key twice for the tabbed Main Menu System. The Main

Menu System is organized under tabbed headings to help you find a specific menu
item quickly: Alarms, Sonar, Setup, Views and Accessories tabs are part of your
tabbed Main Menu System. Use the LEFT or RIGHT 4-WAY Cursor Control  key to
select a tab; then use the DOWN or UP key to select the menu item, and the LEFT or
RIGHT key to alter a menu setting. 

4-WAY Cursor Control Key 

The 4-Way Cursor Control Key has multiple functions, depending on the
situation:

• Use the DOWN or UP arrow keys to select a menu choice from the menu list,

then use the LEFT or RIGHT arrow keys to change a menu setting. 

NOTE:

Menu choices are implemented and saved immediately - no further action is required.

• In all Sonar views but the Big Digits view,  pressing any 4-WAY Cursor Control

key will activate Freeze Frame and will then allow you to position the cursor
on the display.

18

17

Key Functions

Your 700 Series™ Fishing System user interface consists of a set of easy-to-use keys
that work with various on-screen views and menus to give you flexibility and control
over your fishing experience. 

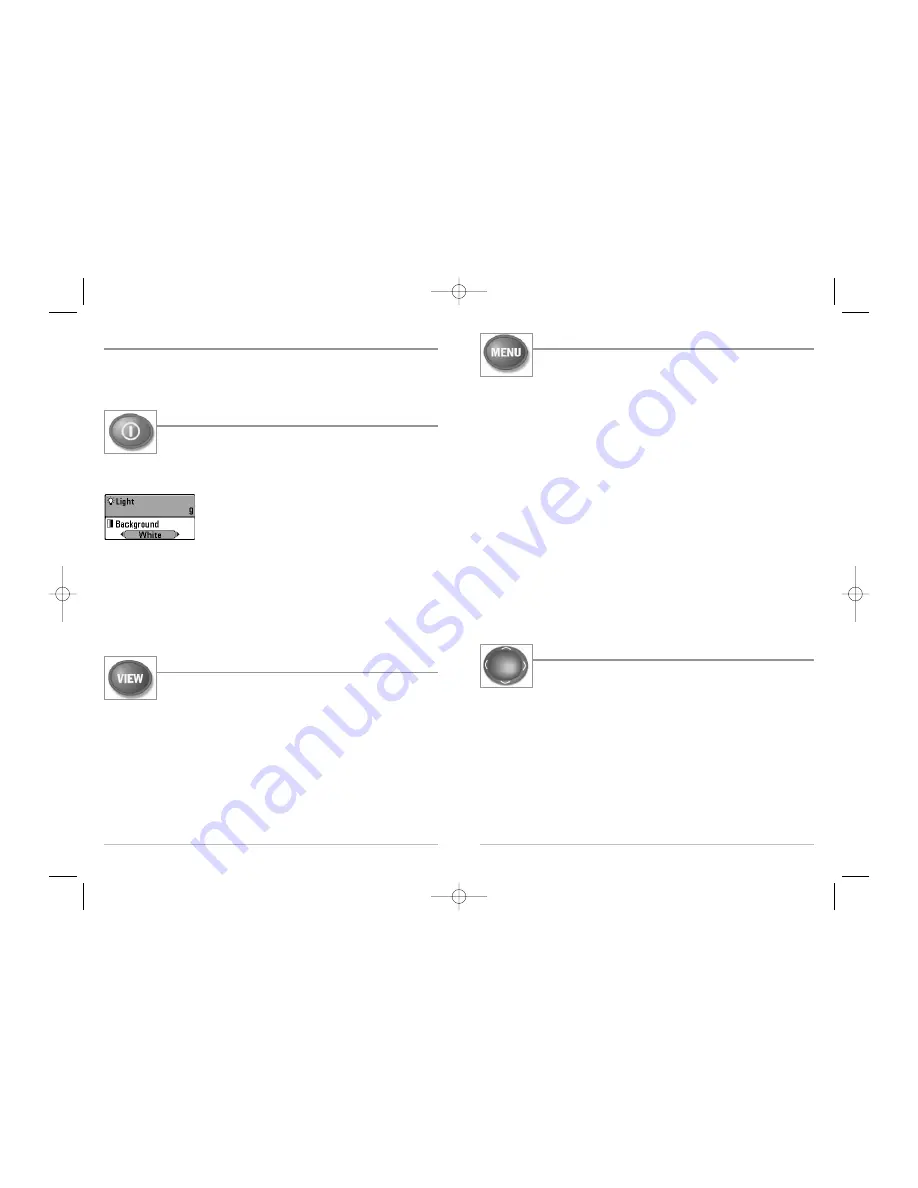
POWER/LIGHT Key

The POWER/LIGHT key is used to turn the 700 Series™ Fishing System
on and off, and also to adjust the backlight and contrast of the display.

Press the POWER/LIGHT key to turn the unit on.  The Title screen is then displayed
until the Fishing System begins sonar operation. 

To adjust the backlight, or to adjust the display background
color, press the LIGHT key to access the Light and
Background menu. Use the 4-WAY Cursor key to select Light
or Background and then use the LEFT or RIGHT Cursor key to
change the settings. Press EXIT to exit the Light and
Background menu.

Press and hold the POWER/LIGHT key for 3 seconds to turn the unit off. A message
will appear telling you how many seconds there are until shutdown occurs. Your
Fishing System should always be turned off using the POWER/LIGHT key.  This will
ensure that shutdown occurs properly and any menu settings will be saved.

VIEW Key 

The VIEW key is used to cycle through all available views. Press the
VIEW key to advance to the next view. Repeatedly pressing VIEW
cycles through all views available. Views can be hidden to optimize
the system to your fishing requirements (see 

Views Menu Tab

).

531474-1_A_777c2_English.qxd  11/3/2005  8:01 PM  Page 24

Содержание 777c2

Страница 1: ...777c2 Operations Manual 531474 1_A 777c2 Operations Manual 531474 1_A_777c2_English qxd 11 3 2005 8 01 PM Page 1 ...

Страница 2: ...original equipment or accessories by unauthorized individuals will void the warranty Handling and or opening this unit may result in exposure to lead in the form of solder WARNING This product contains lead a chemical known to the state of California to cause cancer birth defects and other reproductive harm Humminbird DualBeam PLUS SmartCast Selective Fish ID TM WhiteLine QuadraBeam RTS X PressTM ...

Страница 3: ... 51 User Mode 51 Language International only 51 Triplog Reset with Temp Speed or GPS receiver 52 Restore Defaults 52 Select Readouts Advanced Sonar view only 53 Depth Offset Advanced 54 Temp Offset Advanced 54 Speed Calibration Advanced with Temp Speed only 55 NMEA Output Advanced 56 Views Menu Tab 57 Accessories Menu Tab 58 Troubleshooting 59 700 Series Doesn t Power Up 59 700 Series Defaults to ...

Страница 4: ...ts The returned echoes are displayed on the LCD screen Each time a new echo is received the old echoes are moved across the LCD creating a scrolling effect When all the echoes are viewed side by side an easy to interpret graph of the bottom fish and structure appears 1 The sound pulses are transmitted at various frequencies depending on the application Very high frequencies 455 kHz are used for gr...

Страница 5: ... sonar provides an extremely wide 90 area of coverage QuadraBeam starts with two 45 455 kHz beams for a continuous 90 of uninterrupted side to side coverage to 160 feet These Side Structure locating beams reveal fish and structure to the left and right of your boat near the bottom For structure directly below your boat Quadrabeam uses DualBeam PLUS technology WideSide Sonar withoptional purchaseWi...

Страница 6: ...Window Structure wherefishmaybehiding Thermoclines layers of water with different 83kHz BaitBall Fish the FishFinder displays fish as a r c h e s and or fish icons and can be set to alarm when a fish LowSonarIntensityReturn HighSonarIntensityReturn NOTE Entries in this view that list with Temp Speed or GPS Receiver are available if either device is connected to the 700 Series Fishing System If bot...

Страница 7: ...ishFinder displays fish as arches and orfishicons andcanbesettoalarmwhen a fish of a certain size is detected When a target is detected a Fish ID TM symbol appears on the display with the depth displayed above it Thesizeofthesymbolindicatestheintensity of the sonar return The unit will clearly show schools of Bait Fish as clouds of different shapes and sizes depending on the number of fishandboats...

Страница 8: ...epth Range readouts appears along the right edge of the Sonar View The scale indicates the distance from the surface of the water to a depth range sufficient to show the bottom Depth Range is automatically selected to keep the bottom visible on the display although you can adjust it manually as well see Sonar X PressTM Menu Six additional Digital Readouts display information from optional purchase...

Страница 9: ...e RTS Window plots the depth and intensity of a sonar return see Sonar Menu RTS Window Freeze Frame Freeze Frame Pressing any arrow on the 4 WAY Cursor Control key will freeze the screen and a cursor will be displayed on the screen The cursor can be positioned on the display using the 4 WAY Cursor Control key to determine the depth of any sonar return The RTS Window continues to update in Freeze F...

Страница 10: ... or magnification is displayed in the lower left corner and can be changed to suit conditions see Sonar X PressTM Menu Zoom Level Upper and Lower Zoom Depth Range numbers indicate the depth of the water which is being viewed Digital depth is displayed in the upper left hand corner The digital readouts in the Sonar Zoom View cannot be customized therefore information such as water temperature and v...

Страница 11: ...eset Distance is the distance traveled since the Triplog was last reset Voltage the battery voltage Average Speed shows the speed since the Triplog was last reset 13 200 83 kHz Split Sonar View Split Sonar View displays sonar returns from the 83 kHz wide beam on the left side of the screen and displays sonar returns from the 200 kHz narrow beam on the right side of the screen Depth is always displ...

Страница 12: ...uadraBeamTM transducer accessory and when Transducer Select is set to QuadraBeam see Sonar Menu Tab Transducer Select The QuadraBeam transducer requires a separate purchase This view shows sonar information from both the left and right 90 455 kHz beams and the 200 kHz down looking beam in one view The top portion of the display presents a historical log of sonar returns from the 200 kHz down looki...

Страница 13: ...ented and saved immediately no further action is required In all Sonar views but the Big Digits view pressing any 4 WAY Cursor Control key will activate Freeze Frame and will then allow you to position the cursor on the display 18 17 Key Functions Your 700 Series Fishing System user interface consists of a set of easy to use keys that work with various on screen views and menus to give you flexibi...

Страница 14: ... visit our website at www humminbird com or contact our Customer Resource Center at 1 800 633 1468 for additional details Powering Up the Unit Turn on your 700 Series Fishing System by pressing the POWER LIGHT key The Title screen is displayed until the Fishing System begins operation Your Fishing System will begin Normal or Simulator operation depending on the presence or absence of a transducer ...

Страница 15: ...m Press the MENU key once to display the X PressTM Menu When you select a menu item from the X PressTM Menu the menu will collapse leaving only the menu choice on the screen Use the UP or DOWN Cursor keys to reactivate the X PressTM Menu NOTE The X PressTM Menu choices will vary depending on which view is active when you press theMENUkey aswellaswhetheryouareinNormalorAdvancedUserMode Main Menu Ta...

Страница 16: ...that you are using the Simulator Exit the Simulator by powering your Fishing System off Simulator Shown with Optional WeatherSenseTM Accessory Start Up Options Menu Press the MENU key when the Title screen is displayed to access the Start Up Options menu Use the UP or DOWN 4 WAY Cursor keys to position the cursor then the RIGHT Cursor key to select one of the following choices If you wait too long...

Страница 17: ...uit Board PCB serial number software revision total hours of operation and the input voltage Accessory Test lists the accessories connected to the system NOTE The speed accessory will be detected only if the paddlewheel has moved since your 700 Series Fishing System was powered up Exit System Status by powering your Fishing System off PC Connect withPCConnectCableonly Use PC Connect to update the ...

Страница 18: ...ht Sensitivity on the Sonar X PressTM Menu 2 Use the LEFT or RIGHT 4 WAY Cursor Control keys to increase or decrease the Sensitivity setting Low 1 High 20 Default 10 Sensitivity at Low Sensitivity at Medium Sensitivity at High 27 Side WideSide transducer WideSide viewonly Side sets which transducer beam from the WideSide Transducer is shown in the WideSide View A WideSide transducer must be connec...

Страница 19: ...a more detailed view than you would see if the display went all the way to the bottom M 29 Upper Range Advanced Sonar SplitSonar BigDigitsandCircularFlasherViewsonly Upper Range sets the shallowest depth range that will be displayed on the Sonar Split Sonar Big Digits and Circular Flasher views The Upper Range menu choice is available when User Mode is set to Advanced see Setup Menu Tab User Mode ...

Страница 20: ...ontrol keys to change the Zoom Level setting for the Sonar Zoom View 2x 4x 6x 8x Default 2x NOTE The Zoom Preview Box tracks the bottom and cannot be moved by the user 31 Side Beam Range WideSide transducer WideSide viewonly Side Beam Range sets the deepest range that will be displayed in the WideSide View The range must be set manually to keep the bottom visible on the display If the Side Beam Ra...

Страница 21: ...change the Bottom Lock setting to on Off On Default Off Bottom Range SonarZoomViewonly whenBottomLockisOn Bottom Range allows you to control how much of the water column measured up from the bottom is shown in the Sonar Zoom View Choose a small value to see low lying bottom structure or details of the bottom return Choose a larger value to see large structure in deeper water It is possible to set ...

Страница 22: ... 1 Highlight Beam Select on the Sonar main menu 2 Use the LEFT or RIGHT 4 WAY Cursor Control keys to select either the 200 kHz beam the 83 kHz beam or the 200 83 kHz beams 200 83 kHz 200 kHz 83 kHz Default 200 kHz Fish ID TM Fish ID TM uses advanced signal processing to interpret sonar returns and will display a Fish Symbol when very selective requirements are met When a fish is detected a fish ic...

Страница 23: ...to be displayed as fish This is useful for identifying smaller fish species or baitfish Selecting a lower setting displays fewer fish from weak sonar returns This is helpful when seeking larger species of fish Fish ID Sensitivity is used in conjunction with Fish ID TM Fish ID TM must be On for Fish ID Sensitivity to affect the ability of the Fishing System to identify sonar returns as fish To chan...

Страница 24: ...Hz Balance setting 1 Make sure you have selected QuadraBeamTM Transducer and Advanced Mode and that the QuadraBeamTM transducer is connected then highlight 455kHz Balance on the Sonar Main Menu 2 Use the LEFT or RIGHT 4 WAY Cursor Control keys to change the 455 kHz Balance 10 to 10 Default 0 39 83 kHz Sensitivity Advanced 83 kHz Sensitivity changes the sensitivity of the 83 kHz beam Increasing the...

Страница 25: ...be attached to the 700 Series Fishing System The WideSide Sensitivity menu choice is available when Transducer Select is set to WideSide see Sonar Menu Tab Transducer Select and User Mode is set to Advanced see Setup Menu Tab User Mode NOTE The WideSide Sensitivity requires the purchase of the WideSide transducer You can visit our website at www humminbird com to order this accessory online or con...

Страница 26: ... change the Noise Filter setting 1 Make sure you are in Advanced User Mode then highlight Noise Filter on the Sonar main menu 2 Use the LEFT or RIGHT 4 WAY Cursor Control keys to change the Noise Filter setting Off Low Medium High1 High2 High3 Default Low Max Depth Advanced Max Depth adjusts the maximum depth of operation The performance of your Fishing System can be tuned to the maximum depth you...

Страница 27: ...for a greater range in fish size adjustment to account for this Also make sure that the Water Type is set accurately especially in salt water as this affects the accuracy of deep water depth readings To change the Water Type setting 1 Make sure you are in Advanced User Mode then highlight Water Type on the Sonar main menu 2 Use the LEFT or RIGHT 4 WAY Cursor Control keys to change the Water Type s...

Страница 28: ...attery operated you would want to set the Low Battery Alarm to sound before the battery voltage drops too low for it to be used to start your main gasoline powered engine To change the Low Battery Alarm setting 1 Highlight Low Battery Alarm on the Alarms main menu 2 Use the LEFT or RIGHT 4 WAY Cursor Control keys to change the Low Battery Alarm setting Off 8 5V 13 5V Default Off Temp Alarm Temp Al...

Страница 29: ...its Temp selects the units of measure for all temperature related readouts International Models Only To change the Units Temp setting 1 Highlight Units Temp on the Setup menu 2 Use the LEFT or RIGHT 4 WAY Cursor Control keys to change the Units Temp setting Celsius Fahrenheit Default Celsius Units Distance withTemp SpeedorGPSreceiver Units Distance selects the units of measure for all distance rel...

Страница 30: ... To cancel Restore Defaults press the LEFT Cursor key 51 Units Speed withTemp SpeedorGPSreceiver Units Speed selects the units of measure for speed related readouts and will appear in the menu if a Temp Speed Accessory is connected and the paddlewheel has moved at least once or if a GPS Receiver is connected To change the Units Speed setting 1 Highlight Units Speed on the Setup menu 2 Use the LEFT...

Страница 31: ...ys to change the Temp Offset setting 10 0 to 10 0 degrees Default 0 Select Readouts Advanced Sonarviewonly Select Readouts sets individual digital readouts on the Sonar View This Advanced feature allows you to select what data will be displayed in each of 6 fixed position data windows arranged around the left and bottom edges of the Sonar View screen or whether a particular window will be turned o...

Страница 32: ...you connect the NMEA Output wires of the GPS Receiver cable to another NMEA compatible device such as an autopilot NMEA 0183 is a National Marine Electronics Association standard for data communication The following NMEA sentences are output when NMEA Output is turned On DPT Depth MTW Water Temperature GLL Lat Lon Position GGA GPS Fix Data RMC Recommended Minimum Specific GNSS Data VTG Course Over...

Страница 33: ...the LEFT or RIGHT 4 WAY Cursor Control keys to change the status of the view from Hidden to Visible Views Menu Accessories Menu Tab From any view press the MENU key twice to access the tabbed Main Menu System then press the RIGHT cursor key until the Accessories tab is selected If no accessories are attached to the Accessory Bus no menu choices will appear under the Accessories tab If an accessory...

Страница 34: ...sducer if the cable is damaged or corroded Display Problems There are several main conditions or sources of possible interference that may cause problems with the quality of the information displayed on the control head Look in the following table for some symptoms of display problems and possible solutions Problem Possible Cause Thecontrolheadlosespowerat high speeds Whentheboatmovesathigher spee...

Страница 35: ...se and connect the WideSide transducer to your 700 Series Fishing System to access specialized side looking functions that are extremely useful for bank fishing or looking for bait fish in open water QuadraBeam transducer purchase and connect the QuadraBeam transducer to your 700 Series Fishing System to access specialized QuadraBeam functions such as two 45 455 kHz beams for a continuous 90 of un...

Страница 36: ...ories to grow your 700 Series Fishing System NOTE Each accessory requires a separate purchase You can visit our website at www humminbird com or contact our Customer Resource Center at 1 800 633 1468 for additional details Specifications Depth Capability 1500 ft 450 m PowerOutput 500 Watts RMS 4000 Watts Peak to Peak Operating Frequency 200 kHz and 83 kHz DualBeam PLUS Area of Coverage 60 10 dB in...

Страница 37: ...rmationmovesacrossthedisplay Afastersettingdisplayssonarinformation from more pings and shows more detail but the information moves quickly across the display aslowersettingpermitsviewingofmoresonarhistory butdoesnotdisplayas much detail The best setting is often the user s personal choice Cone Angle The cone angle is the angular measurement of the sonar beam at a specific dB down point i e 10 dB ...

Страница 38: ... darker shades of gray While somewhat counter intuitive this method makes the sonar images crisper and has the benefit of enhancing the apparent sensitivity because the weaker signals appear bolder Inverse grayscale works well in very clear water Debris laden water often appears as a lot of clutter on the screen Instant Image Update Instant Image Update is a Humminbird feature that updates all the...

Страница 39: ...image QuadraBeam uses the DualBeam PLUS configuration for downlooking and also adds two additional beams to look to the left and right The sonar beams pointing to the left and right provide the ability to spot fish and structure over a wide 90 area and to identify on which side of the boat they are located See DualBeam PLUS Quick Disconnect Mount The Quick Disconnect Mounting system is an exclusiv...

Страница 40: ...mminbird units excel at showing structure with great detail over a wider area due to unique sonar configurations developed for the angler Structure ID Structure ID is a Humminbird feature that describes the traditional grayscale method of presenting sonar information See Grayscale Surface Clutter Surface Clutter is a phenomenon where sonar returns are reflected off of tiny objects near the surface...

Страница 41: ...ute of an LCD that characterizes visibility of the display when viewing from off the central axis such as when standing to the side of the fishfinder Wider viewing angles are better because the information remains visible even when viewing from the side WhiteLine WhiteLine is a Humminbird feature that highlights the strongest sonar return on the display using a very light gray band This is preferr...

Страница 42: ...day 8 00 a m to 4 30 p m Central Standard Time 1 800 633 1468 By e mail typically we respond to your e mail within three business days custserv johnsonoutdoors com For direct shipping our address is Humminbird Service Department 678 Humminbird Lane Eufaula AL 36027 USA 531474 1_A_777c2_English qxd 11 3 2005 8 02 PM Page 82 ...

Отзывы:

Похожие инструкции для 777c2