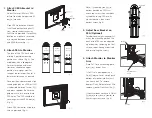
Attach VESA Bracket to
Monitor
Select 75mm or 100mm VESA
bracket to match hole pattern on
back of monitor.
Place VESA bracket on monitor
with raised portion facing away
from monitor and attach using
four screws provided. If mounting
location on monitor is recessed,
use spacers between monitor
and VESA bracket (fig. 1).
Attach FEA to Monitor
The face of the FEA has 8 holes
offering 3 possible mounting
positions as shown (fig. 2). The
middle position is appropriate
for most monitors and users.
However, choose the upper
position for a higher monitor
range or the lower position for a
lower monitor range, as desired.
Once position is determined, align
raised guide pins on VESA bracket
with desired holes on face of FEA
and press together. Be sure the
guide pins are fully inserted into
FEA holes. The FEA should feel
secure against the VESA bracket
(fig. 3).
Attach FEA to monitor using two
screws provided. (fig. 3)
Note: If mounting monitor to
bottom position on FEA, first
attach top screw, then compress
cylinder by raising FEA into its
highest position, then attach
bottom screw
(fig. 4)
.
Adjust Rear Bracket on
FEA (Optional)
For additional height range adjust-
ment, the mounting plate on the
back of the FEA can be adjusted
up or down by removing the four
screws, repositioning as desired,
and reinstalling the screws.
Attach Monitor to Monitor
Arm
Place Cut-Out on mounting plate
over Lip at end of Arm.
If your arm is equipped with a
Quick-Release Lever, simply push
bottom of monitor into Arm until
you hear a click. To remove,
depress Quick Release Lever and
remove monitor from Arm (fig. 5).
If your Arm does not have a Quick
Release Lever, secure monitor to
Arm using two screws (fig. 6).
Vesa
Bracket
Spacers
Top
Position
Middle
Position
Bottom
Position
Cut-Out
Quick-Release
Lever
Screws
1.
2.
3.
4.
fig. 1
fig. 2
fig. 3
fig. 5
fig. 6
fig. 4
screws
Lip
Cylinder


