background image


G10T Wireless Graphics Tablet


8 / 21


www.huion.com 


2. Product Basic Operation 

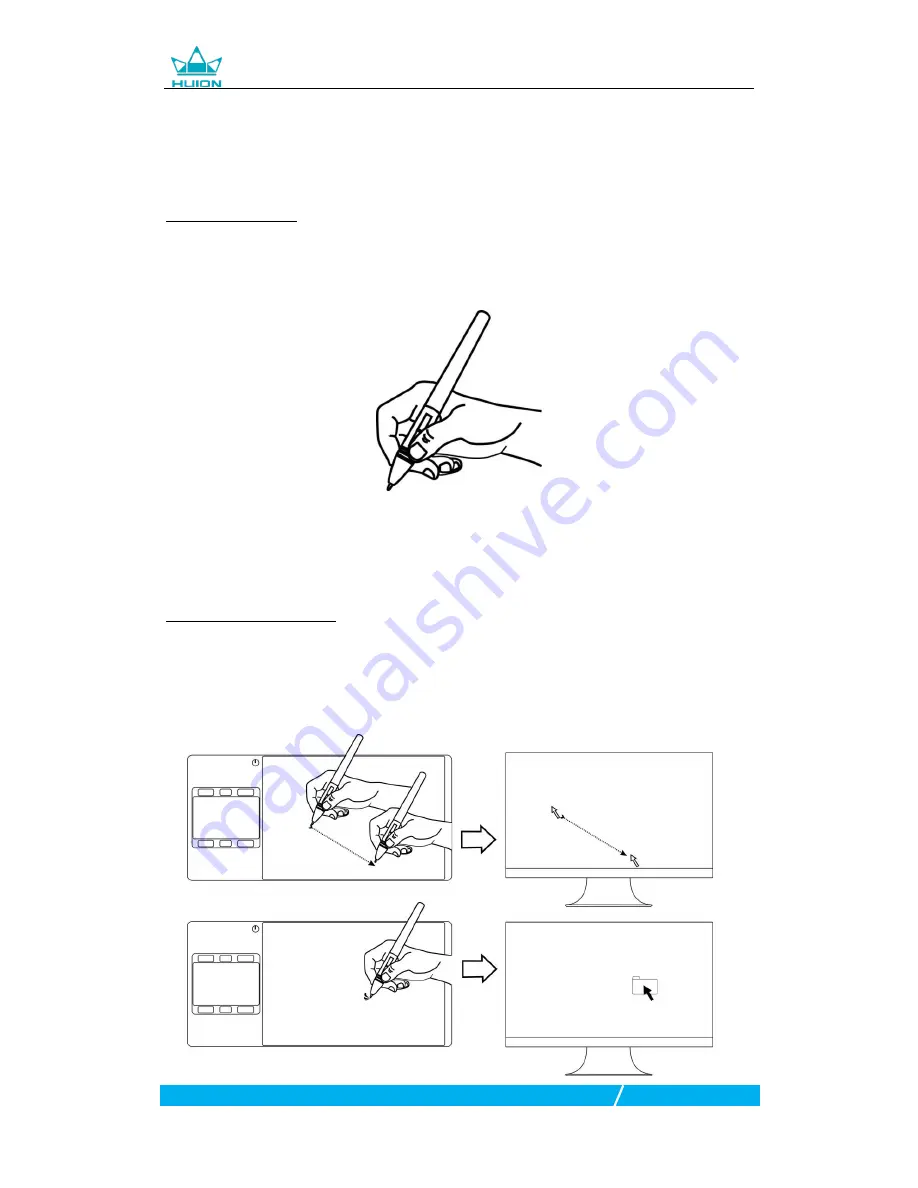
2.1 Using The Pen 

2.1.1 Hold the pen 

Hold the pen as you hold a normal pen or pencil. Adjust your grip so that you can 
toggle  the  side  switch  easily  with  your  thumb  or  forefinger.  Be  careful  not  to 
accidentally press the switch while drawing or positioning with the pen. 


Notice:When not in use, place the pen in the pen case or on the desk. Do not place 
the pen on the surface of screen, which may interfere with the use of other screen 
cursor  positioning  equipment,  may  also  cause  your  computer  can  not  enter  the 
sleep mode. 

2.1.2 Position the cursor 

Move the pen slightly above the active area without touching the screen surface, 
the cursor will move to the new position accordingly.   
Press the pen tip on the screen to make a selection. Tap the screen once with the 
pen tip, or touch it to the screen with enough pressure to register a click. 


Содержание INSPIROY G10T

Страница 1: ...G10T Wireless Graphics Tablet User Manual For Windows and Macintosh OS...

Страница 2: ...he tablet 6 To protect your tablet and save power please switch off the power when it is not in use 7 Do not disassemble the tablet and pen Do not disassemble or otherwise modify the tablet or pen Suc...

Страница 3: ...Using the Tablet 10 3 Function Setting 12 3 1 Device Connection Prompt 12 3 2 Working Area Setting 12 3 3 Press Keys Function Setting 14 3 4 Pen Buttons Function Setting 14 3 5 Pressure Sensitivity Se...

Страница 4: ...ng and creation and full of fun You can freely painting and writing depicting different lines and colors just as the pen writes on the paper which brings you a real shock experience To give you a bett...

Страница 5: ...s pressure sensitivity and can be used for around 350hrs with full battery 1 2 3 Wireless Receiver When using wireless mode please insert the receiver into your computer and unplug the USB cable in th...

Страница 6: ...huion com 1 2 4 Other Accessories 1 3 Tablet Connection 1 3 1 Wired Mode Connection 1 Connect the tablet to your computer with USB cable Pen Box Pen Nib Clip Replacement Nibs USB C Cable Pen Charging...

Страница 7: ...allation following the instruction 1 4 3 Install via Download If you don t have a CD DVD drive you can download the driver from our website www huion com After finishing installation you can find the...

Страница 8: ...d nib with the nib clip 4 Insert the new nib straight into the pen and push the nib slowly and firmly until it stops 1 6 Charging the Pen 1 When the indicator on the pen shows orange it means the volt...

Страница 9: ...not in use place the pen in the pen case or on the desk Do not place the pen on the surface of screen which may interfere with the use of other screen cursor positioning equipment may also cause your...

Страница 10: ...and double click to open it 2 1 4 Move Select the object then slide the pen tip across the screen to move it 2 1 5 Use the side buttons The buttonson the pen can be set to two different customizable f...

Страница 11: ...e according to your own habits which will help to improve your work efficiency 2 2 3 Charging the Tablet 1 Before using the tablet for the first time in wireless mode you should fully charge the table...

Страница 12: ...ion Two fingers Tap the touchpad with two fingers Simulate the right mouse function Swipe left right with two fingers Toggles the previous next item Scroll up down with two fingers Scroll Move two fin...

Страница 13: ...the relationship between pen movement on the tablet and cursor movement on the monitor screen By default the entire active area of tablet maps to the entire monitor If more than one monitor is in use...

Страница 14: ...Area the entire active area of the tablet This is the default setting 2 Customized Area 1 Enter coordinate values or2 Drag the corners of the foreground graphic to select the screen area 3 2 3 Rotate...

Страница 15: ...ault values Customized Setting Select the function to be achieved on the pop up dialog box then click APPLY or OK to take effect Enable Disable Press Keys Check Uncheck Enable Press Keys Enable Disabl...

Страница 16: ...e sensitivity will be changed by dragging the slider up and down the smaller the value the more pressure sensitive 3 6 Pen Pressure Testing Click Start Pressure Test you can gradually apply pressure t...

Страница 17: ...en input Pen features are supported in such as Microsoft Office Windows Journal Adobe Photoshop CC SketchBook 6 and so on 3 8 Data Export and Import The driver supports exporting and importing your cu...

Страница 18: ...port Rate 233PPS Pen Sensing Height 12mm Interface USB Type C Press Keys 6 Customized Press Keys Wireless 2 4G Wireless Distance Approx 6 15m Depending on the actual use of the environment Battery Cap...

Страница 19: ...does not work 1 Make sure the Press Keys function were enabled in the driver 2 Make sure you have correctly defined the Press Keys The cursor is not stable or the drawing line is not straight when us...

Страница 20: ...t to the condition that this device does not cause harmful interferenceChanges or modifications not expressly approved by the party responsible for compliance could void the user s authority to operat...

Страница 21: ...er s body and the back of the handset The use of belt clips holsters and similar accessories should not containmetallic components in its assembly The use of accessories that do not satisfy these requ...

Отзывы: