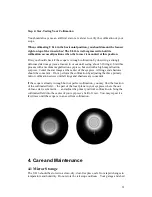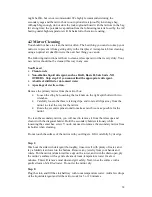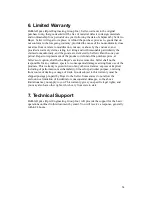
Use a simple collimation cap (or sight tube) for this step. Insert the cap into the
focuser, and look through the peephole of the sight tube at the secondary mirror. If
you do not have a collimation cap or sight tube, then simply eyeball it from a distance
away from the center of drawtube.
The secondary mirror should appear round and exactly centered in the sight tube. If is,
then Step 1 is done. If not, either the secondary holder or the focuser (or both) needs
adjustment.
You should check and adjust the secondary holder first. If the error is up or down
relative to the primary mirror, you can move it forward or away from the primary by
adjusting the center bolt that connect the holder to the spider.
If the error is toward either side of the focuser (90° to the optical axis), then check to
find out if the secondary is well centered in the upper ring. If it isn't, adjust the
spider's mounting screws until it is. If this checks out fine, then loosen the 3 mounting
screws in the focuser bracket, then tilt the focuser as needed and tighten the mounting
screws. Two of mounting holes on the bracket are slightly oversized to allow the
focuser to be adjusted to a certain degree. You will have to remove the focuser to
adjust the L bracket mounting screws. You may have to re-adjust the spider, if it is
still not centered.
Step 2:
Here you adjust the tilt of the secondary mirror to aim the focuser's axis at the
center of the primary. First, remove the primary mirror cover.
A laser collimator will be used for this step: just center the laser beam on the
primary's center spot by adjusting three secondary mirror collimation screws.
A small error in secondary alignment is usually not a problem. As long as the pointing
error is no more than 1 or 2 percent of the main mirror's diameter, it makes no visible
difference.
You will need to repeat Step 2 each time you reassemble the UL16.
Step 3:
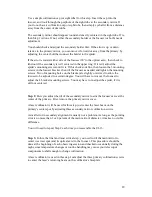
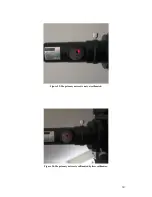
In this, the final and most critical step, you need to tilt the main mirror to
center its sweet spot (and its optical axis) in the focuser. This procedure should be
done at the beginning of each observing session and checked occasionally during the
night, since temperature changes or routine handling may cause your telescope's
components to shift enough to change collimation.
A laser collimator is used in this step. Just adjust the three primary collimation screws
to center the laser’s returning beam on the collimator’s faceplate.
29
Содержание Ultra Light UL 16
Страница 3: ...Figure 1 Mirror Box Figure 2 Upper Ring 3...
Страница 4: ...Figure 3 Spider Vanes 4...
Страница 5: ...Figure 4 Secondary Spider Hub Diagonal Support Figure 5 Focuser L Bracket Figure 6 14 Knob Screws 5...
Страница 6: ...Box 2 The primary mirror Qty Description 1 Primary Mirror 6...
Страница 11: ...Figure 10 Attach the focuser L bracket to the upper ring Figure 11 Attach the focuser to the L bracket 11...
Страница 13: ...Figure 14 Center the secondary in the focuser drawtube 13...
Страница 23: ...Figure 19 Tighten the knob screws 23...
Страница 25: ...Figure 20 Slide in one slot first 25...
Страница 27: ...2 5 Adjust the Sling After UL16 is fully assembled the sling must be adjusted 27...

