background image

CCLINUX 
USER Manual 


Issue 1.2 (2018-09-06)


Huawei Proprietary and Confidential 

Copyright ©  Huawei Technologies Co., Ltd 


36 


2.5 Preferences 

2.5.1 Keyboard and Mouse 

1.


Introduction:


       Use the "Keyboard and Mouse" to set the following: 

1)


swap left and right mouse buttons 

2)


Acceleration and sensitivity of mouse 

3)


the repeat delay of  keyboard character 

4)


the repeat interval of keyboard character  

5)


beep when there is an error of keyboard  input 

2.


Operating procedures:


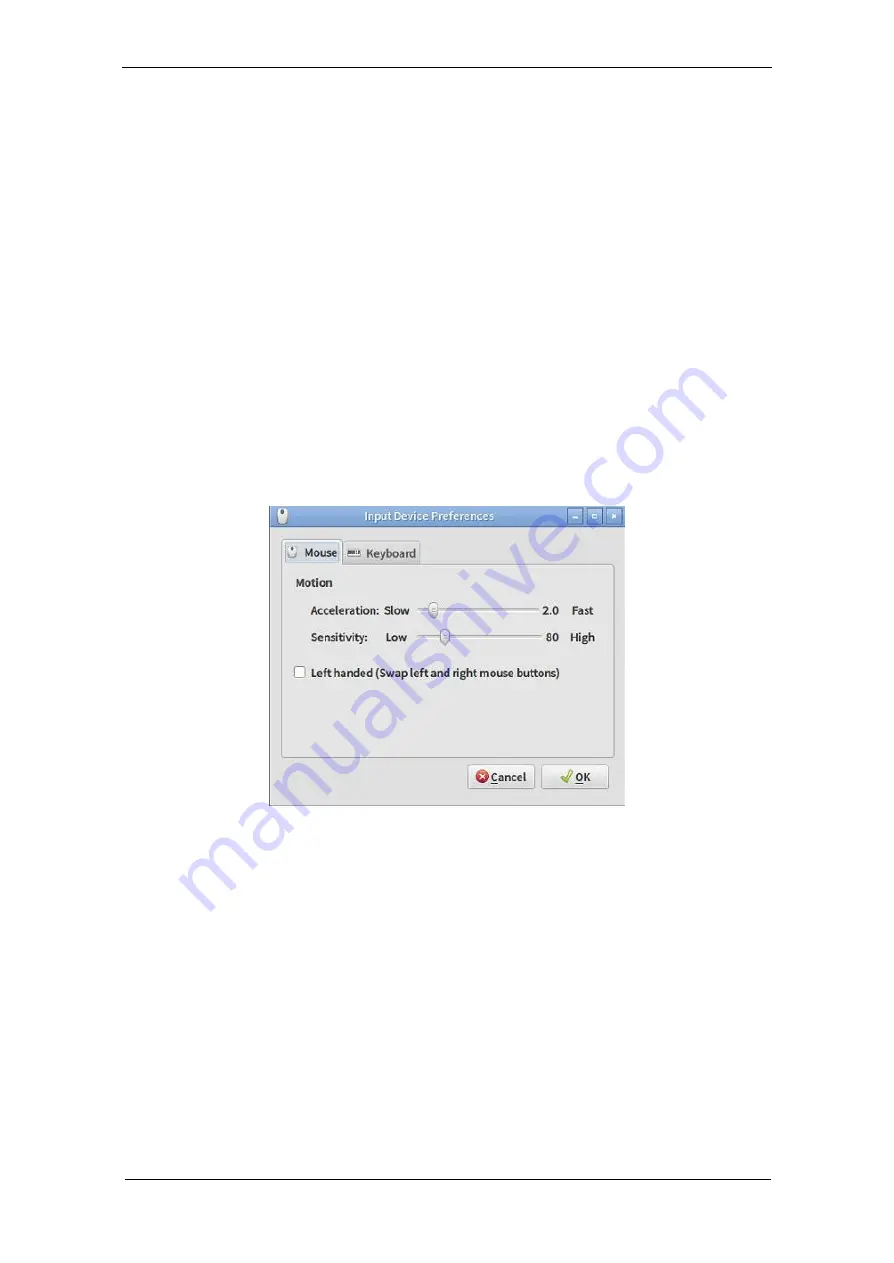
       Click "Start" -> "Preferences" -> "keyboard and mouse", the running interface is shown in Figure 

5-1-1: 


Figure 5-1-1 


3.


Mouse settings


1)


 In the "Mouse" option, click the check box named "left handed (swap left and right mouse 

buttons)", you can swap the left and right mouse button, this setting takes effect 

immediately. When the right button becomes the main button, then the check box is 

checked. If the check box is not in checked state, the left button is the main button. 

2)


Set the mouse speed, you should pull the slider of "Acceleration" and "Sensitivity". This 

setting takes effect immediately. 


4.


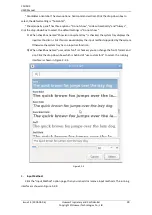
Keyboard settings


Select the "keyboard" option page, the running interface is shown in Figure 5-1-2: 

Содержание ST5110

Страница 1: ...Huawei Proprietary and Confidential Copyright Huawei Technologies Co Ltd CCLINUX V1 2 9 User Manual Issue 1 2 Date 2018 09 06 HUAWEI TECHNOLOGIES CO LTD ...

Страница 2: ...etween Huawei and the customer All or part of the products services and features described in this document may not be within the purchase scope or the usage scope Unless otherwise specified in the contract all statements information and recommendations in this document are provided AS IS without warranties guarantees or representations of any kind either express or implied The information in this...

Страница 3: ... text this document provides is just for offering If version upgrads or technical updates in the future Please base on realistic contents Revision History Issue Date Revision description 1 0 2017 09 25 This issue is the first official release 1 1 2018 05 15 Update the pictures add the 2 5 14 section 1 2 2018 09 06 Add ST5200 ST6200 ...

Страница 4: ...XTerminal 10 2 2 2 File Manager PCManFM 11 2 3 Internet 12 2 3 1 Firefox Web Browser 12 2 3 2 CloudClient 13 2 3 3 Remmina 14 2 3 4 HDPShareAppTray 17 2 4 System Tools 18 2 4 1 Security Settings 18 2 4 2 Time and Date 19 2 4 3 Host Settings 21 2 4 4 Network Tools 22 2 4 5 System Monitor 28 2 4 6 usbview 30 2 4 7 Parallel Test Tools 30 2 4 8 Serial Test Tools 31 2 4 9 SyslogViewer 32 2 4 10 user un...

Страница 5: ... Sup Install Log 47 2 5 9 System Viewer 48 2 5 10 Monitor Settings 49 2 5 11 Sound Mixer 50 2 5 12 Account Management 52 2 5 13 Language Support 54 2 5 14 Sup Install Tool 55 2 6 Logout 57 2 6 1 Shutdown 58 2 6 2 Reboot 58 2 6 3 Switch User 58 2 6 4 Lock Screen 58 2 6 5 Logout 59 2 6 6 Cancel 59 2 7 TCM Client 59 2 7 1 Remote assistance request 59 2 7 2 Manage the configuration 60 2 7 3 History No...

Страница 6: ...ement Welcome to use the Linux terminal please read this user manual carefully before installing and using it for the first time All other products mentioned in this manual are the property of their respective companies Each type of terminal product may be slightly different from the user manual and we will explain it later ...

Страница 7: ...erminal servers Support the mainstreaming of virtualization platforms Main features 1 Support HDP RDP and ICA protocol optional 2 Support to start auto connecting to the server when starting up auto logging in auto execute the application 3 Centralized management centralized maintenance centralized monitoring 4 Easy updating and extending function 5 Effectively prevent data theft and virus invasio...

Страница 8: ... 7 2 Instructions 2 1 Interface introduction 2 1 1 Default desktop The default desktop is shown below in Figure 1 1 1 Figure 1 1 1 2 1 2 Taskbar The taskbar is shown in Figure 1 2 1 Figure 1 2 1 From left to right area can be divided into Start menu bar quick start bar return to desktop application area tray area ...

Страница 9: ...rked with root only for root user the rest are shared Menu Function Permission Accessories LXTerminal root File Manager PCManFM root Internet Firefox Web Browser general HDPShareAppTray general CloudClient general Remmina general System Tools Security Settings root Printers general Time and Date general Host Settings root Network Tools general System Monitor general usbview root Parallel Test Tool...

Страница 10: ...open an Internet browser 3 Return To Desktop Return To Desktop is on the left side of the taskbar and the icon is Left click to iconify all windows Middlw click to shade them 4 Application Area The application area is in the middle of the taskbar and shown in the red box of the Figure 1 2 3 Click the application the application will switch between minimization and display status Right click the ap...

Страница 11: ...e connection information of system 4 Tcm client tool You can request remote assistance manage configuration including Manual Upgrade etc view history notifications and version information 5 Time and date Display the current time click the Time icon to display the current date The time and date of the system can be set via Start System Tools Time and Date 2 2 Accessories 2 2 1 LXTerminal 1 Introduc...

Страница 12: ...awei Technologies Co Ltd 11 Figure 2 1 1 2 2 2 File Manager PCManFM 1 Introduction Used to browse the file system and manage it this feature is limited to root user permissions 2 Operating procedures Click Start Accessories File Manager PCManFM the running interface is shown in Figure 2 2 1 ...

Страница 13: ... open source browser for Windows Linux and MacOS X platform It is small and fast there are some other advanced features the main features are tabbed browsing that make internet surffing more fast prohibit pop up window custom toolbar extended management better search features fast and convenient sidebar 2 Operating procedures Click Start Internet Firefox web browser the running interface is shown ...

Страница 14: ...ht Huawei Technologies Co Ltd 13 Figure 3 1 1 2 3 2 CloudClient 1 Introduction Used to connect HDP clouds 2 Operating procedures Click Start Internet CloudClient the running interface is shown in Figure 3 2 1 Figure 3 2 1 3 Launch Log on the address of the currently selected item 4 Add ...

Страница 15: ...help documentation of cloudclient 9 Quit Exit connection management of cloudclient 2 3 3 Remmina 1 Introduction Remmina is an RDP remote desktop client 2 Operating procedures Click Start Internet Remmina the running interface is shown in Figure 3 3 1 Figure 3 3 1 3 New Click the button in the top left corner Edit RDP configuration parameters If the name is not filled it will be filled synchronousl...

Страница 16: ...ancel operation 3 Connect connect the address of the server parameter 4 Default save the current parameter as the default value and fill in the default parameter when the next new is created There are 3 items name server and password are not saved as default values 4 Right click operation Operate on existing server connection information including connect copy edit and delete as shown in figure 3 ...

Страница 17: ...yright Huawei Technologies Co Ltd 16 Figure 3 3 3 1 Copy According to the saved information click Save you can copy information configuration the same as saved information as shown in Figure 3 3 4 图 3 3 4 2 Edit Edit the selected item 3 Delete Delete the selected item 5 Preferences ...

Страница 18: ... to modify click the preferences on the top right corner of the window to check Remember last view mode for each connection in tab options and change the Default view mode parameter in tab Appearance If you want to keep their last exit when the window mode check the Options Remember last view mode for each connection 2 3 4 HDPShareAppTray 1 Introduction HDP client program kit 2 Operating procedure...

Страница 19: ...m password security policy this feature is limited to root user permissions 2 Operating procedures Click Start System Tools Security Settings the running interface is shown in Figure 4 1 1 Figure 4 1 1 3 Function As shown in figure 4 1 1 there are 5 item can be set include auto login password length the shortest password length longest attempt login times and lock time min After setting click Appl...

Страница 20: ...e 1 Introduction Use the Time and Date program to configure the system s date and time 2 Operating procedures Click Start System Tools Time and Date the running interface is shown in Figure 4 2 1 Figure 4 2 1 3 Set Time Zone Open the dialog box on the right of the Time zone label to set time zone the interface is shown in Figure 4 2 2 ...

Страница 21: ...ke effect immediately 4 Set Time Click the drop down box on the right side of the Configuration to set the time and date including Keep synchronized with internet servers and Manual Select Keep synchronized with internet servers mode then the system time is consistent with the Internet time select manual the running interface is shown in Figure 4 2 3 Figure 4 2 3 After setting click Apply and set ...

Страница 22: ...ervers and Search Domains The DNS server specifies the domain name resolution server address that the computer uses The search domain specifies the default domain name when the domain name is not specified 3 Hosts Displays a list of aliases for other computers 2 Operating procedures Click Start System Tools Host Settings the running interface is shown in Figure 4 3 1 Figure 4 3 1 3 General Change ...

Страница 23: ... Huawei Technologies Co Ltd 22 Figure 4 3 2 5 Hosts You can add edit or delete aliases item the running interface is shown in figure 4 3 3 Figure 4 3 3 2 4 4 Network Tools 1 Introduction The functions of Network Tools include Devices Ping Netstat Traceroute Port Scan Lookup Finger Whois ...

Страница 24: ...5 Port Scan you can view the target network open ports and network services 6 Lookup you can find information about the DNS domain name server through address you input 7 The Finger function is used to query the status of hosts or users on the Internet 8 Whois used to query the domain name and domain name information 2 Operating procedures Click Start System Tools Network Tools the running interfa...

Страница 25: ...uawei Proprietary and Confidential Copyright Huawei Technologies Co Ltd 24 Figure 4 4 2 5 Netstat Netstat can view the Routing table information Active Network Services Multicast information 1 Routing table information as shown in Figure 4 4 3 ...

Страница 26: ...nd Confidential Copyright Huawei Technologies Co Ltd 25 Figure 4 4 3 2 Active Network Services Show the current active network services As shown in Figure 4 4 4 Figure 4 4 4 3 Multicast Information Shows the current multicast Information As shown in Figure 4 4 5 ...

Страница 27: ...opology of the network and the efficiency of data transmission 2 Operating procedures Input the domain name or IP address of the host then click the trace button or press Enter 7 Port Scan 1 Function Displays the open ports and services of the target network address 2 Operating procedures Input the domain name or IP address of the host then click the scan button or press Enter 8 Lookup 1 Function ...

Страница 28: ... Provides an authoritative list of server names for the domain 8 Host name for Address Reverse the FQDN of a specific IP address 9 Start of Authority Query the authorization records of the authoritative DNS server for a domain 10 Mailbox Exchange Query the mail s gateway of the server address that the domain s 11 Text Information Query information of arbitrary string 12 Well Known Services All ser...

Страница 29: ...tatus including processes resources and file systems information 2 Operating procedures Click Start System Tools System Monitor the running interface is shown in Figure 4 5 1 Figure 4 5 1 3 Processes You can view information about the process name user CPU ID memory and priority of the running process 4 Resources You can view CPU History Memory and Swap History and Network History As shown in Figu...

Страница 30: ...etary and Confidential Copyright Huawei Technologies Co Ltd 29 Figure 4 5 2 5 File Systems You can view the device name the device s mount directory mount type total capacity available capacity and used capacity As shown in Figure 4 5 3 below Figure 4 5 3 ...

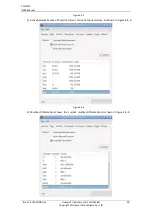
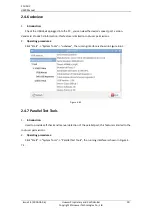
Страница 31: ...information this feature is limited to root user permissions 2 Operating procedures Click Start System Tools usbview the running interface is shown in Figure 4 6 1 Figure 4 6 1 2 4 7 Parallel Test Tools 1 Introduction Used to provide self check and manual detection of the parallel port this feature is limited to the root user permissions 2 Operating procedures Click Start System Tools Parallel Tes...

Страница 32: ...y start testing 2 Check the manual inspection select the register address and enter the value start reading and writing test 2 4 8 Serial Test Tools 1 Introduction You can set the serial port baud rate parity bit data bit stop bit to communicate with the serial device this feature is limited to the root user permissions 2 Operating procedures Click Start System Tools Serial Test Tools the running ...

Страница 33: ...lick the start button Click the Send button it will send the data of Send Area to the device If the device has feedback the result will be displayed in the Receive Area 2 4 9 SyslogViewer 1 Introduction Used to view the system log including date user and event information this feature is limited to root user permissions 2 Operating procedures Click Start System Tools SyslogViewer the running inter...

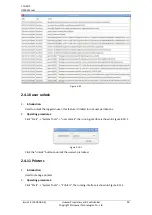
Страница 34: ... user this feature is limited to root user permissions 2 Operating procedures Click Start System Tools user unlock the running interface is shown in Figure 4 10 1 Figure 4 10 1 Click the unlock button to unlock the user who is locked 2 4 11 Printers 1 Introduction Used to manage printers 2 Operating procedures Click Start System Tools Printers the running interface is shown in Figure 4 11 1 ...

Страница 35: ...9 06 Huawei Proprietary and Confidential Copyright Huawei Technologies Co Ltd 34 Figure 4 11 1 3 Add printer Click the Add button and select the device and driver according to the wizard As shown in Figure 4 11 2 and 4 11 3 Figure 4 11 2 ...

Страница 36: ...ssue 1 2 2018 09 06 Huawei Proprietary and Confidential Copyright Huawei Technologies Co Ltd 35 Figure 4 11 3 4 Delete printer Select a printer right click the icon and select Delete As shown in Figure 4 11 4 Figure 4 11 4 ...

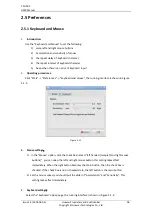
Страница 37: ...Start Preferences keyboard and mouse the running interface is shown in Figure 5 1 1 Figure 5 1 1 3 Mouse settings 1 In the Mouse option click the check box named left handed swap left and right mouse buttons you can swap the left and right mouse button this setting takes effect immediately When the right button becomes the main button then the check box is checked If the check box is not in checke...

Страница 38: ...x named Beep when there is an error of keyboard input you can set terminal beep when there is an error of keyboard input This setting takes effect immediately If check box is selected terminal beeps when there is an error of keyboard input Otherwise does not 2 5 2 Keyboard Input Methods 1 Introduction Use the Keyboard Input Methods to set the following 1 add or remove keyboard input methods 2 shor...

Страница 39: ...method Click the browse button on the right side of the interface the running interface is shown in Figure 5 2 2 Figure 5 2 2 Modify the key value first delete space in the Key code edit box secondly enter the key to modify the key code Change the modifier key you can arbitrarily check the check box which is in front of the modifier key 2 Font and Style ...

Страница 40: ...t show 3 When check box named Show icon on system tray is checked the system tray displays the input method icon click this icon would display the input method supported by the system Otherwise the system tray has no input method icon 4 When check box named use custom font is checked you can change the font s format and size Click the drop down box which is behind of use custom font to select the ...

Страница 41: ...ast click the Add button which is on the right side of the interface Then you can find the newly added input method in the Input Method list 2 remove the input method Fist select the input method which is to be removed in the Input Method list Secondly click the Remove button which is on the right side of the interface then you can remove the selected input method 5 Advanced Click the Advanced opt...

Страница 42: ...s not necessarily consistent with the hardware keyboard 2 If the check box named Share the same input method among all applications is checked then you can use the same input method among all applications Otherwise different program does not use the same input method necessarily This setting takes effect immediately 2 5 3 Network Connections 1 Introduction Use the Network Connections to Manage or ...

Страница 43: ... pop up a dialog box shows Are you sure you wish to delete the connection xxx xxx is a symbol for example Wired connection 1 then select Delete button to delete 4 Change the setting of the network connection Select a network connection which is to be changed in the network connection list box then select the Edit button You can change the settings of General Ethernet 802 1X security IPv4 Settings ...

Страница 44: ...Proprietary and Confidential Copyright Huawei Technologies Co Ltd 43 Figure 5 3 2 5 Add a new network connection To add a new Ethernet connection as an example Click Figure 5 3 1 Add button the running interface is shown in Figure 5 3 3 Figure 5 3 3 ...

Страница 45: ...utton the running interface is shown in Figure 5 3 4 You can set the network connection name general settings Ethernet 802 1X security IPv4 settings IPv6 settings Figure 5 3 4 2 5 4 Restore Configuration 1 Introduction Use the Restore Factory to restore all parameters to the factory state this feature is limited to root 2 Operating procedures Click Start Preferences Restore Configuration the runni...

Страница 46: ...g desktop properties display settings sound configuration font boot logo Firefox browsing cache configuration HDP configuration emptying the system trash network configuration firewall disabled account s password and so on 2 5 5 Autostart Programs 1 Introduction Use the Autostart Programs to list and set all auto start programs 2 Operating procedures Click Start Preferences Autostart Programs the ...

Страница 47: ...for the system including name version architecture description 2 Operating procedures Click Start Preferences Software List the running interface is shown in Figure 5 6 1 Figure 5 6 1 Click the Select filter drop down box to select the software type which you want to be filtered The software types including Only application Only system application and All If you select All the software list displa...

Страница 48: ... program will close the browser Whether to start cleaning system cache select Yes to clean otherwise select No 2 If you check the Automatic cleaning system cache check box the system will clear the system cache every time terminal starts up 2 5 8 Sup Install Log 1 Introduction Used to displays the historical system version and historical installation information this feature is limited to root 2 O...

Страница 49: ...ogies Co Ltd 48 Figure 5 8 1 2 5 9 System Viewer 1 Introduction Use the System Viewer to display the terminal model system version assets hardware and patches and so on 2 Operating procedures Click Start Preferences System Viewer the running interface is shown in Figure 5 9 1 Take V1 2 9 as an example ...

Страница 50: ... 2 Hardware Options Page View the machine s processor model memory size storage space and the MAC address of its network card 3 Asset Options Page View and edit the Asset No and Position 4 Shortcuts Options Page View the information of the hotkeys 2 5 10 Monitor Settings 1 Introduction Use the Monitor Settings to configure the screen resolution and the external monitor 2 Operating procedures Click...

Страница 51: ...ulti Monitors support Extend these monitors and copy these monitors 3 In the case of multiple monitors if you want to set only one to display the Turn On check box which is relate to this monitor must be checked and others must not be checked 2 5 11 Sound Mixer 1 Introduction Use the Sound Mixer to set the following 1 the acquisition of terminal microphone 2 volume size 3 listen the feedback of th...

Страница 52: ...t then you should select HDMI1 when ST5110 ST5200 is connected to HDMI interface you should select HDMI0 when ST6110 ST6200 is connected to DP port then you should select HDMI0 and it is connected to HDMI interface you should select HDMI1 If you connect the USB headset it will increase the USB headset in the sound card list Drag the bar of Master and Capture to set the volume of the speaker and mi...

Страница 53: ...e microphone Then the caption of button by Start into End Click the End button you will exist listen 2 5 12 Account Management 1 Introduction Use the Account Management to view the accounts of the terminal Double click the selected account you can change the selected account s password 2 Operating procedures Click Start Preferences Account Management the running interface is shown in Figure 5 12 1...

Страница 54: ...wei Proprietary and Confidential Copyright Huawei Technologies Co Ltd 53 Figure 5 12 1 3 Change account s password Double click to select the account which password you want to change the running interface is shown in Figure 5 12 2 Figure 5 12 2 ...

Страница 55: ...ese and English currently 2 Operating procedures Click Start Preferences Language Support the running interface is shown in Figure 5 13 1 Figure 5 13 1 Choose the language you want to modify then click Apply button the system will pop up a prompt box to ask whether to restart the running interface is shown in Figure 5 13 2 Figure 5 13 2 Click the Restart now button the system will restart immediat...

Страница 56: ...install the system patch only to read the patch in the U disk 2 Operating procedures Click Start Preferences Sup Install Tool the running interface is shown in Figure 5 14 1 Figure 5 14 1 Select the patch you need to install from the U disk then click Detail button you can see the detailed information of the patch package the running interface is shown in Figure 5 13 2 Figure 5 14 2 ...

Страница 57: ...on wait for the installation result prompt the running interface is shown in Figure 5 14 3 Figure 5 14 3 Click the Close button to show the Detailed information on installation Then you can Click the Continue button to install other patches or click the Quit button to finish the installation the running interface is shown in Figure 5 14 4 ...

Страница 58: ...igure 5 14 4 If there is any failed information please contact the administrator 2 6 Logout 1 Introduction Use the Logout to do the following 1 shut down terminal 2 restart terminal 3 switch user 4 lock screen 5 log out 2 Operating procedures Click Start Preferences Logout the running interface is shown in Figure 6 1 1 ...

Страница 59: ...inal 2 6 2 Reboot Click Reboot button to restart terminal 2 6 3 Switch User Click Switch User button to lock screen and prompt login dialog If you want to switch to another user successfully you should enter that user name and password Correctly 2 6 4 Lock Screen Click Lock Screen button to lock screen You should enter user name and password Correctly in order to return user desktop ...

Страница 60: ...ineers the TCM client provides an operating portal then the site maintenance engineers can also carry out some configuration at the terminal 2 7 1 Remote assistance request 1 Introduction If you encounter problems while using the cloud terminal you can request remote assistance from the system administrator By sending a remote assistance request you can remind the system administrator to respond i...

Страница 61: ...select the Manage Configuration to open the manage configuration menus the running interface is shown in figure 7 2 1 Figure 7 2 1 Tip All management configuration related menu items need to verify the password The password should ask for the system administrator Enter the password interface is shown in figure 7 2 2 Figure 7 2 2 1 Configure server address Select the Manage Configuration option the...

Страница 62: ...s a self upgrade feature that allows manual updating of patches or images that are distributed Figure 7 2 4 3 Peripheral management Cloud terminal has a rich peripheral interface provides access to multiple types of devices The security management of these access devices can be managed remotely by the TCM management or through the peripheral management interface provided by the local client The pe...

Страница 63: ...certain type of device depending on the scenario and security requirements of the device You can also set up an exception device for some kind of device This is very convenient for the security of user scenarios and the flexibility to use The settings interface for the Exceptional device is shown in figure 7 2 6 Figure 7 2 6 The user can allow and prohibit the exception device ...

Страница 64: ...iguration management provides the configuration of the power policy This feature optimizes the configuration of virtual desktop connections and maxes the security of the user The running interface is shown in figure 7 2 7 Figure 7 2 7 2 7 3 History Notice The history notification provides the function to view historical information Figure 7 3 1 ...

Страница 65: ...ns and functions and users can use them conveniently 2 8 1 Keyboard Hotkeys The list of keyboard hotkeys is as follows Hotkey Function Win D Show the desktop Alt F4 Shut down current window Alt Tab Switch window Win m Pops up start menu Ctrl Alt Delete System monitor Ctrl Alt m Restore the default configuration of the display Ctrl Alt i View system information Ctrl Space Switch input method Ctrl A...

Отзывы: