background image

40


2.


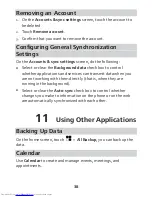
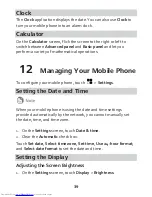
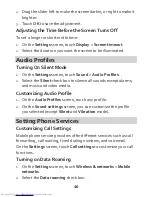
Drag the slider left to make the screen darker, or right to make it 
brighter. 

3.


Touch 

OK

 to save the adjustment. 

Adjusting the Time Before the Screen Turns Off 

To set a longer or shorter idle time: 

1.


On the 

Settings

 screen, touch 

Display

 > 

Screen timeout

2.


Select the durat ion you want the screen to be illuminated. 

Audio Profiles 

Turning On Silent Mode 

1.


On the 

Settings

 screen, touch 

Sound

 > 

Audio Prof iles

2.


Select the 

Silent

 check box to silence all sounds except alarms, 

and music and video media. 

Customizing Audio Profile 

1.


On the 

Audio Prof iles

 screen, touch any profile. 

2.


On the 

Sound settings

 screen, you can customize the profile 

you selected (except 

Silent

 and 

Vibration

 mode). 

Setting Phone Services 

Customizing Call Settings 

Mobile phone service providers offer different services such as call 
forwarding, call wait ing, fixed dialing numbers, and voicemail.   

On the 

Settings

 screen, touch 

Call settings

 to customize your call 

funct ions. 

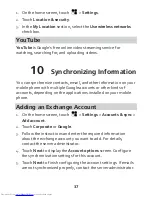
Turning on Data Roaming 

1.


On the 

Settings

 screen, touch 

Wireless & networks

 > 

Mobile 

networks

2.


Select the 

Data roaming

 check box. 

Содержание G7500

Страница 1: ...ns 10 Locking and Unlocking the Screen 11 Home Screen 11 Notification Panel 13 Customizing the Home Screen 13 Moving Icons on the Application Screen 14 Creating New Folders on the Application Screen 15 Using a microSD Card 15 Backing Up data by using Backup to SD 16 3 Calling 17 Making a Call 17 Answering or Rejecting a Call 18 Other Operations During a Call 18 Using the Call log 19 Using Airplane...

Страница 2: ...tact 21 Managing Groups 21 5 Using the Onscreen Keyboard 22 Displaying the Keyboard 22 6 Messaging 23 SMS and MMS 23 Email 24 7 Getting Connected 25 Turning on the Data Service 25 Wi Fi 26 SharingYour Phone s Data Connection 27 Browser 27 Bluetooth 29 8 Entertainment 30 Taking Photos and RecordingVideos 30 Using the Gallery 32 Using the Movies 33 Enjoying Music 33 Listening to the FM Radio 34 ...

Страница 3: ...Configuring General Synchronization Settings 38 11 Using Other Applications 38 Backing Up Data 38 Calendar 38 Clock 39 Calculator 39 12 ManagingYour Mobile Phone 39 Setting the Date andTime 39 Setting the Display 39 Audio Profiles 40 Setting Phone Services 40 ProtectingYour Mobile Phone 41 Managing Applications 42 ManagingYour Mobile Phone Memory 42 Restoring Factory Data 43 ...

Страница 4: ...iv 13 FAQs 44 14 Warnings and precautions 45 ...

Страница 5: ...onal information kept on your SIM UIM card memory card or stored in your device memory If you change to a different device be sure to move or delete any personal information on your old device z If you are worried about viruses when you receive messages or emails from a stranger you can delete them without opening them z If you use your device to browse the Internet avoid websites that might pose ...

Страница 6: ...ces z If you have concerns about the security of your personal information and data please contact mobile huawei com Legal Notice Copyright Huawei Technologies Co Ltd 2013 All rights reserved No part of this manual may be reproduced or transmitted in any form or by any means without prior written consent of Huawei Technologies Co Ltd and its affiliates Huawei The product described in this manual m...

Страница 7: ... settings of local network and therefore may not be activated or may be limited by local network operators or network service providers Thus the descriptions herein may not exactly match the product or its accessories which you purchase Huawei reserves the right to change or modify any information or specifications contained in this manual without prior notice and without any liability Third Party...

Страница 8: ...are installed on this product or for any uploaded or downloaded third party works in any form including but not limited texts images videos or software etc Customers shall bear the risk for any and all effects including incompatibility between the software and this product which result from installing software or uploading or downloading the third party works This product is based on the open sour...

Страница 9: ...LL NOT APPLY TO LIABILITY FOR PERSONAL INJURYTOTHE EXTENT APPLICABLE LAW PROHIBITS SUCH A LIMITATION OF HUAWEI ARISING FROMTHE USE OFTHE PRODUCT DESCRIBED INTHIS MANUAL SHALL BE LIMITEDTOTHE AMOUNT PAID BY CUSTOMERS FORTHE PURCHASE OFTHIS PRODUCT Import and Export Regulations Customers shall comply with all applicable export or import laws and regulations and be responsible to obtain all necessary...

Страница 10: ...ctures in this guide are for your reference only Your phone s actual display features may be different to those described here depending on its software version 2 Getting Started Your Phone Appearance of Your Phone ...

Страница 11: ...ss to lock and turn off the screen when your mobile phone is on z Touch to return to the previous screen or exit the application you are running z Touch to hide the keyboard z Touch to return to the home screen z Touch and hold to show the most recently used applications Touch to open the menu on an active screen Press to adjust volume ...

Страница 12: ...8 Preparing and Installing Before Using Charging the Battery Before charging please confirm the battery has been installed correctly ...

Страница 13: ...tery to charge for a few minutes with the phone powered off before attempting to power the phone on z Using data services increases the power consumption of the phone and will therefore reduce the length of time that the phone can be used between battery charges z The time required to fully charge the battery depends on the ambient temperature and the age of the battery z When the battery power is...

Страница 14: ...g the mobile phone Powering Off Your Mobile Phone 1 Press and hold to open the Phone options menu 2 Touch Power off 3 Touch OK Touchscreen Actions z Touch Tap the screen with your finger to select an item confirm a selection or start an application z Touch and hold Touch an item with your finger and do not release it until the mobile phone responds z Flick Move your finger either vertically or hor...

Страница 15: ...z If your phone is idle for a while the screen will lock automatically Unlocking the Screen 1 Press to wake up the screen 2 Drag the lock icon from left to right to unlock the screen If you have set up a screen unlock pattern you will be prompted to draw the pattern on the screen to unlock it Home Screen ...

Страница 16: ... Speakerphone on Alarm enabled Vibration mode Ringer silenced Call muted Charging battery Battery full Battery extremely low Call in progress Missed call Call in progress with a Bluetooth headset used New mail New text or multimedia message Problem with text or multimedia message delivery Uploading Downloading Open Wi Fi network available Phone storage space is getting low Preparing the mircoSD ca...

Страница 17: ...nel 2 On the panel you can z Touch a notification to open the related application z Touch Clear to clear all notifications Closing the Notification Panel Touch and hold the bottom of the panel Then flick up to close Customizing the Home Screen Adding a New Home Screen Item 1 Touch and hold a blank area on the home screen until the Add to home screen menu is displayed 2 Select an item to add it to ...

Страница 18: ...item to remove it from the home screen Changing the Wallpaper 1 On the home screen touch Wallpaper 2 Touch the menu items to select a picture and set it as the wallpaper Gallery Live wallpapers and Wallpapers Moving Icons on the Application Screen 1 The Application screen holds icons for all of the applications on your phone On the application screen touch 2 Touch and hold the icon you want to mov...

Страница 19: ...ard set the microSD card as a USB mass storage 1 Connect your mobile phone to your PC with the USB cable provided Your PC will detect the microSD card as a removable storage device 2 Touch USB storage in the USB settings dialog box that opens to confirm that you want to transfer files You can now transfer files from your PC to your mobile phone s microSD card When your microSD card acts as a USB m...

Страница 20: ...it helpful to move large applications off your internal storage to make more room for other applications that do not offer the option 6 On the Settings screen touch Applications Manage applications 7 Touch an application in the list Then touch Move to SD card to move the bulk of the application from the phone s internal storage The Storage section of the application s details screen shows details ...

Страница 21: ... to display the dialer 2 Touch the appropriate number keys to enter the phone number 3 Touch to initiate the call Making a Call from Contacts 1 On the home screen touch Contacts 2 In the contact list touch the contact you want to call 3 Touch to dial the phone number Making a Call from Call log 1 On the home screen touch Call log to display the call log 2 Touch to dial If you touch and hold a log ...

Страница 22: ...he call Ending a Call During a call touch End to hang up Rejecting an Incoming Call Drag to the left to reject the call Other Operations During a Call Making a Conference Call Contact your network operator to ask if conference calls are supported and if yes how many parties can participate ...

Страница 23: ...Switching Between Calls If you receive a new call while you are already in a call you can switch between the two calls 1 While you are in the first call and the second call comes in answer the incoming call and then touch Swap calls 2 The current call is placed on hold and you are connected to the first call Using the Call log The Call log contains a list of calls that you have dialed received and...

Страница 24: ...mporting Contacts from a SIM USIM Card 1 In the contact list touch More Import Export 2 Touch Import from SIM card 3 Wait for the SIM card contents to be loaded Select the contacts you want to import or touch All Select to select all contacts 4 Touch Ok Adding a Contact 1 In the contact list touch New contact 2 If you have more than one account with contacts touch the account to which you want to ...

Страница 25: ...As you type contacts with matching names appear below the search box Editing a Contact 1 In the contacts list touch and hold the contact whose details you want to edit and then touch Edit contact in the options menu 2 Make the desired changes to the contact information and then touch Done To cancel all of your changes touch Revert Managing Groups Creating a Group 1 On the home screen touch Contact...

Страница 26: ...ils you want to edit and then touch Edit Group in the options menu 2 Make the desired changes to the group information and then touch Save To cancel all changes you made to the group information touch Cancel 5 Using the Onscreen Keyboard Displaying the Keyboard To enter text use the onscreen keyboard Some applications open the keyboard automatically In others touch a text field to open the keyboar...

Страница 27: ...are ready to send the message touch Send Creating and Sending a Multimedia Message 1 On the home screen touch Messaging New message 2 Enter a phone number or a contact s name in the To field or touch the contacts icon to select one or more contacts 3 Touch Type to compose to start entering your message 4 Touch to display the options panel z Touch Add subject to add the message subject Your mobile ...

Страница 28: ...e account manually 3 Enter the account name and the name you want other people to see when they receive an email from you 4 Touch Done Viewing an Email Message 1 On the accounts screen touch the email account you want to use 2 Access a folder and then touch the message that you want to view Saving an Email Attachment 1 Touch the email message you want to view 2 Touch Save in the email to save the ...

Страница 29: ...een touch Email 2 On the accounts screen touch and hold the email account you want to change 3 Touch Account settings 4 Change General settings Notification settings or Server settings 7 Getting Connected Turning on the Data Service 1 On the home screen touch Settings 2 Touch Wireless networks Mobile networks 3 Select the Data enabled check box to turn on the data connection If you do not need a w...

Страница 30: ...necting to a Wireless Network 1 After turning onWi Fi touch Settings 2 Touch Wireless networks Wi Fi settings You will see a list of detected Wi Fi networks in the Wi Fi networks section 3 Touch aWi Fi network to connect to it z If you select an open network you will be automatically connected to the network z If you select a network that is secured withWired Equivalent Privacy WEP and connect to ...

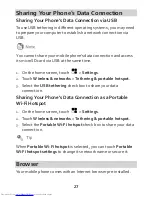
Страница 31: ...ttings 2 Touch Wireless networks Tethering portable hotspot 3 Select the USB tethering check box to share your data connection Sharing Your Phone s Data Connection as a Portable Wi Fi Hotspot 1 On the home screen touch Settings 2 Touch Wireless networks Tethering portable hotspot 3 Select the Portable Wi Fi hotspot check box to share your data connection When Portable Wi Fi hotspot is selected you...

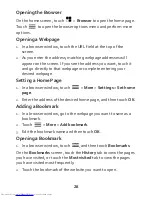
Страница 32: ...our desired webpage Setting a Home Page 1 In a browser window touch More Settings Set home page 2 Enter the address of the desired home page and then touch OK Adding a Bookmark 1 In a browser window go to the webpage you want to save as a bookmark 2 Touch More Add bookmark 3 Edit the bookmark name and then touch OK Opening a Bookmark 1 In a browser window touch and then touch Bookmarks On the Book...

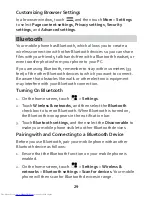
Страница 33: ... walls or other electronic equipment may interfere with your Bluetooth connection Turning On Bluetooth 1 On the home screen touch Settings 2 Touch Wireless networks and then select the Bluetooth check box to turn on Bluetooth When Bluetooth is turned on the Bluetooth icon appears in the notification bar 3 Touch Bluetooth settings and then select the Discoverable to make your mobile phone visible t...

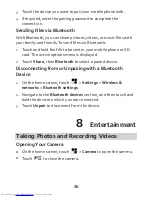
Страница 34: ...or SD card The active options menu is displayed 2 Touch Share then Bluetooth to select a paired device Disconnecting from or Unpairing with a Bluetooth Device 1 On the home screen touch Settings Wireless networks Bluetooth settings 2 Navigate to the Bluetooth devices section and then touch and hold the device to which you are connected 3 Touch Unpair to disconnect from the device 8 Entertainment T...

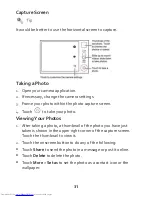
Страница 35: ...ch to take your photo Viewing Your Photos 1 After taking a photo a thumbnail of the photo you have just taken is shown in the upper right corner of the capture screen Touch the thumbnail to view it 2 Touch the onscreen button to do any of the following z Touch Share to send the photo in a message or post it online z Touch Delete to delete the photo z Touch More Set as to set the photo as a contact...

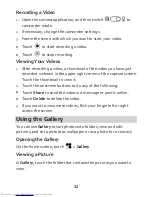
Страница 36: ...f the capture screen Touch the thumbnail to view it 2 Touch the onscreen buttons to do any of the following z Touch Share to send the video in a message or post it online z Touch Delete to delete the video 3 If you want to view more videos flick your finger left or right across the screen Using the Gallery You can use Gallery to sort photos into folders view and edit pictures and set a picture as ...

Страница 37: ... folder that contains the videos you want to view Enjoying Music Opening the Media Library On the home screen touch Music to display the media library The Music application organizes your music files by storage location It contains four tabs Artists Albums Songs and Playlists Playing Music 1 Touch a category on the music library screen 2 Touch the song you want to play ...

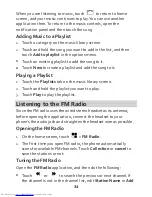
Страница 38: ...e Playlists tab on the music library screen 2 Touch and hold the playlist you want to play 3 Touch Play to play the playlist Listening to the FM Radio Since the FM radio uses the wired stereo headset as its antenna before opening the application connect the headset to your phone s the audio jack and straighten the headset wire as possible Opening the FM Radio 1 On the home screen touch FM Radio 2 ...

Страница 39: ... or Gmail and you will be prompted to sign in to your Google account Creating a Google Account If you do not have a Google account you can create one 1 On the home screen touch Google to open the application After reading the setup information touch Next 2 Touch Create 3 Enter the first name last name and username for your Google account and then touch Next The mobile phone will connect to a Googl...

Страница 40: ...alk is Google s instant messaging service You can use it to communicate in real time with other people using Talk on a phone or on the web Your Talk account is based on the Google account you set up with your mobile phone Maps Maps lets you find your current location view real time traffic conditions depending on availability in your locale and get detailed directions to various destinations You c...

Страница 41: ...r other kinds of accounts depending on the applications installed on your mobile phone Adding an Exchange Account 1 On the home screen touch Settings Accounts sync Add account 2 Touch Corporate or Google 3 Follow the instructions and enter the required information about the exchange account you want to add For details contact the server administrator 4 Touch Next to display the Account options scr...

Страница 42: ... box to control whether applications and services can transmit data when you are not working with them directly that is when they are running in the background z Select or clear the Auto sync check box to control whether changes you make to information on the phone or on the web are automatically synchronized with each other 11 Using Other Applications Backing Up Data On the home screen touch All ...

Страница 43: ...Mobile Phone To configure your mobile phone touch Settings Setting the Date and Time When your mobile phone is using the date and time settings provided automatically by the network you cannot manually set the date time and time zone 1 On the Settings screen touch Date time 2 Clear the Automatic check box Touch Set date Select time zone Set time Use 24 hour format and Select date format to set the...

Страница 44: ...k box to silence all sounds except alarms and music and video media Customizing Audio Profile 1 On the Audio Profiles screen touch any profile 2 On the Sound settings screen you can customize the profile you selected except Silent and Vibration mode Setting Phone Services Customizing Call Settings Mobile phone service providers offer different services such as call forwarding call waiting fixed di...

Страница 45: ...ck box 3 Use the keyboard to enter the PIN and then touch OK 4 To change the PIN at any time touch Change SIM PIN You can dial emergency numbers any time from your mobile phone Protecting Your Mobile Phone with a Screen Lock To keep your data more secure lock the screen and or require a screen unlock pattern every time your mobile phone is turned on or wakes up from sleep mode 1 On the Settings sc...

Страница 46: ...s details Uninstalling an Application 1 On the Settings screen touch Applications Manage applications 2 Touch an application and then touch Uninstall It is suggested to install applications on microSD card The number of installed applications should be less than 10 since the internal storage will be full and cause system abnormalities Managing Your Mobile Phone Memory Using the Internal Storage Yo...

Страница 47: ... all temporary Internet files and Browser history information z Uninstall any downloaded programs that you no longer use z Reset your mobile phone Restoring Factory Data If you reset your phone to its factory settings all of your personal data stored on the phone including information about your Google account any other accounts that you have configured your system and application settings and any...

Страница 48: ...isplays a message asking whether you want to import the contacts Compatibility problems may occur with vcf files created by different mobile phones and certain contact information may be lost after contacts are imported How Do I Set a Song As a Phone Ringtone In Music touch and hold the song to be set as ringtone and then touch Use as phone ringtone How Do I Set an Unlock Pattern On the home scree...

Страница 49: ...ns panel Then touch the current call notification to return to the call screen How Do I Create an Application Shortcut on the Home Screen Touch and hold an application icon on the application screen until the home screen is displayed Then drag the icon to where you want to place it and release your finger How Do I Hide the Keyboard Touch to hide the keyboard 14 Warnings and precautions This sectio...

Страница 50: ...batteries chargers and accessories in your area Charger safety z Unplug the charger from electrical outlets and the device when not in use z Do not drop or cause an impact to the charger z Do not touch the power cord with wet hands or pull the power cord to disconnect the charger z If the power cable is damaged for example the cord is exposed or broken or the plug loosens stop using it at once Con...

Страница 51: ...t the electrolyte does not make direct contact with your skins or eyes If the electrolyte touches your skins or splashes into your eyes immediately flush with clean water and consult a doctor z In case of battery deformation color change or overheating while charging or storing immediately stop using the device and remove the battery Continued use may lead to battery leakage fire or explosion z Do...

Страница 52: ...tures are 0 C to 40 C Extreme heat or cold may damage your device or accessories z Do not expose your device to direct sunlight such as on a car dashboard for prolonged periods z Do not place your device or batteries on or in heating devices such as microwave ovens stoves water heaters or radiators Batteries may explode if overheated z Stop using your device or applications for a while if the devi...

Страница 53: ...n should only use the device with adult supervision Interference with medical equipment z Follow rules and regulations set forth by hospitals and health care facilities Do not use your device where prohibited z Pacemaker manufacturers recommend that a minimum distance of 15 cm be maintained between a device and a pacemaker to prevent potential interference with the pacemaker If using a pacemaker h...

Страница 54: ...z Do not place the device over the air bag or in the air bag deployment area in a motor vehicle Doing so may hurt you because of the strong force when the air bag inflates z Do not use your device while flying in an aircraft Power off your device before boarding Using wireless devices in an aircraft may disrupt wireless networks present a hazard to aircraft operation or be illegal Cleaning and mai...

Страница 55: ...hese objects and result in injury z Do not dismantle the device or accessories This voids the warranty and releases the manufacturer from liability for damage z If the device screen is broken in a collision immediately stop using the device Do not touch or attempt to remove the broken parts Promptly contact an authorized service center Emergency calls The availability of emergency calls is subject...

Страница 56: ...on Non Ionizing Radiation Protection ICNIRP an independent scientific organization and include safety measures designed to ensure the safety of all users regardless of age and health The Specific Absorption Rate SAR is the unit of measurement for the amount of radio frequency energy absorbed by the body when using a device The SAR value is determined at the highest certified power level in laborat...

Страница 57: ......

Страница 58: ......

Отзывы: